A Yaoyao Guide
Written by lunaflaw, cuppacote
Updated for Version 4.0

“Hello, I’m Yaoyao, a lowly disciple of the adeptus, Streetward Rambler. It’s a pleasure to make your acquaintance! If you encounter any difficulties outdoors… then lemme help you!”
Table of Contents
Introduction
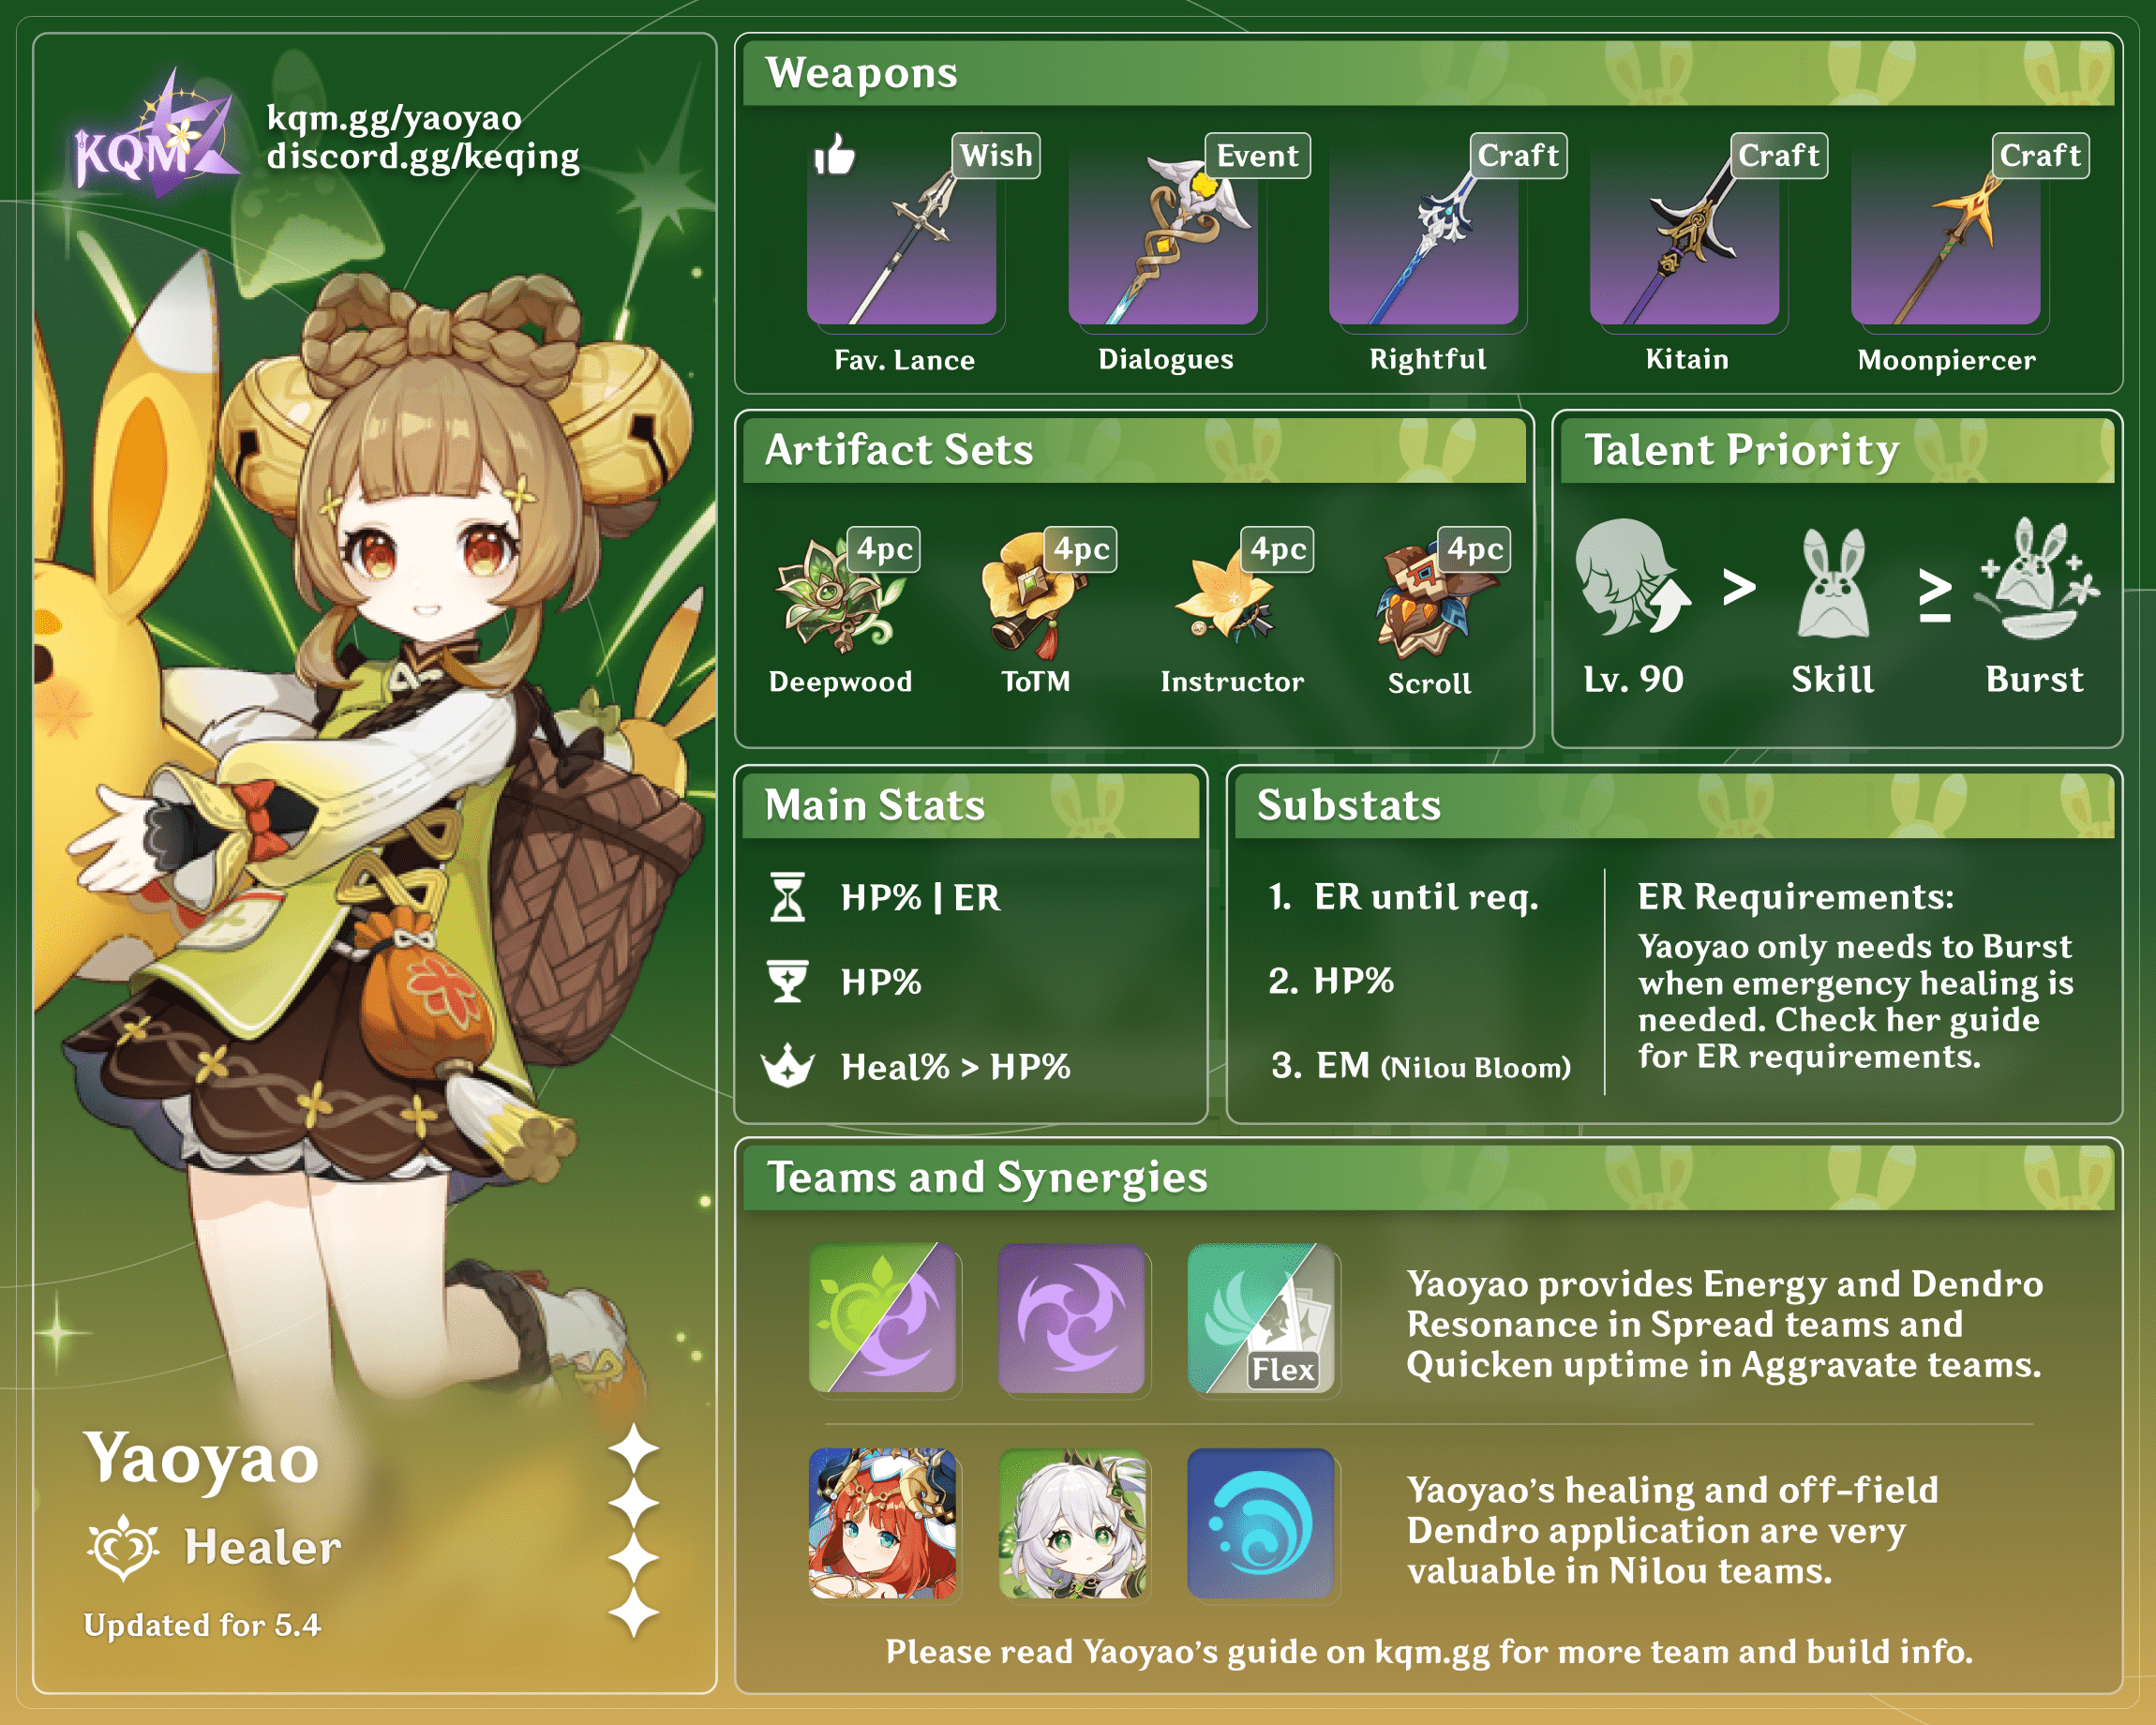
Yaoyao is a cute and powerful 4-star Dendro Polearm character who provides healing and Elemental application. This guide will review Yaoyao’s best weapons, best artifact sets, best teams, Talent priority, combos, preferred artifact stats, and more!
Why Play Yaoyao?
Yaoyao is a great defensive choice in Dendro teams: her Burst provides on-demand, teamwide healing while her Skill supplies extra healing with sufficient Dendro application for most Spread teams.
Yaoyao has incredible versatility. Despite her seemingly simple kit, players who dive deeper into Yaoyao's Talents and builds will find a large variety of support artifact sets and gameplay options.
Pros
- Combines Dendro application and healing
- Provide moderate Energy generation for on-field Dendro units
- Doesn’t rely on her Burst in some teams
- Can support teams through a variety of artifact sets
- Constellations increase her supportive abilities, reaction damage, and personal Energy regeneration
Cons
- Dendro application can vary based on multi-target scenarios and random turret targeting
- Her Burst’s healing and damage is compromised if she swaps out early
- Staying on-field for the whole Burst duration is costly for team DPS
- Instantaneous Dendro application is tied to casting her Burst
TL;DR
Glossary
Character Overview
Healer Playstyle
Yaoyao’s main role is to heal teammates via her Skill and Burst with the help of Yuegui and her White Jade Radishes. The Radishes act as projectiles and heal party members upon impact or damage enemies and apply Dendro.
This guide focuses primarily on her healer builds and teams. Gear for a DPS Yaoyao build is touched on briefly in the Playstyles and Gearing section should you wish to play her offensively, but a DPS playstyle is not recommended for Yaoyao due to her low damage output even with a damage-oriented build.
Talents

“Go get ‘em, Yuegui!”
Talent Overview
 Normal Attack | Toss 'N' Turn Spear
Talent Description
Normal Attack
Performs up to 4 consecutive spear strikes.
Charged Attack
Consumes a certain amount of Stamina to lunge forward, dealing damage to opponents along the way.
Plunging Attack
Plunges from mid-air to strike the ground below, damaging opponents along the path and dealing AoE DMG upon impact.
A standard set of Physical Normal Attacks. They are unaffected by Yaoyao’s other Talents and do very little damage in all of her teams. Their sole purpose is to drive other characters’ off-field abilities during Yaoyao’s Burst duration.
 Elemental Skill | Raphanus Sky Cluster
Talent Description
Calls upon “Yuegui: Throwing Mode,” a special device created by a certain adeptus to help Yaoyao solve her problems.
This skill will be used differently in Holding Mode.
Hold
Enters Aiming Mode to adjust the throw direction.
Yuegui: Throwing Mode
Throws out White Jade Radishes that will explode upon hitting characters or opponents, dealing Dendro DMG to opponents within a certain AoE, and healing characters within that same AoE based on Yaoyao’s Max HP. If a radish does not hit either an opponent or a character, the radish will remain where it is and explode on contact with a character or opponent, or will explode after its duration expires.
Yuegui: Throwing Mode will choose its radish-throw targets.
- If all nearby characters have more than 70% HP remaining, then it will throw the radish at a nearby opponent.
- If nearby characters have 70% or less HP remaining, it will throw a radish at the character with the lowest HP percentage remaining. If no opponents exist nearby, Yuegui will also throw White Jade Radishes at characters if they all have more than 70% HP and less than 100% HP remaining. Otherwise, it will throw radishes into the area at random.
A maximum of 2 instances of Yuegui: Throwing Mode can exist at any one time.
This is the focal point of Yaoyao’s kit. When her Skill is used, Yaoyao throws a Yuegui onto the field. Every second, Yuegui throws a White Jade Radish that deals Dendro damage to nearby opponents or heals the on-field character if they have less than 70% HP. If no opponents are in range, Yuegui will continue to heal the on-field character until they are fully healed. 10 seconds after deployment , Yuegui expires.
Upon hitting an enemy, Jade Radishes generate one Dendro Particle with a cooldown of 1.5s, granting a maximum of 5 particles if all Radishes hit enemies. Radishes from her Skill have a special ICD – applying only once every 2.5s (usually every 3rd hit in stationary targets) – meaning that in single-target scenarios, her Skill will apply at most 4 times in this 10s window.
Her Skill and Burst share some mechanics, which will be explained in a further section: Advanced Radish Targeting.
 Elemental Burst | Moonjade Descent
Talent Description
At the enjoinment of a certain adeptus, Yuegui’s full potential can be unleashed in an emergency, dealing Dendro DMG to nearby opponents and entering an (in some sense) unsurpassed Adeptal Legacy state.
Adeptal Legacy
- White Jade Radishes generated will be changed to heal and deal DMG according to this skill. Explosions will heal all nearby party members, and the Dendro DMG that they deal will be viewed as Elemental Burst DMG instead.
- Summons “Yuegui: Jumping Mode” at intervals until their limit has been reached. The behavior of this version of Yuegui is the same as that of “Yuegui: Throwing Mode” in the Elemental Skill, Raphanus Sky Cluster. A maximum of 3 Yuegui: Jumping Mode can exist at any one time.
- Yaoyao’s Movement SPD is increased by 15%.
- Yaoyao’s Dendro RES will be increased.
The Adeptal Legacy state will end once Yaoyao is off-field, and all remaining Yuegui: Jumping Mode will be cleared once this state ends.
When Yaoyao uses her Burst, she enters the Adeptal Legacy state for 5s. In the Adeptal Legacy state, Yaoyao boasts large multipliers, rapid Dendro application, and teamwide healing capabilities. Yaoyao will summon 3 more powerful Yueguis (one per second) and change her Skill’s multipliers to her Burst ones, providing better damage and healing.
However, this state abruptly ends when swapping out, removing all Yueguis generated from the Burst and reverting Yuegui: Throwing Mode to its original multipliers. As a result, Yaoyao’s Burst is generally used either during a rotation’s downtime or as a source of emergency healing. This means that the value of Yaoyao’s Burst is highly dependent on many factors:
- The team’s field time distribution.
- Enemies’ teamwide DoT effects (e.g. Corrosion, Brand of the Abyssal Flame, etc.).
- Particularly dangerous enemies (like Bosses).
- Self-damaging effects from Dendro Cores (i.e. Nilou’s Bountiful Core, Hyperbloom, and Burgeon).
Furthermore, Radishes thrown in the Adeptal Legacy state also have a reduced ICD – from once every 2.5s > 1.5s. As such, in single-target scenarios, her Burst will apply Dendro 4 times. Note that Radishes from Yaoyao's Skill share their ICD with Radishes from her Burst, lowering your overall Dendro application if you do E > Q and stay on-field. This is because her Skill and Burst ICDs are time-based and not hit-based. If staying on-field during Burst, players should only use her Skill right before swapping out (Q > E).
As previously stated, because her Skill and Burst share some mechanics, they will be explained in Advanced Radish Targeting.
 Ascension 1 Passive | Starscatter
Talent Description
While affected by the Adeptal Legacy state caused by Moonjade Descent, Yaoyao will constantly throw White Jade Radishes at nearby opponents when she is sprinting, jumping, or running. She can throw 1 White Jade Radish this way once every 0.6s.
This Passive Talent allows Yaoyao to generate a few more Radishes while in her Burst state. This won’t usually translate to more Dendro application but can help with her damage contribution and healing if she dash-cancels or jump-cancels her attack strings.
 Ascension 4 Passive | In Others' Shoes
Talent Description
When White Jade Radishes explode, active characters within their AoE will regain HP every 1s based on 0.8% of Yaoyao’s Max HP. This effect lasts 5s.
Provides decent additional healing in the form of a 5s regeneration effect. While this Talent only triggers when the on-field character receives healing from Yuegui, the regeneration effect remains even after the character leaves the field.
This Passive has great synergy with the Marechaussee Hunter artifact set, since the healing over time can rapidly generate stacks. This is mostly useful with characters that already have a way to reduce their own health within their kit – like Hu Tao or most Fontaine characters. Note that bringing Yaoyao just to use the 4pc set on a DPS isn’t recommended, it’s more of an extra build option for teams which already include her.
 Utility Passive | Tailing on Tiptoes
Talent Description
When Yaoyao is in the party, your characters will not startle Crystalflies and certain other animals when getting near them.
Check the “Other” sub-category of the “Living Beings / Wildlife” section in the Archive for creatures this skill works on.
This Passive makes it easier to catch Crystalflies. Note that catching one Crystalfly will startle others nearby regardless.
Level and Talent Priority
> ≥
Skill ≥ Burst > NA
It is recommended to level Yaoyao to 90 to maximize her healing and Transformative Reaction damage. The latter is particularly useful in specific Nilou Bloom teams where Yaoyao triggers more Blooms. However, if players don’t need to increase the amount of healing, higher levels and Talents can be neglected.
Talent levels do not affect Yaoyao’s Transformative Reaction damage, but they do greatly improve her healing. For this reason, it’s worth investing in her Skill and Burst. Yaoyao’s Normal Attack can be left unleveled.
Constellations

“Don't fear, Yaoyao's here!”
Yaoyao is a perfectly usable character even at C0, with none of her Constellations drastically changing her gameplay. Nonetheless, they improve her healing, lessen her ER needs, provide extra buffs for the team and herself, and add extra Dendro application.
 Constellation 1 | Adeptus’ Tutelage
When White Jade Radishes explode, active characters within their AoE will gain 15% Dendro DMG Bonus for 8s and have 15 Stamina restored to them. This form of Stamina Restoration can only be triggered every 5s.
Gives anyone within the Radishes’ explosion AoE a decent Dendro DMG Bonus buff, which is handy in teams where Yaoyao supports another Dendro DPS character. Additionally, the Stamina restoration effect can be helpful for characters that frequently dash or use Charged Attacks.
 Constellation 2 | Innocent
While affected by the Adeptal Legacy state caused by Moonjade Descent, if White Jade Radish explosions damage opponents, 3 Energy will be restored to Yaoyao. This form of Energy regeneration can occur once every 0.8s.
With this Constellation, Yaoyao can gain up to 18 Flat Energy every time she uses her Burst, significantly lowering her ER requirements. This is mostly useful in Nilou Bloom and Burgeon teams where her Burst is used every rotation. This Constellation can also be useful in other teams, as Yaoyao occasionally struggles to regain Energy even when Bursting every other rotation. It can allow her to divert ER stats into HP, EM, or CRIT, improving her healing and damage.
 Constellation 3 | Loyal and Kind
Increases the Level of Raphanus Sky Cluster by 3.
Maximum upgrade level is 15.
Adds 3 levels to her Elemental Skill. Not the flashiest Constellation, but helpful nonetheless. The additional healing is appreciated as Yaoyao can rely more on her Skill for healing in teams where using her Burst isn’t needed.
 Constellation 4 | Winsome
After using Raphanus Sky Cluster or Moonjade Descent, Yaoyao's Elemental Mastery will be increased based on 0.3% of her Max HP for 8s. The maximum Elemental Mastery she can gain this way is 120.
Gives Yaoyao some offensive stat returns even in a healing-centric build. The EM buff caps when Yaoyao has 40,000 HP. This is not hard to achieve, considering Yaoyao’s high Base HP and HP% Ascension stat. This Constellation leads to a slight damage increase in most Spread or Nilou Bloom teams.
 Constellation 5 | Compassionate
Increases the Level of Dream of Moonjade Descent by 3.
Maximum upgrade level is 15.
Adds 3 levels on her Elemental Burst. This Constellation is mostly useful when using Yaoyao in Nilou Bloom teams. Otherwise, higher Talent levels on her Burst mean faster party-wide healing in emergency scenarios.
 Constellation 6 | Beneficent
For every 2 White Jade Radishes Yuegui: Throwing Mode throws out, it will also throw a Mega Radish that will have a larger AoE than the standard White Jade Radish and have the following effects upon exploding:
• Deals AoE Dendro DMG based on 75% of Yaoyao's ATK.
• Restores HP for the active character based on 7.5% of Yaoyao's Max HP.
Every Yuegui: Throwing Mode can throw out a maximum of 2 Mega Radishes.
This Constellation greatly improves Yaoyao’s healing and Dendro application. Aside from that, the Mega Radish’s larger AoE helps Yaoyao’s A4, C1, and C4 trigger more consistently. This extra healing also allows Yaoyao to allocate more substats into EM for Nilou Bloom teams.
However, in some Aggravate teams, this Constellation can make her Skill apply Dendro in quick succession, momentarily removing the Electro aura from enemies. This may compromise some Electro Swirls or the 4pc Thundersoother set bonus. Nonetheless, this Constellation is still worth activating in most teams.
Advanced Radish Targeting
Yaoyao’s kit is quite unique as her healing comes from projectiles instead of larger Areas of Effect like Bennett’s Burst or character-centric abilities like Barbara’s or Kuki’s Skills. Yuegui can either target your party members to heal them or target enemies to deal damage. They can hit both the ally and enemy, but cannot target both simultaneously.
When the on-field character’s HP is at low health, Yuegui always prioritizes healing that party member up to 70% of their Max HP before returning to targeting enemies. This compromises Yuegui’s damage, Dendro application, and — in the case of Radishes thrown from Yaoyao’s Skill — particle generation as well.
Additionally, while Yuegui’s throwing range is large, its Radishes have an extremely limited explosion AoE. As such, Yuegui has increased synergy with melee characters — Radishes can simultaneously heal units while applying Dendro to enemies at close range due to this small AoE.
Yuegui simultaneously healing characters while damaging enemies by lunaflaw
As such, the benefits from leveling Yaoyao's Skill come twofold. Not only does she heal and deal more damage, but she also spends less time healing and more time focusing on enemies, increasing Dendro application. In addition, players should position themselves as close to the enemy as possible, since this can give extra team healing and Elemental application.
Playstyles and Gearing

“Eh? Did my spear just get lighter? ...It'd be great if it could get a little shorter, too…”
Healer
ER Requirements
In most Quicken teams, Yaoyao casts her Burst every other rotation or only when extra healing is needed. As such, even in teams with very low particle generation, she shouldn’t need more than 150% ER.
However, in Nilou Bloom and Burgeon teams where Yaoyao is the sole healer, her Skill isn’t enough to sustain her teammates’ HP or application needs. In these cases, Yaoyao’s ER requirements are far more strict.
Constellation 0-1 ER Requirements
Assumptions: 20-22s rotations, Burst every rotation, 1 Skill use per rotation
| Solo Dendro | 260%–270% |
| Double Dendro | 220%–240% |
| Triple Dendro | 200%–210% |
Constellation 2-6 ER Requirements
Assumptions: 20-22s rotations, Burst every rotation, 1 Skill use per rotation
| Solo Dendro | 220%–230% |
| Double Dendro | 190%–210% |
| Triple Dendro | 170%–180% |
Notes
- ER needs are roughly divided by 2 when bursting every other rotation.
- Teams with Nahida tend to have lower ER requirements; they fall into the lower range of Double Dendro and Triple Dendro values.
- Electro Resonance shaves off around 15-20% from ER requirements.
- Fischl lowers Yaoyao’s ER requirements by roughly 25%.
- Kitain Cross Spear R1-5 reduces ER requirements by around 15-30%.
- Each Favonius proc reduces ER requirements by 15-20%.
- Rightful Reward R1-5 reduces ER requirements by around 20-40%.
For exact ER values catering to specific teams, refer to Zakharov’s Energy Recharge Calculator.
Stat Priorities
 Sands |  Goblet |  Circlet |
| HP%/ER% | HP% | Healing Bonus > HP% |
In most cases, Yaoyao prefers to have more HP for extra healing, as her damage contribution is negligible without her Burst and suboptimal with her Burst. Furthermore, the increased healing indirectly improves her Dendro application as Yuegui targets enemies sooner rather than later.
Substat Priority:
ER% > CRIT Rate* > HP% > Flat HP / EM
ER% is only more valuable than HP% if your team needs Yaoyao to cast her Burst every rotation. Building EM isn’t recommended since she’s mostly used to apply Dendro onto enemies while other party members trigger reactions, and her damage contribution isn’t high enough to justify focusing on EM instead of extra HP% rolls.
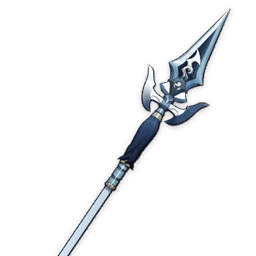
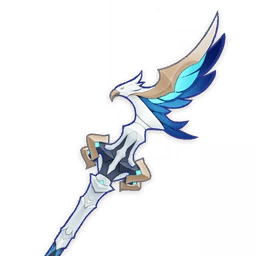
*If Yaoyao stays on-field during her Burst, she can consistently proc Favonius Lance's passive with only 30% CRIT Rate, as she can get up to 15 hits. If Yaoyao isn't Bursting, an E + N3 combo gives 6 hits, which makes proccing the passive more reliable at the cost of a longer rotation.
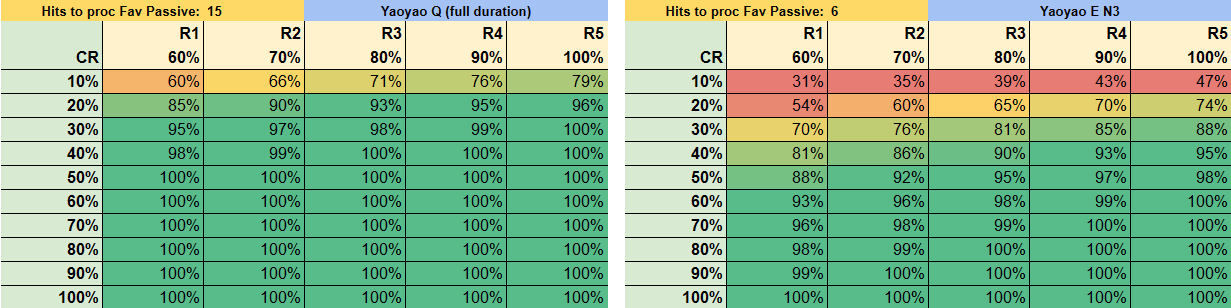
The % chance of proccing your Favonius passive with ‘x’ amount of CRIT Rate (CR) when using Burst for the full duration (left) versus only doing E + N3 (right).
If you’re building Yaoyao for damage, prioritize CRIT Rate/DMG > EM > ATK%. However, note that by focusing on damage, Yuegui will spend more time healing allies under 70% HP, and less time dealing damage (as previously explained in Advanced Radish Targeting). As such, it’s imperative to stay as close as possible to enemies to deal damage while simultaneously healing allies.
Weapons — Healing
Yaoyao has high base healing with her Burst, so she should equip weapons that can aid other party members by providing extra Energy generation or ATK/EM buffs. Below is a table of recommended weapon options that either buff her raw healing and/or enhance team buffs.
Assumptions: Yaoyao C0 | Talents 9/9/9 | Single-target | 220% ER needs | HP/ER - HP - HB | All 10 E radishes and 9 Q radishes counted towards healing, with 10s of A4 uptime
| Weapon | Healing | Notes |
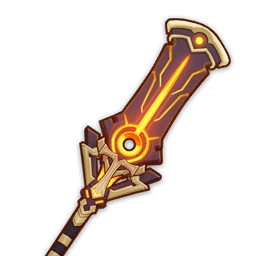
 Dialogues of the Desert Sages R5 | 127% | Yaoyao can reliably proc the Energy passive twice per rotation with her constant healing from her Radishes and A4 Passive’s healing over time. The passive also works with overhealing. Her ER requirements can drop by over 100% in Energy-hungry teams, while the extra healing helps a lot in Furina teams to stack her DMG% Bonus. |
 Favonius Lance* | 110% | Incredible option if Yaoyao and her team are Energy-hungry. The passive can still help allies’ ER needs even if Yaoyao doesn’t Burst. However, triggering it will be harder with only Skill hits and Normal Attacks. |
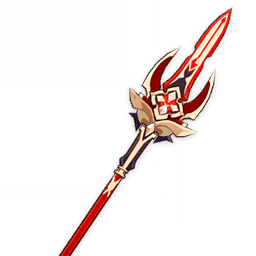
 Rightful Reward R1–R5 | 107%–110% | An incredible craftable option, as Yaoyao utilizes both the secondary stat and the passive. The passive works with overhealing, meaning that Yaoyao can easily gain the Flat Energy during her Burst state. |
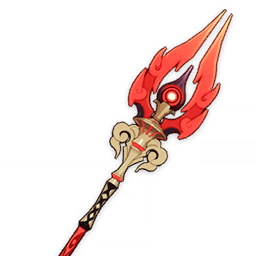
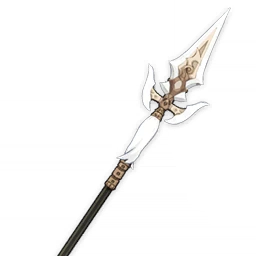
 Kitain Cross Spear R1–R5 | 100%–102% | Kitain’s EM secondary stat and Energy regeneration passive make this weapon great in Nilou Bloom teams, where Yaoyao triggers some Blooms and needs to Burst frequently to heal the team from self-damage. |
Other Options
The weapons below only work if Bursting every other rotation or at C2+, as they can’t reach KQM Standard ER needs. For more information, check Yaoyao Solo DMG/Heal Calcs - Luna
| Weapon | Healing | Notes |
 Black Tassel | 112% | Black Tassel provides the largest HP% secondary stat of any weapon. In addition, it's a 3-star, making it easy to obtain. However, its lack of party buffs and Energy generation makes the weapon easily replaceable by other universal options. |
 Moonpiercer* | 98% | With Yaoyao’s Skill triggering reactions even off-field, she is able to generate the Leaf of Revival and grant the team an ATK% buff. However, its strength is highly dependent on the team archetype and the character that picks up the Leaf, which can be hard when it spawns/stays inside enemies’ hitboxes. |
 Staff of Homa | 104% | Not Recommended Although Homa provides HP% with its passive, it lacks crucial Energy generation that other weapons provide. Furthermore, its CRIT DMG secondary stat is mostly wasted in a build focused on healing. Staff of Homa usually has better use on other Polearm characters who make good use of the damage increase. |
*Aside from their healing capabilities, these options also contribute to buffing the team and are recommended for overall team DPS.
Artifacts — Healing
Yaoyao’s best artifacts are entirely team-dependent. Since she has negligible damage when built for healing, she should use artifact sets that focus on buffing allies or debuffing enemies.
 4pc Deepwood Memories (DM) | 4pc DM is a great support set that shreds Dendro RES. Since this effect doesn't stack, if Yaoyao uses this set, other Dendro teammates should equip more offensive sets like 4pc Gilded Dreams. Note that characters with more consistent Skill/Burst hits like Nahida are more suited to hold 4pc DM for more uptime on the RES Shred. In teams outside of Bloom, Hyperbloom and Burgeon and where Yaoyao is the only Dendro character, the 4pc DM set bonus is wasted, so Yaoyao should use another set. |
 4pc Instructor | 4pc Instructor provides Yaoyao's teammates with an EM buff if Yaoyao triggers reactions while on-field, making it an excellent option in reaction-based teams. To trigger Instructor’s set effect, Yaoyao should stay on-field until a Radish hits an enemy. In addition, Yaoyao can either swap in again during the last few hits of her Skill or cast her Burst to proc the 4pc Instructor set effect a second time in the rotation. Note that 4-star artifacts’ stats are lower and cap at +16, thus reducing Yaoyao’s overall stats. Video of Yaoyao activating 4pc Instructor’s set effect by lunaflaw |
 4pc Tenacity of the Millelith (TotM) | An excellent support set in non-Bloom related teams. The 2pc effect helps with healing while the +20% ATK buff is appreciated by many characters. Note that Yaoyao’s Burst transforms all Radish DMG into Burst damage, meaning she will have some buff downtime during her Burst state. |
 2pc Mixed Sets | 2pc Set Bonuses: HP%, Healing Bonus% While these options won’t provide any additional buffs or benefits, they are easier to obtain and improve Yaoyao’s healing. Players should still choose buffing sets if available, even if they leave Yaoyao with less useful substats. |
Off-field DPS
Being an off-field DPS is not Yaoyao’s intended role due to her suboptimal scaling and unsuitable kit. However, if you wish to play her as an off-field DPS, the following information may prove useful.
Weapons — Damage
Assumptions: C0; Lvl 90; Talent Lv. 9; 4pc Deepwood Memories; EM/Dendro DMG%/CRIT; KQMS
No Burst; Damage averaged for 10 Radish hits, 4 Spreads total, Single-target; 100% Dendro Resonance uptime; 100% Deepwood RES shred uptime
| Weapon | DPS | Notes |
 Deathmatch R5 | 133% | Against 1 Enemy |
Staff of Homa R1 <50% HP | 132% | Third BiS for healing. <50% HP only feasible if not Bursting |
 Staff of the Scarlet Sands R1 | 131% | 0 Stacks* |
Deathmatch R1 | 122% | Against 1 Enemy |
Staff of Homa R1 | 120% | Third BiS for healing |
 Missive Windspear R1–R5 | 104% | Passive not included* |
Kitain Cross Spear R5 | 104% | It’s a good option for healing and some Bloom teams |
 White Tassel R5 | 100% | Not worth leveling just for Yaoyao |
Kitain Cross Spear R1 | 100% | Same as R5 |
*Each Yuegui snapshots stats upon its creation, but the type of damage dealt by White Jade Radishes (Skill or Burst) is determined on explosion. Therefore, Yaoyao is not able to take advantage of weapon buffs that occur after Skill cast.
All other Polearms are either worse than Kitain Cross Spear in terms of boosting Yaoyao’s damage, or are less accessible than her other options. To see the full list of Yaoyao’s offensive options, check out Leifa’s Yaoyao DPS Calcs.
Artifacts — Damage
Assumptions: KQMS - lv90 - C0 - 9/9/9 - Deathmatch R1 - ATK/Dendro/CRIT - only Yaoyao damage, no buffs - 165% ER needs - E+Q > 5 E hits | 19 Q hits - 7 spreads - Yaoyao DPS calcs
| Artifact Set | DPS | Notes |
4pc Deepwood Memories (DM) | 100% | If no other character in the team uses this set, 4pc DM is the BiS for its Dendro RES Shred as well as its 2pc Dendro DMG Bonus. If wanting to focus solely on Yaoyao’s damage, other characters like Fischl or Zhongli can activate the 4pc effect, enabling more offensive options. |
 4pc Gilded Dreams (GD) | 104% | Yaoyao should space apart her Skill and her Burst in order to trigger more reactions and have more consistent damage. 4pc GD is best suited in Spread teams where Yaoyao doesn’t need to focus on Burst or has more teammates who help her with Energy needs. |
 4pc Emblem of Severed Fate (ESF) | 123% | Yaoyao can do an E+Q combo to convert her Skill damage to Burst damage. This allows her Yuegui from the Skill to benefit from the 4pc ESF set bonus, increasing DPS while on-field. 4pc ESF is best suited when focusing on Yaoyao's raw talent damage with ATK buffs instead of a more consistent Spread DPS. |
Teams & Synergies
As a Dendro healer, Yaoyao plays an important role in most Dendro-related teams, providing both off-field Dendro application and strong healing. Furthermore, since Yaoyao’s Burst can heal off-field party members, low-health teammates don’t have to swap in for healing at the risk of dying.
The following teams will focus solely on Yaoyao’s healer playstyle.
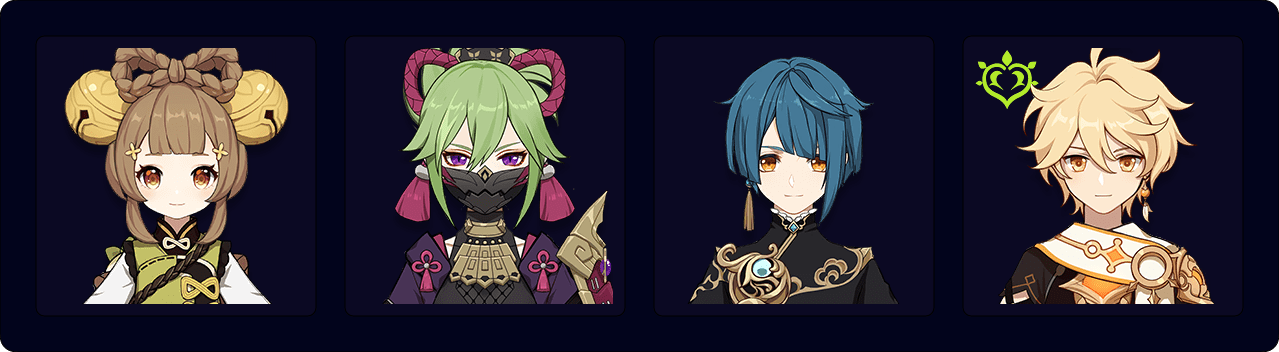
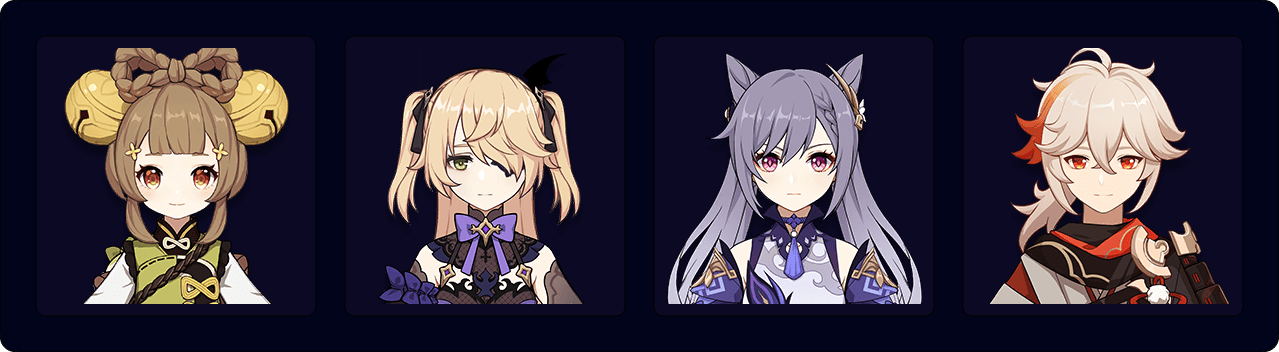
Hyperbloom
As Yaoyao consolidates healing and Dendro application, you can choose more offensive options for your Hyperbloom teams.
However, as her Skill and Burst share ICD, you’ll need to make space in your rotation to cast her Skill and Burst separately. This prevents the overlapping of their durations, which would lower Yaoyao’s overall Dendro application.
If she is the sole Dendro unit in the party, it becomes even more crucial for her to Burst every rotation to supply the team with enough Dendro aura, thus requiring off-field Hydro and Electro units to generate and trigger Cores while Yaoyao Bursts. Note that it is still recommended to bring a second Dendro/Electro to ease Yaoyao’s ER needs, as already discussed in her ER requirements.
Hyperbloom Triggers
 Shinobu | Shinobu is a comfortable pick who provides consistent AoE Electro application and extra healing — especially helpful if you’re fighting against effects like Corrosion, or if Yaoyao’s Burst is not frequently used. |
 Raiden | Yaoyao aids Raiden in reaching her full potential in Hyperbloom teams. In single-target scenarios, Raiden can trigger a large amount of Hyperblooms from off-field, allowing you to bring faster Dendro and Hydro appliers to further boost Dendro Core generation. |
 Cyno | Cyno utilizes the Quickbloom archetype very well by having a second Dendro to provide enough Quicken aura to trigger both Hyperbloom and Aggravate. Note that Cyno appreciates a shielder more than a healer, as shielders provide extra interruption resistance for smoother gameplay. |
 Sucrose | With off-field Electro appliers which are discussed below, Sucrose can trigger Hyperblooms by doing Electro Swirls while on-field. Her Burst can supply the team with off-field Swirls while players stay on-field during Yaoyao’s Burst, allowing for team flexibility. Sucrose’s EM buffs also boost the occasional reactions triggered by other team members. Other Anemo options can also work as Hyperbloom triggers but aren’t as flexible as Sucrose or don’t work as well with Yaoyao. |
Hydro Units
 Xingqiu | Xingqiu’s great single-target damage and fast Hydro application allow him to generate the most amount of Dendro Cores at C6 (compared to C0 5 stars) with little field time, making him a premier Hydro unit in Hyperbloom teams. Additionally, he also provides defensive utility in the form of chip healing and damage reduction, which is helpful if Yaoyao is unable to cast her Burst frequently. |
 Yelan | Though Yelan provides similar utility to Xingqiu, she is generally a weaker candidate for Hyperbloom teams due to her lower rate of Hydro application. Additionally, her DMG% buff sees less value in this team archetype, as Hyperbloom deals Transformative Reaction damage, which doesn’t benefit from DMG% buffs. Nevertheless, she’s a great unit for on-field units like Alhaitham, who do benefit from the DMG% buff. |
 Ayato | As Yaoyao and Ayato both provide on-field and off-field Elemental applications, their kits complement each other: Yuegui can apply Dendro from off-field while Ayato casts his Skill, and Ayato can apply Hydro from off-field with his Burst when Yaoyao is on-field to cast hers. |
Flex Options
 Nahida | Nahida’s consistent and strong off-field Dendro application is sufficient for most teams even if Yaoyao doesn’t use her Burst, which lets other Electro and Hydro characters take more field time if needed. It is recommended to have Nahida equip 4pc Deepwood Memories (DM), as she activates the set more consistently compared to Yaoyao, but players can still use more offensive sets if available and if the rotation allows for more field time on Yaoyao to refresh 4pc DM. Nahida is able to share up to 250 EM to your on-field character, which is a great boost if you use an on-field Electro unit to trigger Hyperbloom. |
 Alhaitham | In single-target scenarios, Alhaitham can take advantage of Yaoyao's 4pc DM Dendro RES Shred. However, in multi-target scenarios with high-mobility enemies, Yaoyao is more inconsistent compared to other units like Shinobu, Zhongli, or Nahida. |
Dendro Traveler | With most Hyperbloom teams having close to 20s rotations, DMC makes for a good second Dendro as a free option. It’s also easier to manage their 8s Skill cooldown as players can cast Traveler’s Skill and Burst, swap into Yaoyao’s Burst, and swap back, knowing that DMC’s Skill will be almost ready when her Burst ends. DMC also decreases Yaoyao’s ER needs, as players can funnel their particles into Yaoyao. |
 Fischl | As Oz doesn’t target Dendro Cores, Fischl can help the team’s ER needs while also providing great single-target off-field damage. When Yaoyao is your solo Dendro, Fischl and other Electro options won’t trigger Aggravate as often but can still be viable options. |
 Beidou | As with Fischl, Beidou can contribute great off-field damage, activate Electro Resonance for extra particles, and provide defensive utility in the form of damage reduction through her Burst and C1’s shield. Beidou can only ‘steal’ Hyperblooms with her Skill and Burst cast, as her Burst coordinated attacks can’t hit Dendro Cores. |
 Yae Miko | Yae Miko brings off-field Electro application with her Skill and a high-damage nuke with her Burst. Note that her Skill targets enemies and not Dendro Cores. Therefore, she should use an Aggravate-focused build unless players can afford to stay on-field and trigger Hyperbloom with her Normal and Charge Attacks – making a hybrid build with EM/Electro/CRIT useful in this case. |
 Cryo | At first glance, Cryo characters don’t seem to fit into Hyperbloom teams. However, similar to Electro, Cryo application weakens the Hydro aura with Frozen. By not reacting directly with Dendro, Cryo can coexist with it, weakening incoming Hydro applications and resulting in more Dendro Core generation as less of the Dendro aura would be consumed. Kaeya, Rosaria and Ganyu are most suited for this role as they can constantly apply Cryo from off-field. However, be mindful as all three units usually need upwards of 220% ER to consistently use their Burst. |
Example Teams and Rotations
Yaoyao E N2 - DMC E N1 Q - Shinobu N1 Q - Xingqiu E Q N1 - Shinobu E N1 - DMC E N3 - Yaoyao Q (any NA combo for 5s)
Video Demonstration
Fischl E - Xingqiu E Q N1 - Yaoyao E N2 - Sucrose N3 E 2[N3D] - Fischl Q - Sucrose N1 Q N1 - Yaoyao Q 6[N1J] - Sucrose N3 E
Video Demonstration
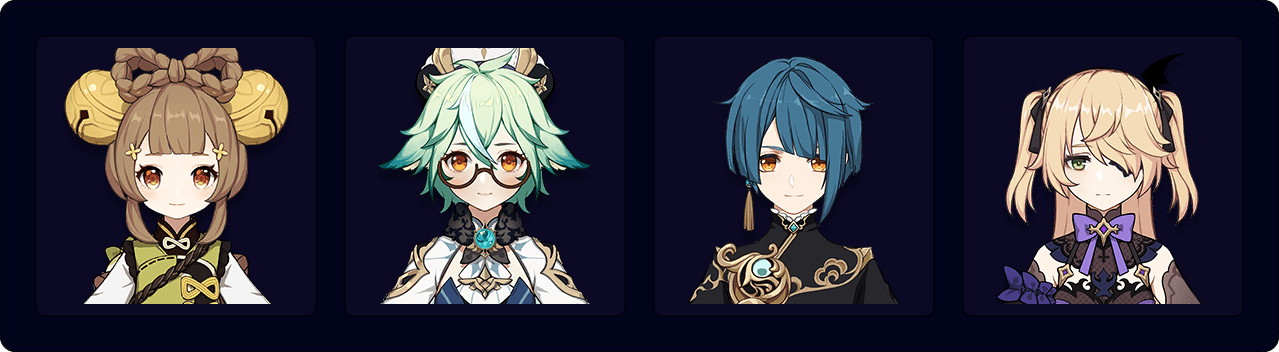
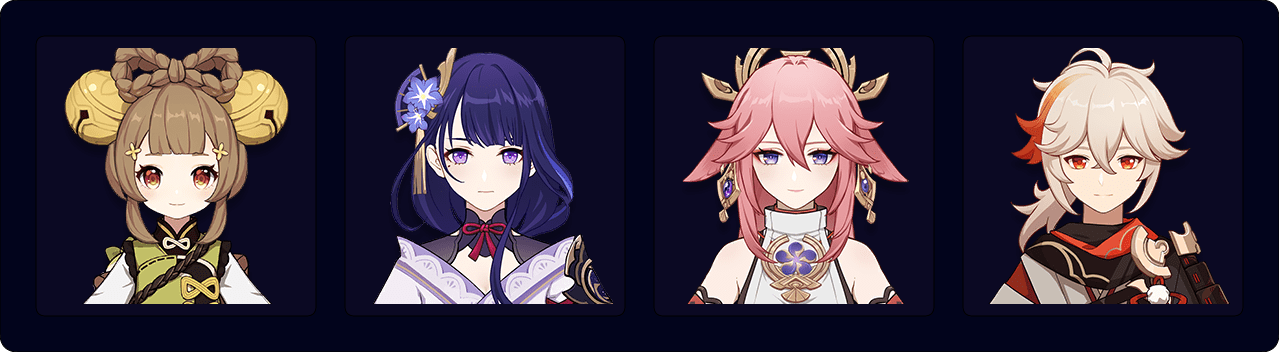
Quicken with Anemo
With her Skill’s slow but consistent off-field Dendro application, Yaoyao can maintain Quicken in single-target scenarios for as long as 18s, making it easier to maintain Electro aura on enemies without taking up too much field time.
As such, Yaoyao isn’t tied to her Burst in Quicken. It is mostly used if players need the party-wide healing or more Dendro application in longer rotations, against high AoE scenarios, or when enemies move outside of her Skill range.
Yaoyao should use support sets like 4pc Instructor and 4pc Tenacity of the Millelith. Since Yaoyao is the only Dendro, 4pc Deepwood Memories isn't worth using.Note that with Yaoyao providing both healing and Dendro application, more offensive or competitive Electro or Anemo choices can be used. Teams with extra Dendro units will be discussed in the next team archetype: Quicken without Anemo.
Electro Units
Yae Miko | Yae Miko deals great single and multi-target damage with her Skill and Burst. Players should be aware of the time Yae takes to set up her turrets, as she can get staggered without a shielder in the team. Her field time requirements are similar to Keqing's, so players should bring more off-field focused characters with Yae, like Fischl or Beidou. |
 Keqing | As Keqing works best in quickswap teams with 12/25s rotations, Yaoyao’s 15s Skill cooldown could bottleneck the team if not used correctly. Yaoyao’s Skill should be used just before Keqing goes on-field so that Yuegui’s Dendro application can last for both of Keqing’s combos. If one lacks enough application, casting Yaoyao’s Burst can apply on-demand Dendro for more Quicken uptime. |
Fischl | Fischl is almost a must-have in Aggravate teams, as she is both a battery for Electro units and an incredible off-field single-target DPS. When doing Swirl setups, players should keep in mind the time Yuegui takes to throw the first Radish. Yaoyao should stay on-field until the first Radish is thrown (shown in the Artifact section - 4 Instructor) so Fischl’s A4 can reapply Electro, thus making it possible to Swirl afterwards. |
Raiden | Raiden’s Burst damage increases when other Elemental Bursts are used beforehand. As such, when bringing Raiden, Yaoyao should build sufficient ER to Burst every rotation. However, Raiden’s Elemental Skill and Burst will help with Energy generation, and with a second Electro, Yaoyao’s Energy needs will remain on the lower end, as stated in the ER Requirements section. |
Beidou | Beidou works well as a powerful 4-star option in Aggravate with Yaoyao. Her damage reduction, in combination with Yaoyao’s healing, makes for a tanky team with great damage against 2 enemies. Note that Beidou needs extra Energy generation to reliably Burst, or her ER requirements will be rather high. Fischl and Beidou especially make an incredible pair if you’re also bringing an Anemo Catalyst unit like Sucrose or Heizou to drive Beidou’s Burst and Fischl’s A4. |
 Cyno | Cyno is able to remain on-field for his full Burst uptime and have extra comfort with Yaoyao’s off-field Dendro application, healing and Energy generation. Yuegui also helps in multi-wave content if enemies spawn nearby, as players won’t need to swap out of Cyno mid-Burst. Note that Cyno teams usually bring a shielder for smoother combos. If a shielder is brought, Yaoyao is more of an extra comfort choice, with Nahida and Dendro Traveler being more optimal. |
 Sara | At C6, Sara can buff the CRIT DMG of your Electro allies, contributing to both their base damage and Aggravated attacks. She can be a substitute to Fischl at C6, being an optimal support for Yae Miko, Raiden, or Keqing in AoE-focused scenarios. However, at Constellation 5 and below, her Flat ATK buff isn’t significant enough to justify swapping Fischl out for Sara, as it only buffs the base Talent damage, not the Aggravated portion. |
 Lisa | Lisa can support the team with her DEF Shred through her A4 Passive as well as Catalysts like TTDS, Hakushin Ring, or Wandering Evenstar. She is an option for more hypercarry styles with Raiden or Yae for example, while also being able to stay on-field for extra damage. Note that Lisa usually needs high amounts of ER as few rotations allow her time to use her hold Skill. |
Flex Units
 Kazuha | Kazuha is an incredible Anemo unit for Aggravate teams. His Skill and its short cooldown provide the team with valuable grouping and rotation flexibility, and he can buff Electro units with an Elemental DMG Bonus via his A4 Passive. Note that as Dendro cannot be Swirled, Kazuha can only increase Electro characters’ damage. Furthermore, Kazuha can also trigger Aggravate in AoE scenarios via Electro Swirls, which dish out good damage due to his full EM build. Such mechanics have paved the way for a new variant of Aggravate teams, which will be discussed further below. |
Sucrose | Sucrose provides incredible buffs to both your Electro and Dendro units with her A4 Passive’s EM share. In addition, she can hold Hakushin Ring, which gives her teammates additional Elemental DMG Bonus. Sucrose also serves as an on-field driver for units like Fischl and Beidou, as she can proc both Fischl’s A4 with her Swirls and Beidou’s Burst with her Normal Attacks. Lastly, as Sucrose’s Burst always absorbs Electro in Aggravate teams, her C6 provides an extra 20% DMG Bonus for Electro teammates. |
 Venti | Venti’s grouping capabilities and Energy refund for all Electro units are very valuable, allowing his teammates to build more offensive stats and Burst more reliably. Furthermore, Venti’s Swirls trigger Aggravate in AoE scenarios, scaling greatly with his full EM build. Note that some melee characters might miss their attacks when lighter enemies are sucked into Venti’s Burst. |
 Zhongli | Zhongli provides utility and buffs through his strong shield, its Elemental RES Shred, and set effects from artifacts such as 4pc Tenacity of the Millelith, 4pc Archaic Petra, or 4pc Instructor. If you’re bringing Zhongli, it’s advised not to bring an Anemo unit and instead to pick two Electro damage dealers. |
Example Teams and Rotations
Fischl E/Q > Yaoyao E > Kazuha EQ > Keqing EQE N1C EE 3N1C
Video Demonstration
Note: on 1st rotation, wait for Yuegui to throw Radish before swapping.
Yae 3E > Raiden E > Kazuha E Q > Yaoyao Q 3DJ > Yae Q 3E > Kazuha E > Yaoyao E > Raiden Q 3N3C N1C E (skip first Raiden E on next rotations)
Video Demonstration
Raiden E > Sucrose ED > Yaoyao Q E > Lisa N1 Q > Sucrose N1 Q > Raiden Q combo
Video Demonstration
Raiden E > Kazuha E > Yaoyao Q E > Lisa Q > Kazuha Q E > Raiden Q combo
Video Demonstration
Yae 3E > Kazuha E > Fischl E > Yaoyao E > Kazuha Q E > Yae Q 3E > Fischl Q > Kazuha E > Yaoyao Q N3 > Yae N2C
Video Demonstration
Aggravate — Anemo Trigger

A unique variant of Aggravate teams that became viable upon Yaoyao’s release. Yaoyao can constantly heal allies off-field and apply just enough Dendro to sustain a Quicken aura, but not enough to remove Electro auras, thereby allowing Anemo units to Swirl Electro and trigger Aggravate. She also works incredibly well with Kazuha’s and Venti’s 15s Burst cooldowns, which keeps the rotation short.
In this team composition, Kazuha and Venti trigger Aggravate via Electro Swirls and Electro-absorbed Bursts with the help of Fischl.
Furthermore, by having two Anemo characters in the team, players may switch Kazuha’s artifacts to 4pc Thundering Fury (TF) without losing 4pc Viridescent Venerer’s valuable RES Shred. Equipping Kazuha with 4pc TF is not necessary, but it opens up a different playstyle by reducing Kazuha’s Skill cooldown when he triggers Aggravated Swirls, allowing players to spam his Skill frequently.
Other Anemo options such as Sucrose and Faruzan have longer Burst cooldowns, which defeats the purpose of bringing Yaoyao and Fischl in a 15s rotation team. They also lack the strong grouping and Absorption both Kazuha and Venti provide, which means fewer instances of Aggravated Swirls.
Note that this team loses a lot of its strength in single-target scenarios, as Swirls cannot Aggravate on their initial targets and can only off other nearby enemies who possess Quicken auras. When facing single-target content, the lack of Aggravated Swirls also means Kazuha would only proc 4pc TF via his Electro-absorbed Burst, thereby reducing his chances to lower his Skill cooldown.
Rotation - with 4TF Kazuha
Fischl E/Q > Venti EQ > Yaoyao E > Kazuha jumpE Q jumpE > Venti E > Kazuha jumpE
Video Demonstration
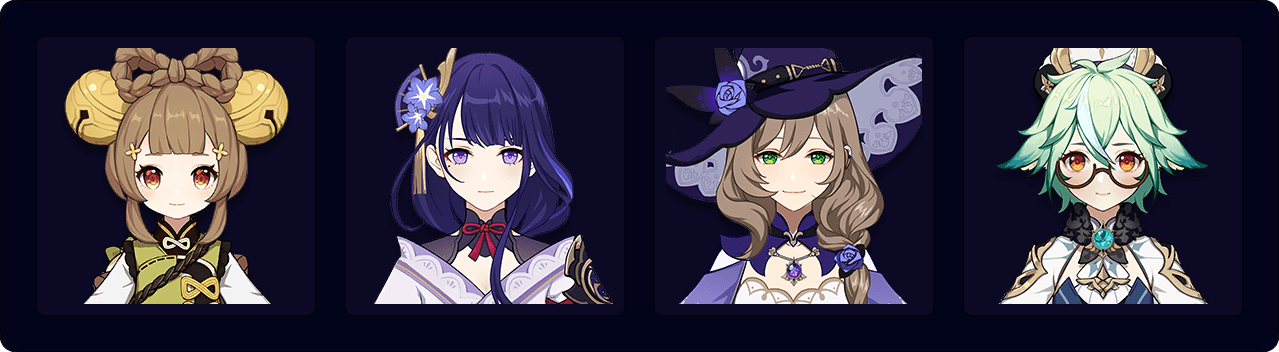
Quicken without Anemo
With other Dendro characters in the team, there is a surplus of Dendro application and reduction of Electro aura uptime. This makes it difficult for Anemo units to Swirl Electro and Electro units to benefit from 4pc Thundersoother, while also reducing Fischl’s A4 damage, as Spread does not count as an Electro reaction. However, more Dendro units help battery each other and activate Dendro Resonance for extra EM buffs.
Compared to traditional Spread-focused teams, Yaoyao usually takes the defensive slot characters like Kuki occupy, thus allowing for more offensive Electro units in her place.
Dendro Units
Nahida | Nahida serves as a strong off-field DPS and Dendro battery while also providing EM buffs for the on-fielder. It is recommended to have Nahida equip 4pc Deepwood Memories (DM), as she activates the set more consistently compared to Yaoyao, but players can still use more offensive sets if available and if the rotation allows for more field time on Yaoyao to refresh 4pc DM. |
Alhaitham | Yaoyao can hold 4pc DM and let Alhaitham equip the more offensive 4pc Gilded Dreams (GD) artifact set. Be mindful that, unlike Kuki, who usually wears this set for Alhaitham, Yaoyao usually hits only one enemy at a time, making the set unreliable in multi-target scenarios or against mobile enemies. |
 Tighnari | Similar to Alhaitham, Yaoyao can hold 4pc DM while Tighnari equips 4pc GD to increase his Spread damage. Unfortunately, as Tighnari is a Bow user, he usually fights enemies from a distance, which prevents Yuegui from both healing Tighnari and hitting opponents simultaneously. |
Electro Units
Yae Miko | Yae Miko does great single and multi-target damage with her Skill and Burst. Note that she is prone to stagger while setting up her turrets, as she can take up to 3s to use her Skills if weaving Normal Attacks between them. Note that Yae’s Burst has a high 90 Energy cost. Players are advised to bring a second Electro like Fischl or Raiden to ease her ER requirements while helping with team DPS. |
Fischl | Note that Spread doesn't trigger Fischl's A4 Passive. This means that, in Double Dendro teams, Fischl cannot reach her full potential and will deal less damage. Bringing a second Electro unit will both improve Fischl’s damage and the team's ER requirements with Electro Resonance. |
Raiden | Raiden provides excellent off-field Electro application for Quicken and her Burst state’s Electro attacks are further improved through Aggravate. This enables players to run her as a decent dual carry with Yae Miko without sacrificing character synergies. |
Beidou | The damage reduction and interruption resistance from Beidou’s Burst brings extra comfort for more fragile teammates. A caveat to using Beidou is her high ER requirements — a secondary Electro unit is needed to generate extra Electro Particles and make Beidou more comfortable to play. |
Flex Units
Zhongli | Zhongli’s strong shield and Elemental RES Shred makes him an incredible second defensive unit if you want the extra comfort. |
Example Teams and Rotations
Nahida E Q > Raiden E > Yae 3E > Yaoyao Q 3DJ > Nahida E N4 > Yae Q 3E > Raiden Q 3N3C N1C E > Yaoyao E (skip first Raiden E on next rotations)
Video Demonstration

Yae 3E > Yaoyao E > Fischl E > Alhaitham hEP N3D N3 > Yae Q 3E > Alhaitham Q* > Fischl Q > Alhaitham N3D N3C 2[N3D] N3C N3D
*Need to swap fast into Fischl and back to get the stacks. Players can do Fischl Q > Alhaitham Q [...] for extra comfort.
Video Demonstration
Yae 3E > Yaoyao E > Fischl E > Tighnari E 3C Q > Yae Q 3E > Yaoyao Q > Fischl Q > Tighnari E 3C Q
Video Demonstration
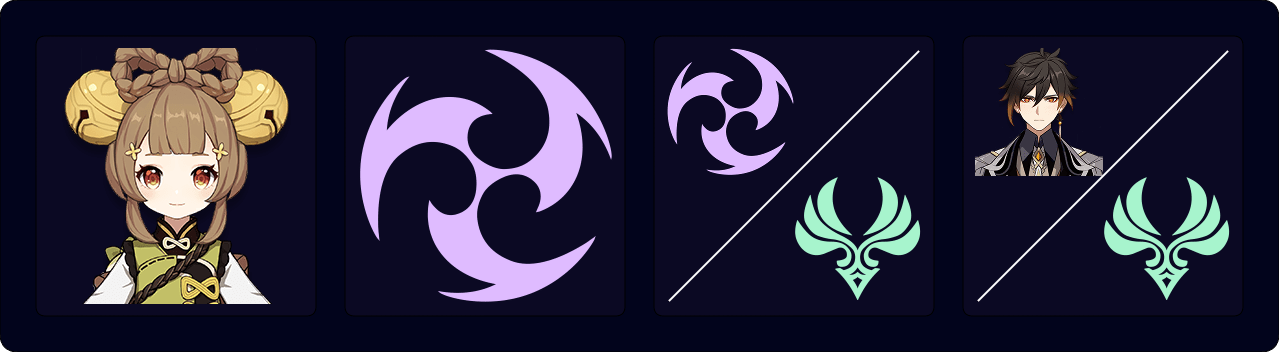
Burgeon

Yuegui’s random targeting leads to a deceptively high amount of Dendro application in AoE scenarios. Due to Bloom-related reactions’ damage ICD, only two instances of damage can be dealt at any given time. Since Yuegui generates Dendro Cores one at a time instead of in large batches like Dendro Traveler’s Burst, Burgeon can be triggered more frequently without overcapping on the reaction ICD, making Yaoyao a perfect candidate for this archetype.
However, as her Skill and Burst share ICD, you’ll need to make space in her rotations to cast her Skill and Burst separately. This prevents the overlapping of their durations, which lowers Yaoyao’s overall Dendro application.
If she is the sole Dendro unit in the party, it becomes even more crucial for her to Burst every rotation to supply the team with enough Dendro aura, thus requiring off-field Hydro and Pyro units to generate and explode Cores while Yaoyao uses her Burst. It is recommended to have party members (including herself) equip Favonius weapons to ease the team’s ER needs.
Pyro Units
 Thoma | Thoma and Yaoyao have great synergy: As Thoma applies Pyro from off-field, Yaoyao is given on-field time to Burst if in need of extra Dendro application, healing the team and applying Dendro without compromising Pyro application and the amount of Burgeons triggered. Note that both Thoma and Yaoyao have high ER requirements in this team. Thoma can reduce his by using Kitain Cross Spear and having C4; while Yaoyao’s is reduced by using Favonius Lance and having C2, the former of which also helps the rest of the team’s ER needs. Thoma’s C1 can also be triggered by White Jade Radish Explosions, decreasing his Skill and Burst cooldowns by 3s every 20s, given that the on-field character is shielded by Thoma. |
 Klee | Players need to be careful with Klee’s Pyro application: they should ignore her Burst and pace out application to avoid overwhelming enemies with a Burning aura. It’s possible to have off-field Pyro application by using Klee’s Elemental Skill before swapping into Yaoyao’s Burst. This also decreases Yaoyao’s ER needs thanks to Klee’s A4 Passive. A triple EM build with 4pc GD and Sacrificial Fragments will have better results at KQMS (4-7%)*, but players with higher investment can opt into a hybrid build with EM/Pyro/CRIT. |
 Yanfei | Yanfei can also work similar to Klee as an on-field Burgeon trigger. Players need to position themselves between Dendro Cores and enemies to reliably hit them with her Normal Attacks, while Yanfei’s Charged Attacks and Skill will help in AoE hits. Yanfei can be a safer option with her longer range, shield from C4, and faster animations. However, building ER isn’t recommended so players are encouraged to build triple EM or a hybrid build similar to Klee’s. |
Hydro Units
Xingqiu | Xingqiu’s single-target damage and fast Hydro application make him a premier choice as a Hydro option for Burgeon teams, as he is able to keep up with the high demand for Dendro Cores. He also provides additional defensive utility in the form of chip healing and damage reduction in combination with Yaoyao’s healing. |
Yelan | Yelan by herself can have trouble removing enemies’ Burning aura even if your Pyro application is slow. With her in the team, it is recommended to bring Electro/Cryo/Geo characters as your flex, as those help weaken the Burning aura and allow for more Dendro Core generation. If players own Yelan’s C2, the extra application will mitigate most of this issue and allow for more flexible teammates. |
 Childe | By having a Pyro unit on the team, Childe is able to Vaporize his Burst — front-loaded damage that is helpful in multi-wave content. With Childe’s fast on-field AoE Hydro application, players should bring a second Dendro unit to allow even more Core generation during his field time. |
Ayato | Ayato provides both on and off-field Hydro application in a deceptively large area. If you need someone to spend time on-field, Ayato works quite well. When he is on-field with both his Burst and Skill active, his Hydro application can be quite fast. Note that Ayato’s Energy requirements are high in teams where he only uses his Skill once. Players should adapt their rotation to include 2 Skill uses or build Ayato with higher ER as his Burst is crucial for extra Hydro application. |
 Kokomi | Kokomi allows for AoE off-field presence with her jellyfish, while also being able to stay on-field to apply more Hydro with her Normal and Charged Attacks. She also aids Yaoyao with her own healing, meaning players can ignore Yaoyao’s Burst if there’s a second Dendro in the team to help with Dendro Core generation. Keep in mind that Kokomi’s jellyfish can’t be repositioned with her Burst and she will have suboptimal off-field Hydro application against multi-wave content or highly mobile enemies compared to other Hydro options. Players can opt into bringing her with Sacrificial Fragments to reposition her jellyfish and not need to Burst every rotation for full uptime. |
Flex Units
Nahida | Nahida’s strong and constant off-field Dendro application via her Skill allows Yaoyao to forgo her Burst if healing isn’t needed, thus being able to bring Hydro or Pyro characters who need to take more field time. It is recommended to have Nahida equip 4pc Deepwood Memories (DM), as she activates the set more consistently compared to Yaoyao, but players can still use more offensive sets if available and if the rotation allows for more field time on Yaoyao to refresh 4pc DM. Take extra caution with Nahida’s strong application. Without a fast Hydro applier like Xingqiu C6 or Childe, Nahida’s Skill will most likely maintain a Burning aura on the enemies, reducing Dendro Core generation. |
Dendro Traveler | Dendro Traveler can work as a budget second Dendro unit on the team to help with Core generation. However, players should hit Traveler’s Burst with Hydro before Pyro, as the latter would make their Burst explode and lose its Dendro application. |
Fischl | Apart from triggering some Hyperblooms, Fischl’s off-field Electro application is able to trigger Overload on the Burning aura, weakening it and allowing more Dendro Core generation by the way Dendro, Electro and Hydro interact with each other. Furthermore, her particle generation is highly appreciated, as many characters in Burgeon teams can be Energy-hungry (like Thoma, Xingqiu, and Yaoyao herself). |
Cryo | At first glance, Cryo characters don’t seem to fit into Burgeon teams. However, similar to Electro, Cryo application weakens the Burning aura with Melts. Furthermore, by not reacting directly with Dendro, Cryo can coexist with it, weakening incoming Hydro and Pyro applications and resulting in more Dendro Core generation as less of the Dendro aura would be consumed. Kaeya, Rosaria, and Ganyu are most suited for this role as they can constantly apply Cryo from off-field. However, all three units usually need upwards of 220% ER to consistently use their Burst. |
Example Teams and Rotations
Nahida E Q > Thoma QE N1 > Childe Q (ranged) > Yaoyao N1 E N1> Childe E 6N2C > Thoma N1 E N1 > Yaoyao Q 3N2D
Video Demonstration
Fischl E - Xingqiu Q N1 - Yaoyao E N2 - Thoma Q N1 E N1 - Xingqiu E N4 - Fischl N1 Q - Yaoyao N1 Q 6[N1J]
Nilou Bloom

Yaoyao is an incredible unit in Nilou Bloom teams. She provides much-needed healing for this archetype and allows characters like Kokomi and Barbara to build more EM. The random nature of Yuegui’s targeting makes for high Dendro application in AoE scenarios, increasing Dendro Core generation.
Note that even though Yaoyao provides great Dendro application, she should still focus on building HP/Healing Bonus and enough ER in Nilou Bloom teams instead of building EM (unless paired with Candace). It is advised that Yaoyao focus on maintaining enemies’ Dendro auras for the Hydro units to trigger Blooms because of the way Elements interact.
As her Burst increases her Dendro RES, Yaoyao can serve as a good driver for off-field units such as Xingqiu or Candace, allowing her to tank Bloom self-damage with minimal risk while healing all party members. For more information on Nilou Bloom teams, you can click here to check out the KQM Nilou Quick Guide. A full Nilou guide is currently underway.
Furthermore, because Candace infuses melee attacks with Hydro, Yaoyao has higher Bloom ownership in teams with her, as she is able to apply Dendro with her Burst while triggering Blooms with infused Normal Attacks. It is recommended to shift Yaoyao’s build to allocate artifacts with EM mainstats, but players can still build some HP if in need of healing.
Example Teams and Rotations
Nilou E 3E (Q every 2 rots) > Yaoyao E > DMC E Q > Candace E N1 Q N2 > DMC 2[N3D] E N3D > Yaoyao Q NA combo > reset
Video Demonstration
Nahida EQ > Kokomi E > Nilou E (Q every 2 rots) > Yaoyao Q 3[N1J] E > Kokomi Q N2 >
Nahida E N2CJ N2 > Kokomi 3N2 > reset
Video Demonstration
Credits

“It is said that joy hides just beyond the horizon, and bliss is as fleeting as the setting sun! So, whenever I notice anything fun going on, I always gotta go check it out... and you never know, maybe I'll find something I can help with.”
Writing: lunaflaw, cuppacote
Editors: idkanonymized, sexyeboy69, mocha_biscuit, mintblossom__
Consultants: caramielle, nikatosaurus, .athene.
Transcribers: cinders_pear
Extra thanks to: gellagella, reddraegon