Updated for Version 4.1
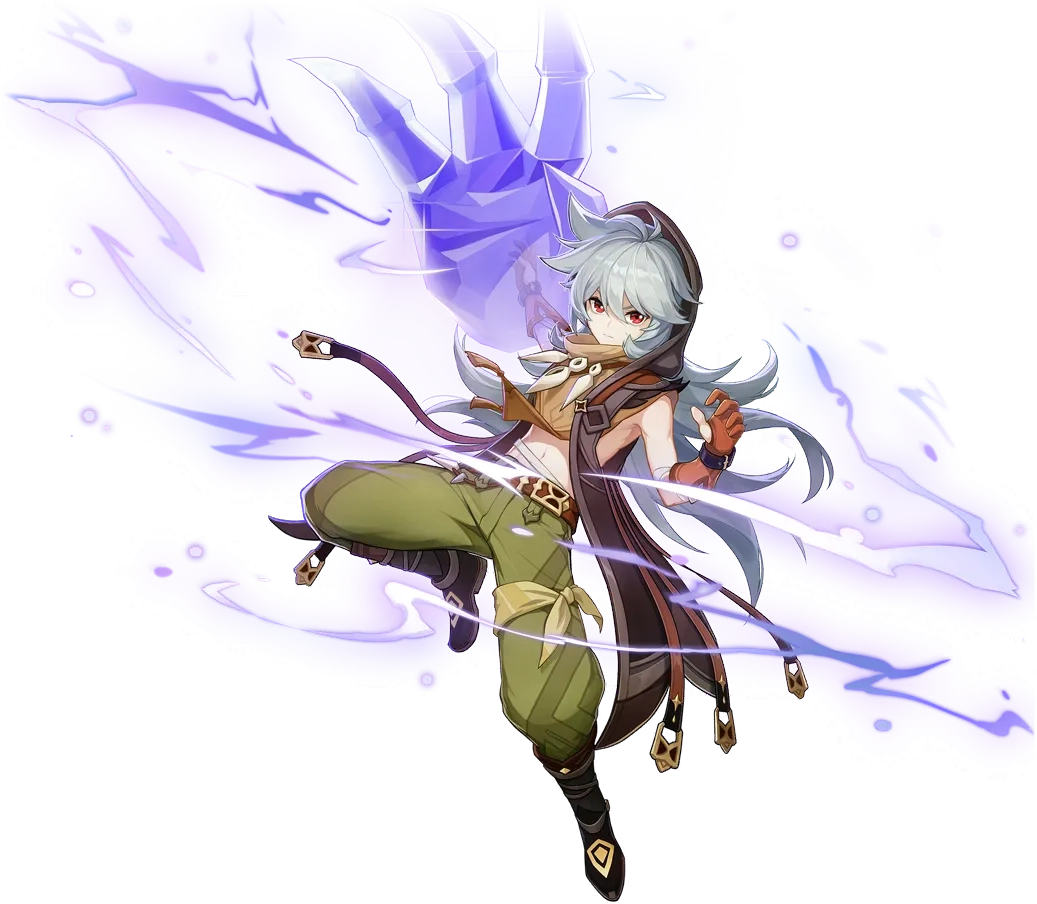
Razor is a 4-star Electro Claymore character who requires a large amount of field time to deal a mix of Physical and Electro damage.
Learn about Razor’s best buids, Talent priority, best weapons, best artifacts, and best teams in this quick guide.
Note that the information given is subject to change if and when new discoveries are made. More extensive testing is in progress.
The full-length guide is available here. It is heavily outdated and currently being updated, please visit our Discord to learn more about Razor.
Table of Contents
New Content
 Baizhu | A 5-star Dendro Catalyst character who offers teamwide healing, small shields, and a buff for Dendro-reactions to on-field units. However, his off-field Dendro application is quite limited compared to other Dendro units. |
 Kirara | A 4-star Dendro Sword character who provides a strong shield. She is a decent option in Aggravate, but her near non-existent off-field Dendro application limits her synergy in Bloom-based Reaction teams. |
 Talking Stick | A Battle Pass-exclusive weapon that provides different buffs when the wielder is affected by certain Elements. While Razor can easily gain its buff due to his Burst mechanics, it generally does not surpass his other 4-star options if at all. Serpent Spine is also a much stronger and more flexible alternative from the Battle Pass. |
 Tidal Shadow | A craftable weapon from Fontaine. Its passive can be an improvement over that of Prototype Archaic, but requires consistent healing to function. |
 Marechaussee Hunter | A new artifact set obtained in Fontaine. Its 2pc effect is serviceable for Razor’s mixed sets. While its 4pc effect is quite powerful, fulfilling its requirements is currently too impractical to recommend for most playstyles. Burgeon’s self-damage can maintain stacks on the 4pc effect. However, Razor much prefers sets that increase his reaction damage in such playstyles. |
 Lynette | A 4-star Anemo Sword character available after reaching AR25. She can carry 4pc Viridescent Venerer and provide a team ATK buff, while her Burst deals off-field damage and taunts enemies. She can notably deal Ousia-aligned damage to weaken Pneum-aligned enemies. |
 Portable Power Saw | Do not use this weapon. |
Infographic
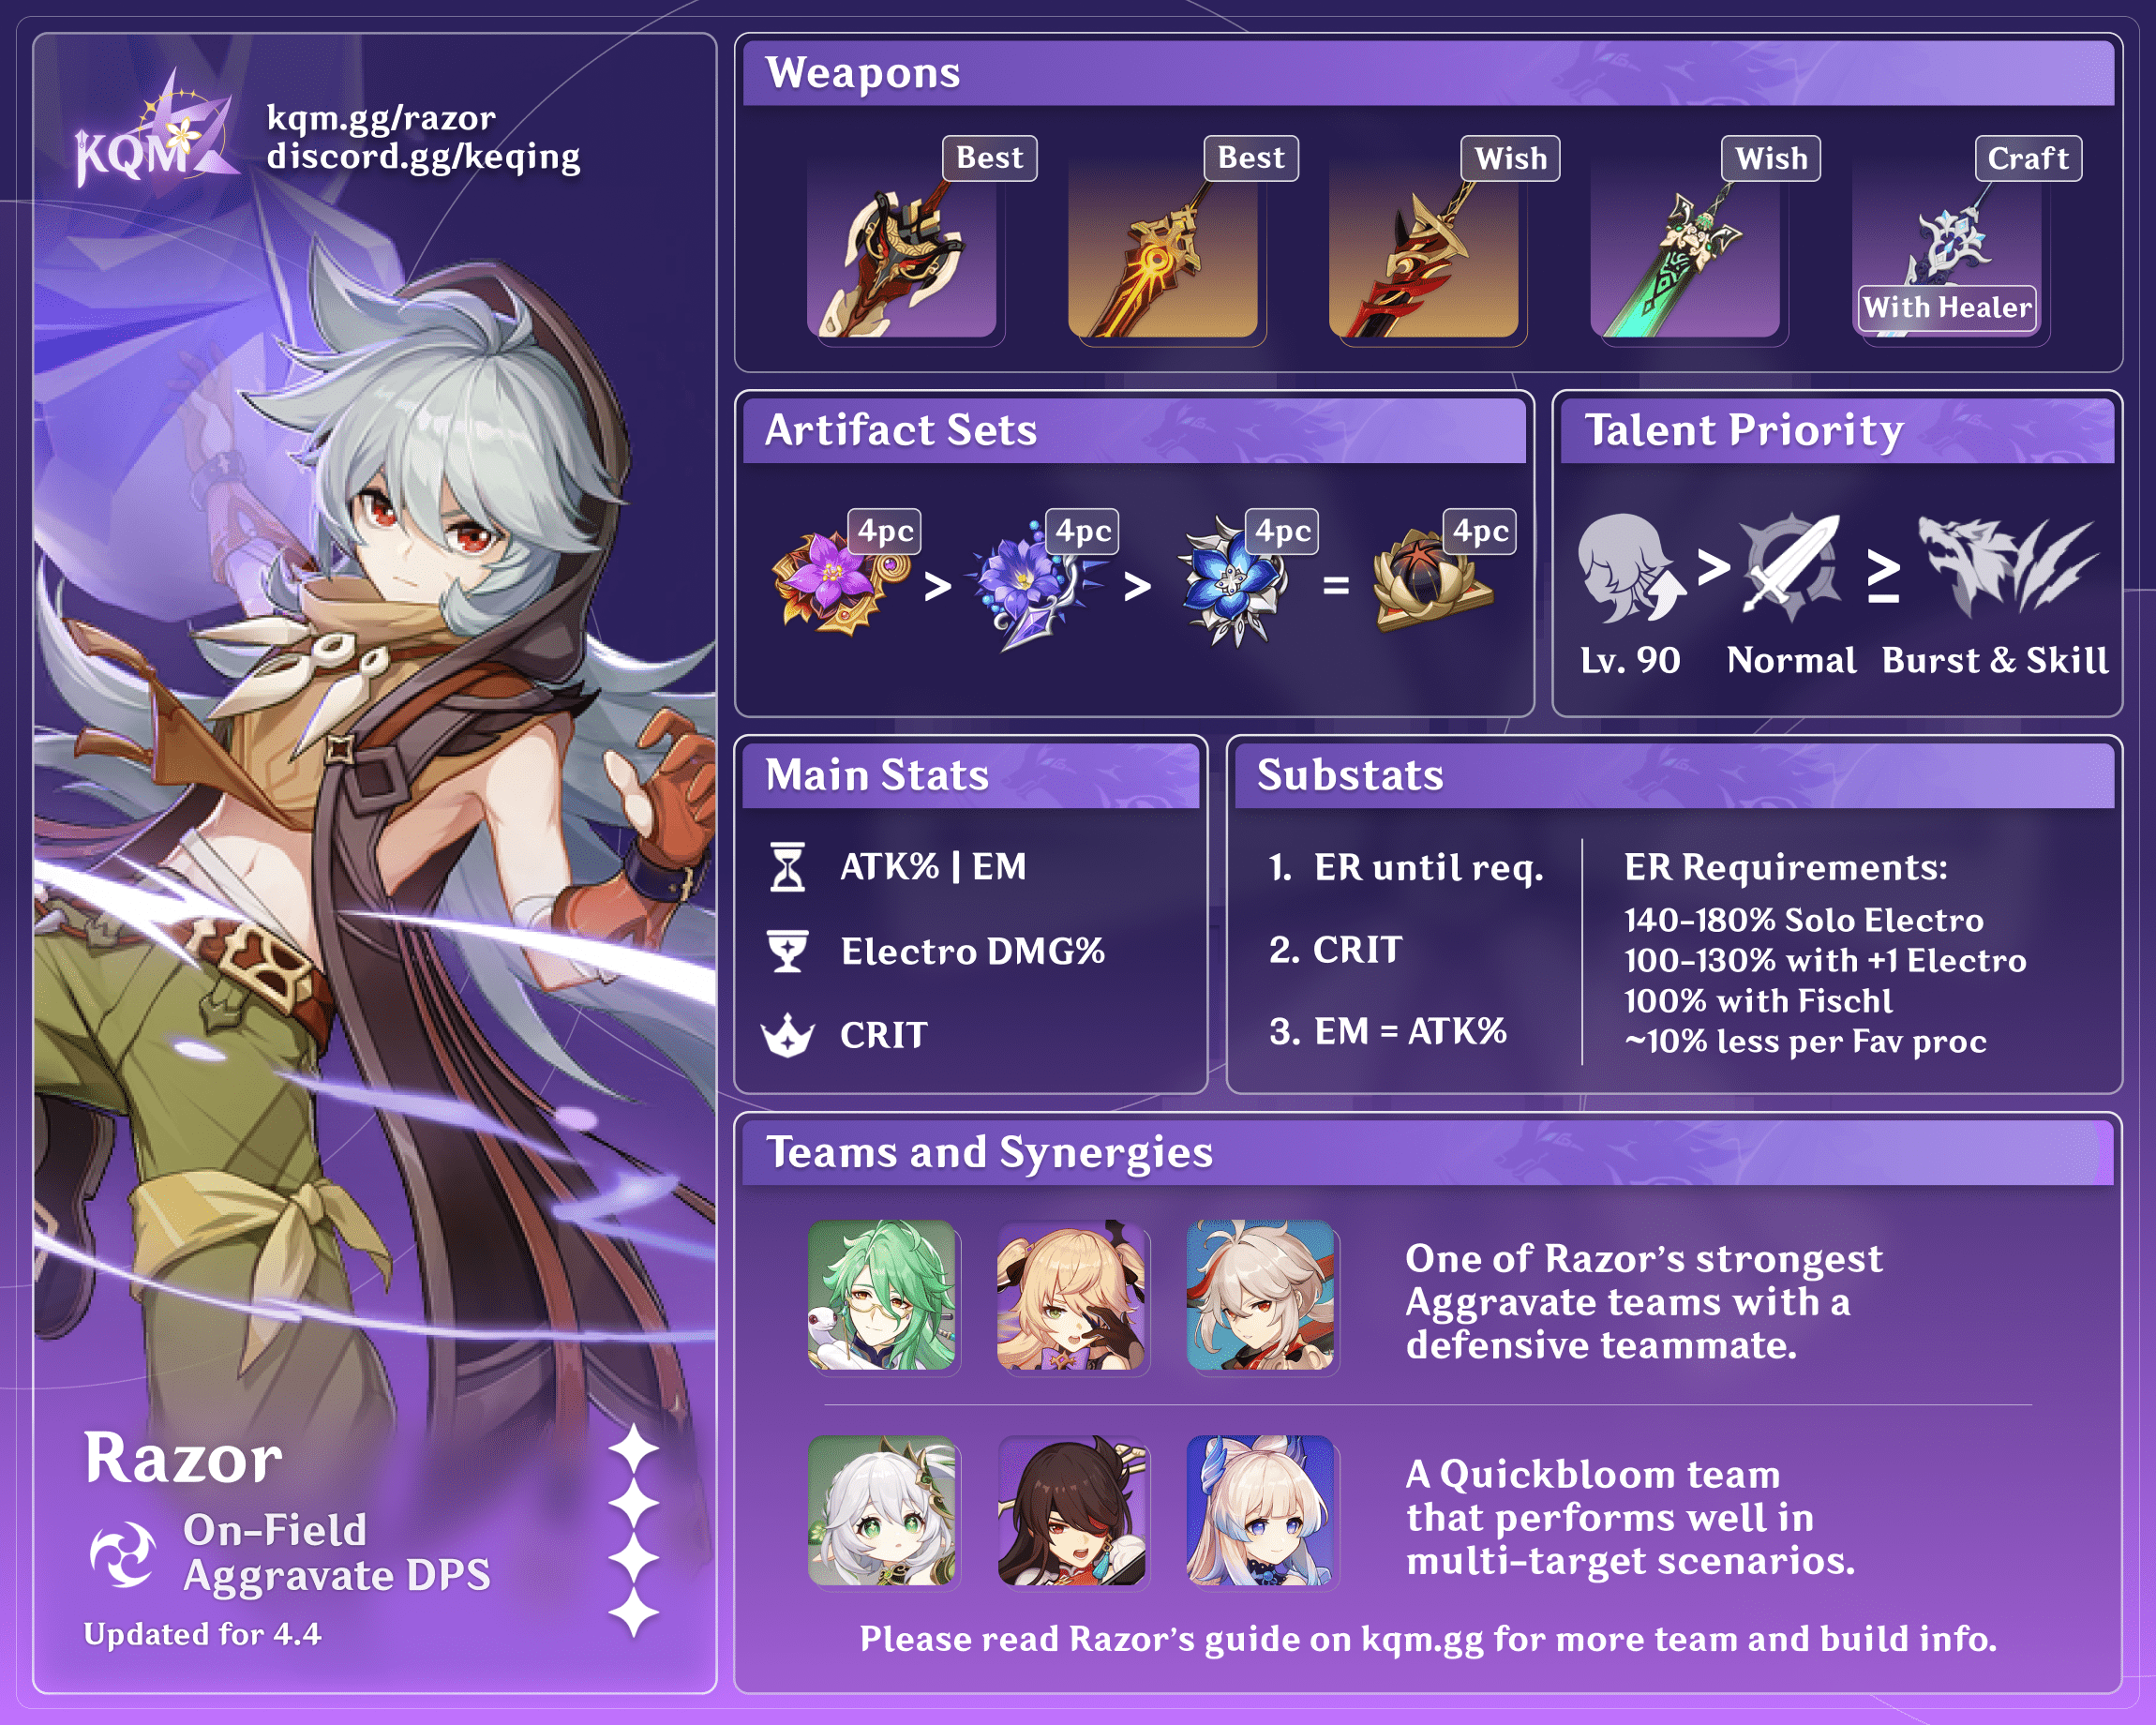
Credits to: angtahimik, irokei
Character Overview
Playstyles
Physical DPS
The simplest way to play Razor, making full use of his high Normal Attack scalings and Physical DMG Bonus Ascension stat. This playstyle is a viable option in the early game, but it will suffer in the late game from relatively few sources of Physical DMG buffs compared to his Elemental playstyles.
Aggravate DPS
Quicken allows Razor to substantially increase his Electro damage through Aggravate, which he can trigger on his Skill, Burst, and C6. Notably for Razor, he can still deal good Physical DMG with his Normal Attacks on top of his Aggravated Electro damage, such that weapons, artifacts, and teammates associated with his Physical playstyles can still find use in this team archetype. He can also make good use of the Electro RES Shred from 4pc Viridescent Venerer as well as Elemental DMG% buffs such as Kazuha’s A4 Passive. Note that high Dendro application is not needed due to Quicken’s long uptime.
Transformative Reaction DPS
A niche but possibly potent build that utilizes Razor’s unique mechanics to deal numerous Transformative Reactions such as Electro-Charged, Hyperbloom, Burgeon and Overloaded. This build can experience numerous gameplay issues that makes it difficult to use in practice, such as Razor’s strict on-field requirement, Overloaded’s knockback, expensive team Energy costs, restrictive ability AoEs, or Bennett’s C6 base requirement to function.
Talents
Level and Talent Priority
Raising Razor to Level 90 is recommended when he is used as an Aggravate or Transformative Reaction DPS to maximize his reaction damage.
Talent Priority
Normal Attack > Burst > Skill
Razor’s Normal Attacks make up a substantial portion of his damage, especially in Physical builds. The next priority is his Burst for its damage and Attack SPD Bonus, followed by his Skill. This priority is also true for Razor’s Aggravate builds, as his reaction damage is not increased by Talent levels.
For Transformative Reaction-based builds, Razor’s Talents can be left unlevelled as they contribute negligible damage.
Talents Overview
![]() Normal Attack | Steel Fang
Normal Attack | Steel Fang
Talent Description
Normal Attack
Performs up to 4 consecutive strikes.
Charged Attack
Drains Stamina over time to perform continuous spinning attacks against all nearby opponents.
At the end of the sequence, perform a more powerful slash.
Plunging Attack
Plunges from mid-air to strike the ground below, damaging opponents along the path and dealing AoE DMG upon impact.
Razor’s damage primarily comes from his Normal Attacks, which have rather high multipliers. Even when built to trigger Electro reactions, Razor’s Normal Attacks should not be neglected, as they make up a majority of his raw damage.
It is worth noting that the fourth hit of Razor’s Normal Attack string hits the hardest but is also the slowest (see the Combos section for how to most optimally utilize and cancel Razor’s Normal Attacks).
Razor’s Charged Attack should not be used for any of his playstyles.
![]() Elemental Skill | Claw and Thunder
Elemental Skill | Claw and Thunder
Talent Description
Hunts his prey using the techniques taught to him by his master and his lupical.
Press
Swings the Thunder Wolf Claw, dealing Electro DMG to opponents in front of Razor.
Upon striking an opponent, Razor will gain an Electro Sigil, which increases his Energy Recharge rate.
Razor can have up to 3 Electro Sigils simultaneously, and gaining a new Electro Sigil refreshes their duration.
Hold
Gathers Electro energy to unleash a lightning storm over a small AoE, causing massive Electro DMG, and clears all of Razor’s Electro Sigils.
Each Electro Sigil cleared in this manner will be converted into Energy for Razor.
Razor’s Skill allows him to be self-sufficient with his Energy needs. His Tap Skill tends to be the most versatile and gains a significant upgrade at C4, but his Hold Skill can be useful to deal short instances of consolidated AoE damage, break shields, or allow him to use his Burst when he is just short of Energy.
On-hit, Razor’s Tap Skill will generate an Electro Sigil that lasts for 18s that grants him 20% ER while it is active. He can hold up to three Sigils, with each Tap Skill refreshing their durations.
Razor’s Hold Skill will displace him backwards some distance unless his Burst is also active. It will also consume any Sigils he has in exchange for 5 Flat Energy per Sigil cleared.
This Talent applies 2U of Electro, which is useful for shield-breaking and controlling certain reactions, namely extinguishing the Burning aura in Burgeon teams.
![]() Elemental Burst | Lightning Fang
Elemental Burst | Lightning Fang
Talent Description
Summons the Wolf Within, which deals Electro DMG to all nearby opponents. This clears all of Razor’s Electro Sigils, which will be converted into Elemental Energy for him.
The Wolf Within will fight alongside Razor for the skill’s duration.
The Wolf Within
- Strikes alongside Razor’s normal attacks, dealing Electro DMG.
- Raises Razor’s ATK SPD and Electro RES.
- Causes Razor to be immune to DMG inflicted by the Electro-Charged status.
- Disables Razor’s Charged Attacks.
- Increases Razor’s resistance to interruption.
These effects end when Razor leaves the battlefield.
When Razor leaves the field, a maximum of 10 Energy will be returned to him based off the duration remaining on this skill.
Razor’s Soul Companion deals Electro Burst damage alongside Razor’s Physical Normal Attacks, giving him the unique ability to deal both types of damage at the same time. If Razor’s Normal Attacks are infused with an Element, they will deal the infused Element’s damage alongside his Soul Companion’s Electro attacks. The ATK SPD, Electro RES, and interruption resistance inherent to Razor’s Burst are all valuable as well.
Razor’s Burst also clears any active Electro Sigils, converting each into 5 Energy, for a maximum of 15 Energy refunded. Swapping out during the Burst duration will end it prematurely and also refund some Energy. It is important to note that during Razor’s Burst, his Skill does not generate any Energy particles.
His Burst also applies Electro to himself throughout its duration, which can be useful in cleansing debuffs or triggering reactions.
In Physical teams, Razor’s Burst allows for easy access to Superconduct when paired with an off-field Cryo unit. In Dendro teams, this Talent is also Razor’s most crucial ability, as it is his most consistent method of Electro application.
![]() Ascension 1 Passive | Awakening
Ascension 1 Passive | Awakening
Talent Description
Decreases Claw and Thunder’s CD by 18%. Using Lightning Fang resets the CD of Claw and Thunder.
Improves Razor’s self-sufficiency by allowing him to generate Energy with his Skill more quickly. It can also be used for front-loading Electro DMG with repeated uses of his Hold Skill.
![]() Ascension 4 Passive | Hunger
Ascension 4 Passive | Hunger
Talent Description
When Razor’s Energy is below 50%, increases Energy Recharge by 30%.
Another Passive Talent that helps Razor get his Burst back more quickly.
![]() Utility Passive | Wolvensprint
Utility Passive | Wolvensprint
Talent Description
Decreases sprinting Stamina consumption for your own party members by 20%.
Not stackable with Passive Talents that provide the exact same effects.
A Utility Passive that can be useful in combat due to Razor’s optimal combos involving dash cancels, which consume Stamina. Note that this effect does not stack with identical Utility Passives, such as those of Kaeya or Kazuha.
Constellations
![]() Constellation 1 | Wolf’s Instinct
Constellation 1 | Wolf’s Instinct
Picking up an Elemental Orb or Particle increases Razor’s DMG by 10% for 8s.
A decent damage increase that, due to Razor’s high field time, has very consistent uptime.
![]() Constellation 2 | Suppression
Constellation 2 | Suppression
Increases CRIT Rate against opponents with less than 30% HP by 10%.
A fairly unremarkable 3% CRIT Rate buff on average, this Constellation can be slightly useful for finishing off high HP mobs or Bosses. It can also help proc Favonius Greatsword’s passive.
![]() Constellation 3 | Soul Companion
Constellation 3 | Soul Companion
Increases the Level of Lightning Fang by 3.
Maximum upgrade level is 15.
A simple +3 Talent levels to Razor’s Burst. This does not increase any of Razor’s reaction damage.
![]() Constellation 4 | Bite
Constellation 4 | Bite
When casting Claw and Thunder (Press), opponents hit will have their DEF decreased by 15% for 7s.
Razor’s best Constellation; his C4 provides DEF Shred, which can increase the entire team’s damage. With frequent uses of Razor’s Tap Skill, this Constellation can have 100% uptime.
![]() Constellation 5 | Sharpened Claws
Constellation 5 | Sharpened Claws
Increases the Level of Claw and Thunder by 3.
Maximum upgrade level is 15.
A simple +3 Talent levels to Razor’s Skill. Despite the incentive to use Tap Skill often (because of Razor’s C4), C5 is a relatively minor damage increase.
![]() Constellation 6 | Lupus Fulguris
Constellation 6 | Lupus Fulguris
Every 10s, Razor’s sword charges up, causing the next Normal Attack to release lightning that deals 100% of Razor’s ATK as Electro DMG.
When Razor is not using Lightning Fang, a lightning strike on an opponent will grant Razor an Electro Sigil for Claw and Thunder.
This Constellation does not infuse Razor’s Normal Attacks with Electro. Instead, it fires a separate bolt of Electro DMG. For Physical Razor, this Constellation is a minor damage increase. However, it can be useful for Razor’s Aggravate and Transformative Reaction teams since it increases Razor’s Electro application. C6 can also decrease Razor’s ER requirements even more by pre-stacking Electro Sigils.
Combos
N# = Corresponding number of consecutive Normal Attacks
P = Plunging Attack
tE = Tap Elemental Skill
hE = Hold Elemental Skill
Q = Elemental Burst
J = Jump
D = Dash
Burst Combos
| tEQ tE D | Razor’s standard Burst combo, using his Tap Skill to pre-funnel Energy before Bursting, followed up by another Tap Skill thanks to his A1 Passive. |
| hEQ tE | A Hold Skill can be used to consume any active Sigils to fund Razor’s Burst if he is short on Energy, while also pre-funneling slightly more particles. Note that using Hold Skill outside of Burst will move Razor backwards, and may require him to dash forward to stay in melee range. |
| hEQ hE | A niche combo that can be handy for breaking shields or front-loading AoE Electro DMG. |
| tEQ hE (C4+) | Similar to the above combo but uses a Tap Skill to first shred enemy DEF. |
Normal Attack Combos
| N3(tE)D | Razor’s best combo when not using his Burst, such as when finishing off enemies. It is also useful in teams where he triggers Transformative Reactions with his Normal Attack combos. The third attack should be canceled with either a dash or his Tap Skill when it is available, the latter of which should itself be canceled with a dash. |
| N4(tE)D | Razor’s preferred combo while his Burst is active, as its ATK SPD buff makes landing his last Normal Attack much more favorable for DPS. Do note that his last Normal Attack can knock back light enemies a significant distance. Similar to the N3 combo, the final hit should be canceled with either a dash or a Tap Skill and dash. |
| N1DJP | EDJP | Also known as ‘Dragonstriking’, this technique allows Razor to perform a Plunging Attack from ground level for substantial AoE damage. However, failure to execute it consistently is often a significant DPS loss. While novel and stylish, Dragonstriking is not recommended except for players seeking gameplay variety or skill expression. |
First Rotation Pre-stacking
| tE > Swap out > Razor | At the start of an Abyss chamber, Razor may begin the first rotation using a Tap Skill to gain an extra Electro Sigil before swapping to his teammates. At C4, this also shreds enemy DEF before teammate Skills and Bursts are cast. |
| N1tE > Swap out > Razor (C6) | Similar to the above combo, but utilizes C6’s lightning attack to gain yet another Electro Sigil. |
Artifacts
ER Requirements
| Double Electro with Fischl | 100% |
| Double Electro | 100-130% |
| Solo Electro | 140-180% |
Razor is able to greatly mitigate his Energy requirements on account of his Ascension Passives and the additional Energy Recharge granted by his Electro Sigils. Rotations can also make use of his Hold Skill to further reduce ER requirements by consuming Electro Sigils for Flat Energy.
Razor’s exact ER requirements depend heavily on your team composition, Skill usage, and enemy layout. Use the Energy Recharge Calculator to find your exact Energy requirements based on your team and rotation.
Artifact Stats
Physical
 Sands |  Goblet |  Circlet |
| ATK% | Physical DMG Bonus / ATK% | CRIT |
Substats: ER until requirement > CRIT > ATK%
Energy Recharge is a crucial stat for ensuring Razor can consistently use his Burst. An ATK% Goblet should only be considered if a Physical DMG Bonus Goblet is unavailable, or if running Serpent Spine.
Aggravate
Sands | Goblet | Circlet |
| ATK% / EM | Electro DMG Bonus / ATK% | CRIT |
Substats: ER until requirement > CRIT > EM = ATK%
Energy Recharge is a crucial stat for ensuring Razor can consistently use his Burst. An ATK% Goblet should only be considered if an Electro DMG Bonus Goblet is unavailable, or if running Serpent Spine.
An ATK% Sands is recommended as it benefits both Razor’s Physical and Electro DMG; however, an EM Sands can still be considered especially if Razor is triggering Hyperblooms in a Quickbloom team.
Transformative Reaction
Sands | Goblet | Circlet |
| EM / ER% | EM | EM / CRIT Rate |
Substats: ER until requirement > EM >> CRIT Rate (If using Favonius)
Energy Recharge is incredibly important, as much of Razor’s damage will rely on his Burst uptime. Once his ER requirements are met, focus on EM to maximize his Transformative Reaction damage. If running Favonius Greatsword, consider a CRIT Rate Circlet or CRIT Rate substats to consistently trigger its passive.
Artifact Sets
Aggravate and Physical
 4pc Pale Flame | The best choice for maximizing Razor’s Physical damage, as he can easily maintain the passive effect with his Tap Skill. This set is still a viable option in Aggravate teams as his Normal Attacks can still contribute good damage. |
 4pc Thundering Fury (TF) | Razor’s preferred artifact set in Aggravate or Quickbloom teams due to its mix of relevant buffs and unique passive. Its cooldown reduction passive allows Razor to use his Tap Skill after every N4 combo, triggering more Aggravates. It also indirectly lowers his ER requirements, as Razor can build up Electro Sigils much more quickly with repeated Tap Skills. |
 4pc Gilded Dreams | Provides a mix of ATK% and EM, two stats that are greatly appreciated in Aggravate builds. Its EM bonus is also significant in Quickbloom teams for increasing Razor’s Hyperbloom damage. |
 4pc Thundersoother | Can be a potent set for Razor in Physical or Aggravate teams, as its 4pc effect buffs both his Physical and Electro damage. While it excels in scenarios where an Electro aura can be consistently maintained on enemies, the introduction of other reactions such as Hyperbloom can lower its performance. |
 4pc Gladiator’s Finale | A safe choice that provides an unconditional increase to Razor’s Normal Attacks; however, this artifact set does nothing for Razor’s Electro damage or his Plunging Attacks in Dragonstrike playstyles. |
 2pc Combinations of ATK%/Physical DMG%/TF/EM Marechaussee Hunter | Mixed artifact sets can still be viable options while farming for 4pc sets, and can even outperform 4pc sets with excellent substat quality. EM sets should only be used in Aggravate teams. |
Transformative Reaction
4pc Gilded Dreams | This set provides a very large amount of EM with both its 2pc and 4pc set effect, allowing it to buff Razor’s reaction damage by a substantial amount. |
 2pc Combinations of EM/EM | Mixed sets can be a suitable replacement for 4pc Gilded Dreams, as it can be very difficult to farm for several EM mainstats of a specific set. This is especially true if the 2pc sets you have possess superior substats. |
4pc Thundering Fury | Provides a decent DMG bonus for Transformative Reactions, but its passive is not as impactful in Hyperbloom or Burgeon teams. Not recommended to farm specifically for Razor. |
 4pc Flower of Paradise Lost | Grants the largest damage increase for Hyperbloom and Burgeon, beating out 4pc Gilded Dreams by a small margin. However, it does not benefit other reactions such as Electro-Charged or Overloaded. It is also generally less Resin-efficient to farm than 4pc Gilded Dreams. |
Weapons
Aggravate and Physical
Beacon of the Reed Sea | Boasting a high Base ATK, CRIT Rate stat, and ATK% passive, this weapon ranks highly among all of Razor’s weapons. While Razor can easily proc the first part of the passive, it can be problematic trying to purposefully trigger the second. |
 Wolf’s Gravestone | This thematic weapon works incredibly well with Razor’s Physical or Aggravate builds due to its massive ATK stat. While the passive effect is teamwide, it can be difficult to proc at all, let alone utilize it on teammates whose abilities snapshot buffs. |
 Redhorn Stonethresher | While it is held back by its low Base ATK and fairly useless passive, its massive CRIT DMG stat still makes it a potent option, especially in conjunction with external ATK buffs. |
 Song of Broken Pines | When used as a Physical DPS, Razor makes great use of Eula’s signature weapon. Its passive is also a teamwide ATK% buff similar to Wolf’s Gravestone, but with a more reliable proc condition. This weapon can still perform admirably in Aggravate builds especially if its team buffs can be used to good effect. |
 The Unforged | An excellent choice when running shield supports, potentially outscaling Wolf’s Gravestone at full stacks. |
 Serpent Spine | Razor’s best 4-star option, especially with high refinements. Its passive may encourage using shielders to prevent the loss of stacks. Due to its relatively low Base ATK and its passive providing DMG% it may be preferable to equip an ATK% Goblet with this weapon. |
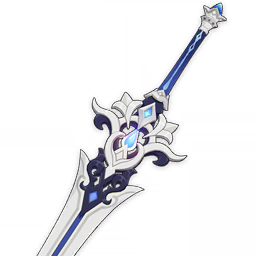
 Skyward Pride | Its Energy Recharge stat often covers Razor’s Energy needs, allowing for greater investment into offensive substats. The passive effect’s vacuum blades also scale well with CRIT and Physical DMG Bonus, stats that should be abundant in Razor’s Physical builds. |
Tidal Shadow | This weapon provides even more ATK if Razor is healed, benefitting all of his damage sources. It can outperform Prototype Archaic if its passive is active; however, it requires a consistent healer like Diona or Baizhu to function. This weapon has some anti-synergy with Bennett, as his healing does not trigger once Razor is above 70% HP. |
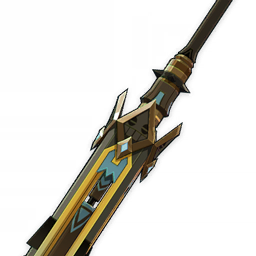
 Prototype Archaic | A good free-to-play weapon option, whose passive also scales with Physical DMG Bonus. Unlike Snow-tombed Starsilver, this weapon can also be used well by other ATK-scaling Claymore users should Razor be given a different weapon in the future. |
 Lithic Blade | It can reach similar performance to Serpent Spine, but is highly reliant on refinements and stacking Liyue teammates. Since Razor is not a Liyue character himself, he can never gain full stacks on its passive. |
 Rainslasher | A decent option in Aggravate or even Quickbloom teams, as long as either Electro or Hydro aura can be maintained. Its performance drops considerably without Dendro reactions, and it should not be used in Physical builds. |
 Mailed Flower | A free-to-play option for players who acquired it during its event. It provides the highest amount of EM of all Claymores, as Razor can easily maintain its passive. Its ATK% passive is also appreciated for Razor’s Talent damage. |
 Makhaira Aquamarine | Trades Rainslasher’s personal DMG% buff for a teamwide Flat ATK buff. Can be a good option in Dendro teams with ATK-scaling off-field DPS units like Fischl. |
Talking Stick | Razor can easily activate the second part of its passive with his Burst. Bennett can trigger the first part of the passive, but his Burst’s ATK buff makes the added ATK% less valuable. This weapon does not perform much better (or in some cases performs worse) than Razor’s other 4-star weapons, making it a poor choice considering its cost. It is also greatly outperformed by the other Battle Pass-exclusive Claymore, Serpent Spine. |
 Akuoumaru | A surprisingly decent option in Aggravate teams, as its Burst DMG% buff gives a nice boost to his largest source of Electro DMG. However, most of Razor’s teams do not even surpass 280 total Energy, and its performance is highly dependent on refinements. Even in its best case scenario, it will be outperformed by an R5 Rainslasher. |
Transformative Reaction
Mailed Flower | A free-to-play option for players who acquired it during its event. It provides the highest amount of EM of all Claymores, as Razor can easily maintain its passive. |
 Bloodtainted Greatsword | A cheap 3-star option that actually has more EM than Rainslasher. |
Makhaira Aquamarine | Provides the same EM as Rainslasher while also providing a permanent ATK buff for the whole team. A powerful option when teamed up with ATK-scaling off-field units such as Xingqiu, especially with refinements. However, it can be difficult to acquire refinements as it can only be obtained from limited Event weapon banners. |
Rainslasher | Has slightly less EM than Bloodtainted Greatsword, but can be used if it has already been leveled. However, its passive is of far less importance for Transformative Reactions. |
 Forest Regalia | Craftable option that provides a mix of ER and EM. However, the passive’s Leaf may be difficult or even impossible to pick up in actual combat, and its EM buff is dependent on refinements. |
 Favonius Greatsword | Its high Energy Recharge stat and passive allow Razor to commit heavily towards EM stats on his artifacts. Passive procs also help reduce team ER requirements, but require refinements or CRIT Rate investment for better consistency. |
Teams
Teambuilding
- Razor’s aversion to swapping out of his Burst early warrants teammates with long-lasting off-field Skills or buffs to provide support during his uptime.
- Cryo units enable Superconduct for a substantial boost in Physical DMG output while Dendro units allow Razor to exploit Quicken; both of these effects can be used simultaneously.
- It can be difficult to use teammate Skills or Bursts that have limited stationary AoEs (“Circle Impact”) due to Razor’s short range. Abilities that either follow the active character or have generous AoEs are much more preferable.
- Razor’s fast Normal Attacks in his Burst synergize very well with abilities that proc on Normal Attack usage.
Notable Teammates
 Diona | Packs nearly all the support Razor wants: off-field Cryo application, healing, shielding,and a wide array of minor buffs. |
 Layla | A substitute for Diona, trading healing for a stronger shield, while also applying Cryo off-field. Her shield does not last for Razor’s entire Burst. |
 Rosaria | Rosaria provides off-field Cryo application with her Burst along with a variety of buffs such as CRIT Rate share and Physical RES Shred at C6. |
 Kaeya | Generally worse than Rosaria, but his Burst is mobile. |
 Qiqi | Consolidates strong healing and mobile off-field Cryo application. Her Skill has an extremely long cooldown and cannot generate any particles. |
 Fischl | Fischl generates plentiful Electro Particles and deals considerable off-field damage. Razor’s can frequently trigger Electro reactions to trigger her A4 Passive, which is especially potent in Aggravate teams. |
 Kuki Shinobu | Kuki can provide healing and hold supportive sets such as 4ToTM. She can deal decent AoE damage in Aggravate teams, or work as an off-field Hyperbloom DPS. Note that she does not trigger many Hyperblooms while Razor’s Burst is active. |
 Beidou | Beidou provides excellent off-field damage in AoE situations but her damage falls greatly in single-target situations. |
 Yae Miko | Yae brings off-field Electro damage and a potent nuke with her Burst, but generates fewer Electro Particles than Fischl. |
 Dori | Acts as a substitute for Kuki, but is generally worse in every aspect. |
 Kujou Sara | Sara provides ATK and a Electro CRIT DMG buff at C6, but her short buff durations aren’t well suited to Razor’s typically long field times. |
 Xingqiu | The ubiquitous off-field Hydro unit, providing high single-target damage and Hydro application, as well as DMG Reduction and minor healing. |
 Yelan | Provides off-field single-target Hydro damage and a ramping DMG% buff. When combined with Xingqiu, they form a formidable off-field DPS core. |
 Kokomi | Provides strong healing and off-field AoE Hydro application, as well as buffs like 4ToTM or Thrilling Tales of Dragon Slayers. |
 Candace | Her Hydro Infusion has niche usage in Transformative Reaction teams, and her C6 can provide some off-field Hydro application. |
  Nahida | Dendro Traveler | Nahida and Dendro Traveler are the most recommended off-field Dendro appliers particularly in Transformative Reaction teams, since their application methods are faster, more effective in AoE situations, and have longer durations than other Dendro units. Nahida also offers substantial EM buffs and respectable personal damage especially in Quicken teams. Her Skill needs to be recast against new enemy waves, which can be problematic when Razor is still using his Burst. |
 Yaoyao | Baizhu | Kirara | Dendro defensive options for Aggravate teams who can also provide various other utilities such as Baizhu’s small shields and Dendro Reaction buff. However, their off-field Dendro application is too slow or inconsistent to be relied upon in Transformative Reaction teams. |
 Collei | Collei provides mobile off-field Dendro application via her Sprout effect, and can give buffs with Elegy for the End. |
 Kazuha | Kazuha brings grouping, VV Shred, and potent DMG% buffs with his A4 Passive, while dealing respectable damage with his Swirls. |
  Sucrose | Heizou | Anemo Catalysts who provide VV Shred, modest grouping, EM buffs, and can hold supportive Catalysts like Thrilling Tales of Dragon Slayers. |
  Jean | Sayu | Consolidate teamwide healing with VV Shred. Jean’s Burst has the unique property of applying Anemo to the on-field character, cleansing debuffs and triggering Swirl off-field in conjunction with self-Element application. Sayu can deal good off-field damage by triggering Aggravated Swirls with her Burst. |
Lynette | Lynette provides VV Shred, and her Burst offers off-field damage, a minor ATK buff, and a persistent taunt. She can also deal Ousia-aligned damage to deal with Pneuma-aligned Fontaine enemies. |
 Bennett | Bennett consolidates strong healing and a potent Flat ATK buff. His Burst’s self-Pyro application has a unique interaction with Lightning Fang’s self-Electro application to trigger Overloaded at Razor’s position. This deals decent damage with EM investment, but also knocks smaller enemies out of Bennett’s Burst AoE. His C6 is completely anti-synergistic with Razor’s Physical or Aggravate teams, but allows for Transformative Reaction builds that focus on Razor triggering Burgeon and Overloaded. |
 Xiangling | Xiangling deals off-field Pyro damage and enables consistent Overloads from both herself and Razor. She is best paired with Bennett to mitigate her ER requirements. |
 Zhongli | Zhongli provides an exceptionally bulky shield along with Universal RES Shred. He can also grant team buffs with 4pc ToTM or 4pc Archaic Petra. |
 Yun Jin | Yun Jin can provide Base DMG Bonus and Normal Attack DMG% buffs, as well as equip 4pc Archaic Petra to boost Electro DMG as well. |
 Albedo | Albedo deals off-field Geo damage and grants a flat 125 EM buff with his Burst. Best used with Zhongli because of their combined synergy. |
Physical DPS

Physical Razor teams should slot in at least one Cryo character to trigger Superconduct; the debuff’s 12s duration means that even slow off-field Cryo application can sustain full uptime for the entirety of Razor’s field time. While it is tempting to stack as many buff supports to increase Razor’s Physical damage, including off-field damage dealers who can synergize with his fast Normal Attacks often leads to better team damage.
Example Teams

Razor – Rosaria – Fischl – Zhongli

Razor – Layla – Yelan – Xingqiu
Aggravate DPS

There are several ways to fill out the flex slot. Anemo units can provide grouping and VV Shred. Cryo units can allow Superconduct to occur alongside Quicken for a sizable boost to Razor’s Physical damage. Hydro units may reduce Quicken uptime but allow Razor to trigger Hyperbloom, which is especially potent if Razor has high EM from his build and external buffs.
Example Teams

Razor – Yaoyao – Fischl – Kazuha

Razor – Nahida – Fischl – Diona
Transformative Reaction DPS

This team can be difficult to use as most of Razor’s Electro application is locked behind his Burst, preventing teammates from swapping in and using Skills during its duration (such as applying Nahida’s Seed of Skandha against a new wave of enemies). Due to this, Razor is often not as effective a Hyperbloom trigger as other units who can act more flexibly.
Razor’s Transformative Reaction build is most potent when paired with a C6 Bennett. This is because Bennett’s Pyro Infusion allows Razor to simultaneously apply Pyro and Electro with his Normal Attacks and Burst hits, respectively, allowing him to trigger Burgeon, Overloaded, and Hyperbloom for impressive AoE damage potential. Razor’s Electro application (notably the 2U application on his Skill) is useful for minimizing Burning, which would otherwise impede Bloom procs. However, this variant heavily restricts Razor to fighting within Bennett’s Burst AoE; this can be problematic if opponents move or are knocked out of range. It also strictly requires Bennett’s C6, which can be inaccessible or potentially undesirable depending on the other teams you play.
Example Teams

Razor – Nahida – Xingqiu – Bennett

Razor – Dendro Traveler – Yelan – Xingqiu
Credits
nikatosaurus, chasing_haze, sew, seima, nocii, irokei, davjac123, sharaths21312, cuppacote, casdela, uhinf1999