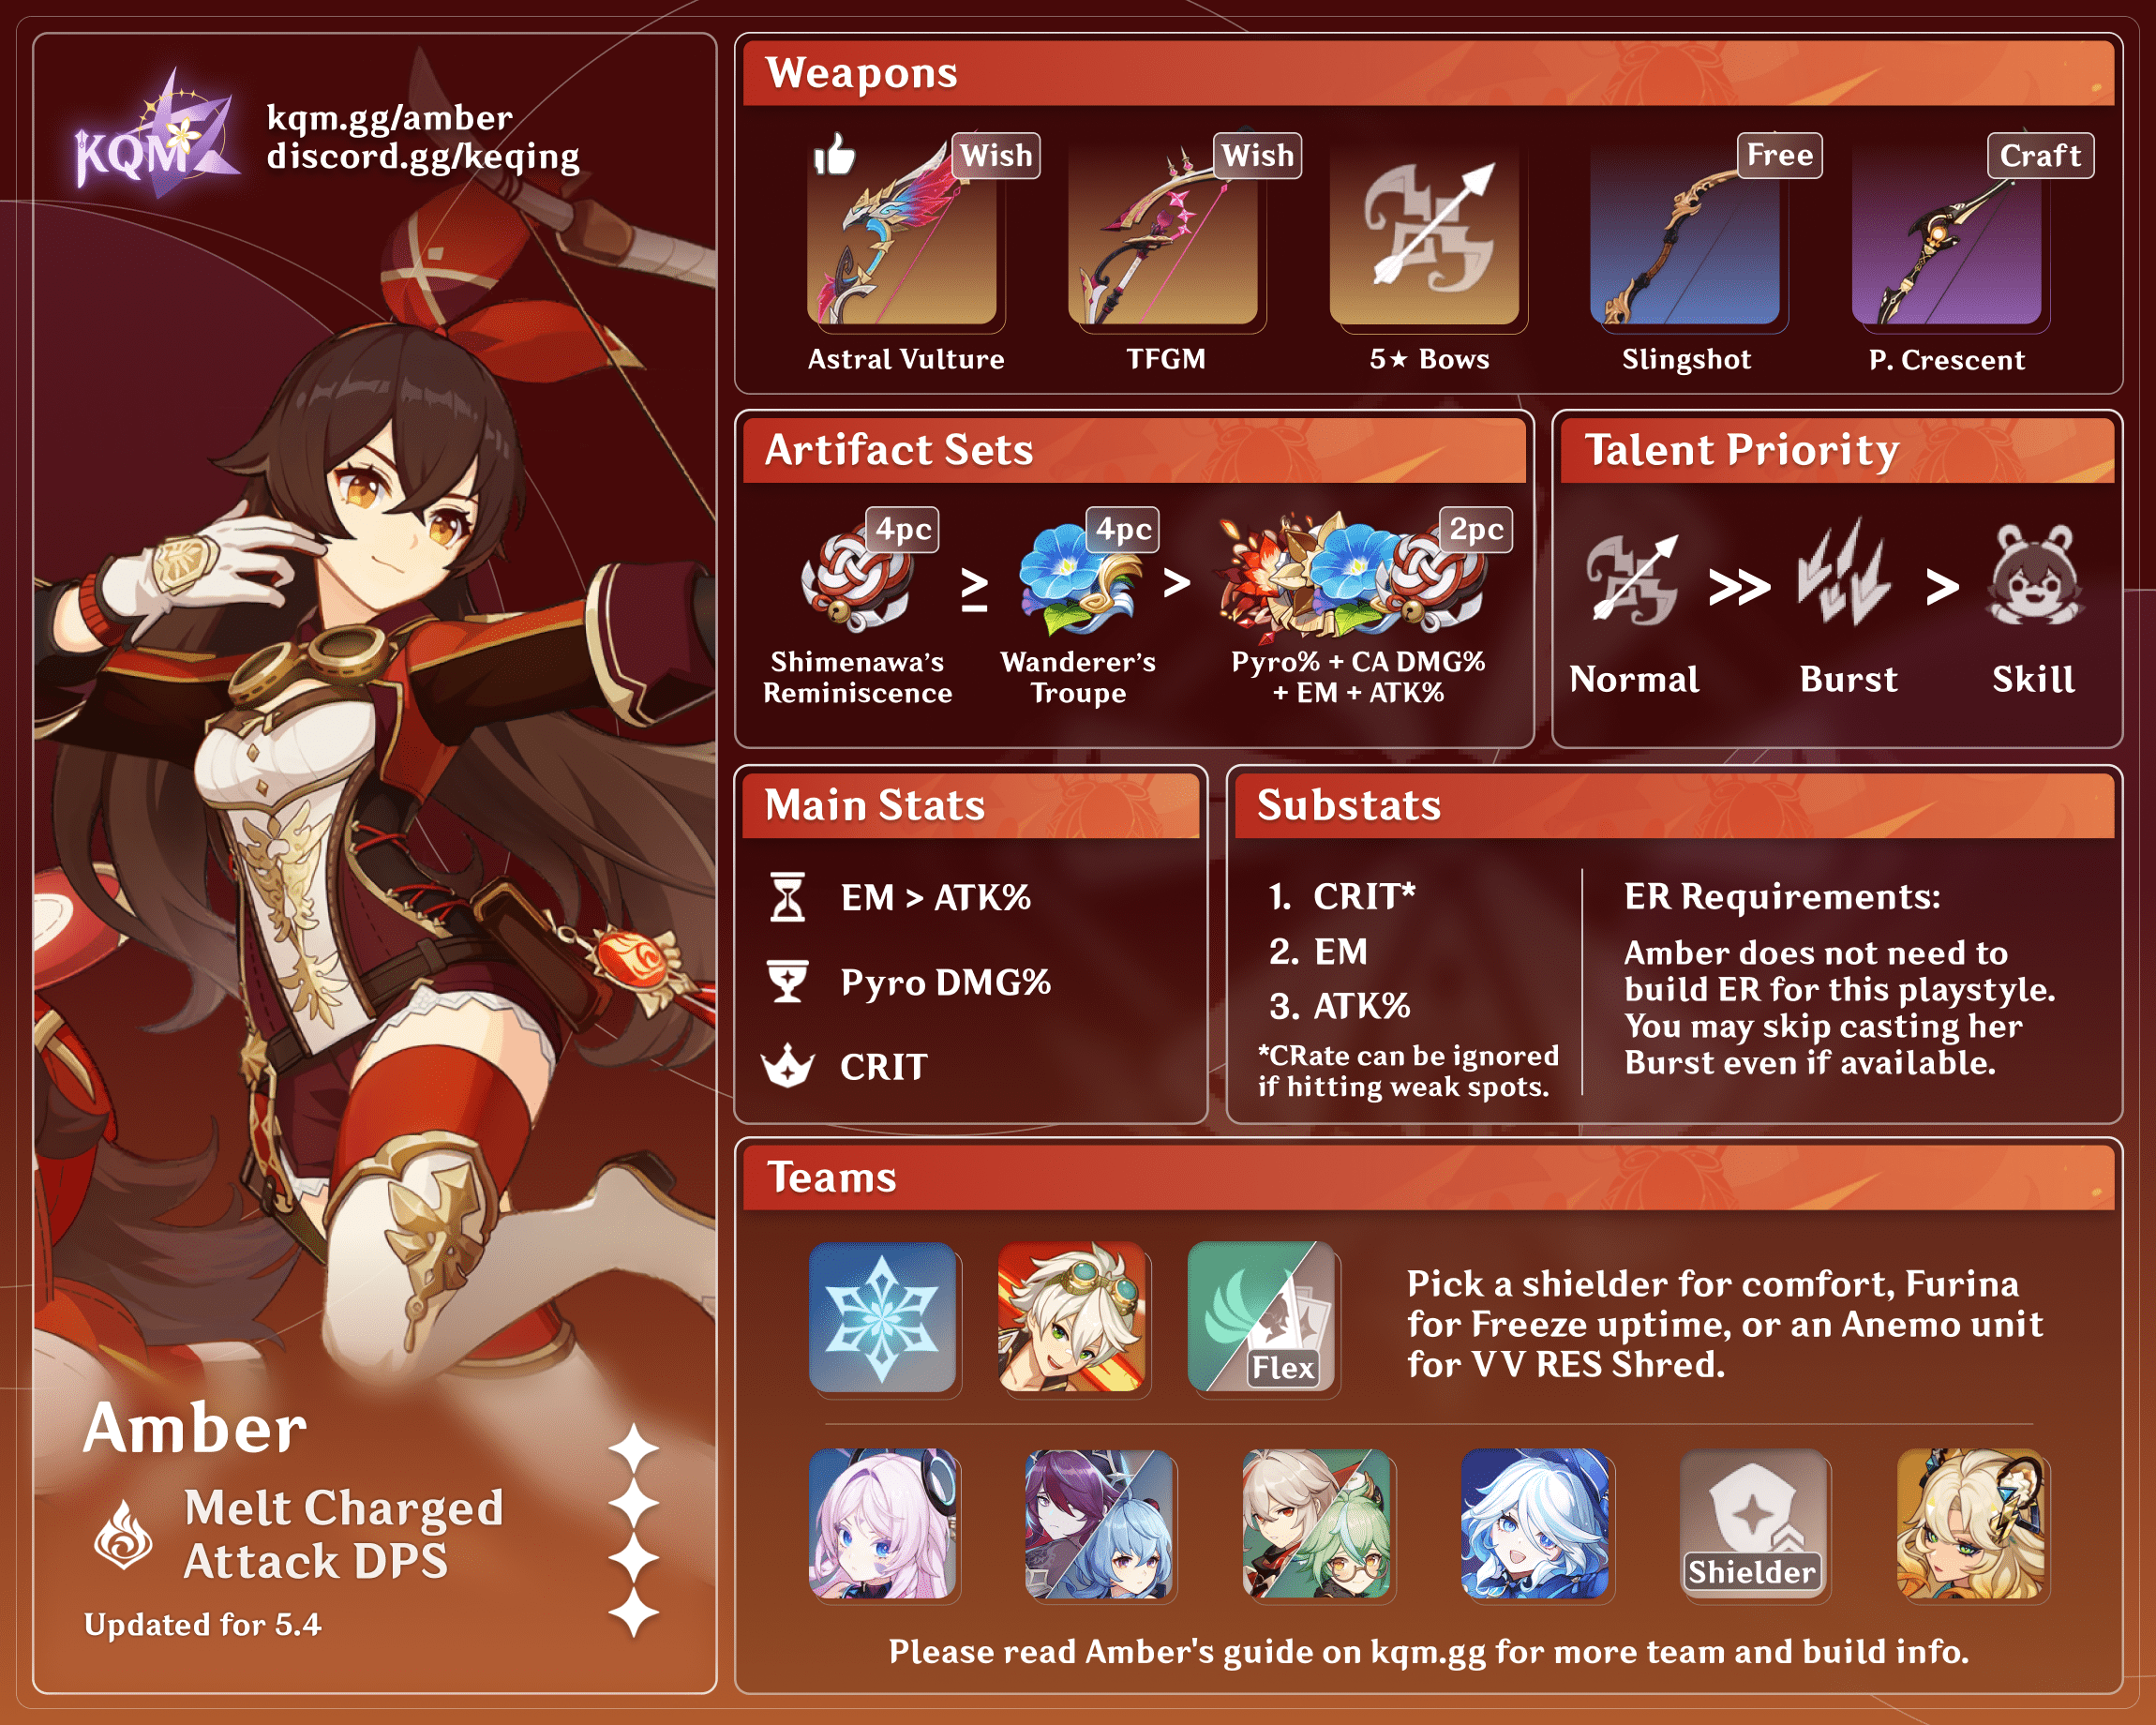
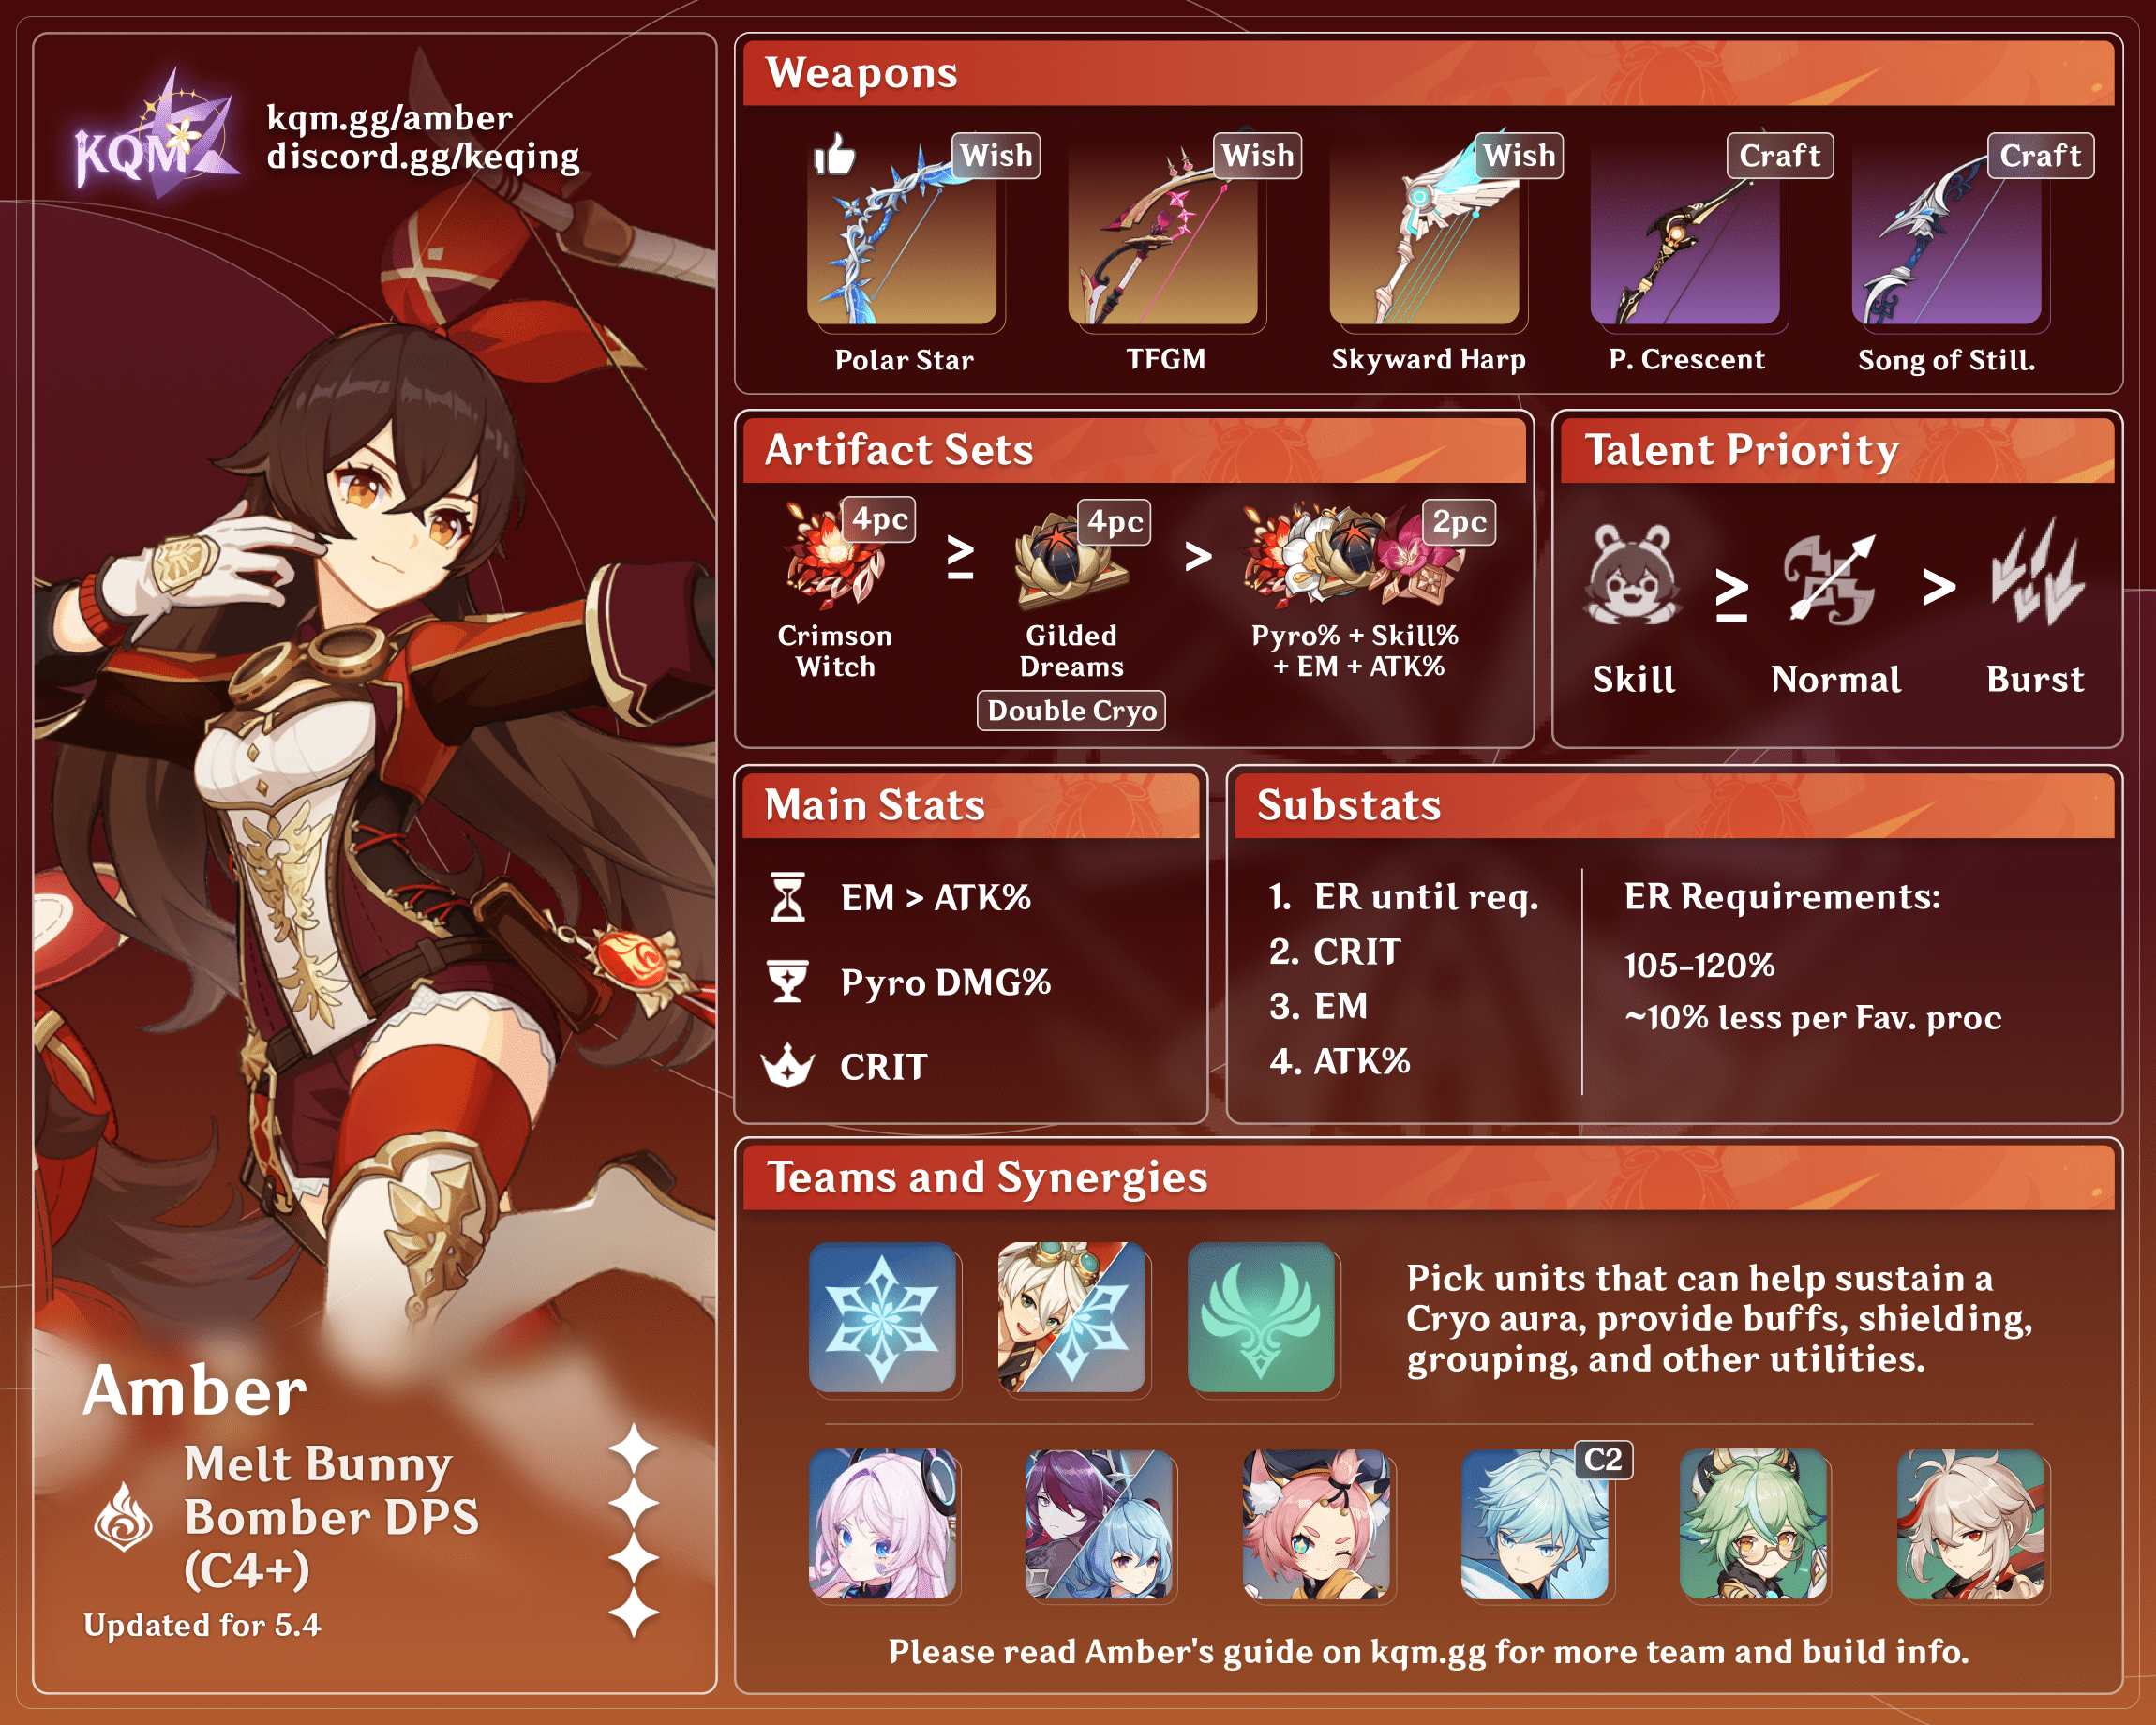
Updated for Version 5.4

Amber is a 4★ Pyro Bow character in Genshin Impact who works as an on-field Charged Shot DPS or Burst support that provides fast Pyro application and taunting utilities. Learn about Amber’s best builds, Talent priority, best weapons, best artifacts, and best teams in this in-depth review.
Note that the information given may change if new discoveries are made. More extensive testing is in progress.
The full-length guide is available here. It is heavily outdated and currently being updated — in the meantime, please visit our Discord to learn more about Amber.
Table of Contents
New Content
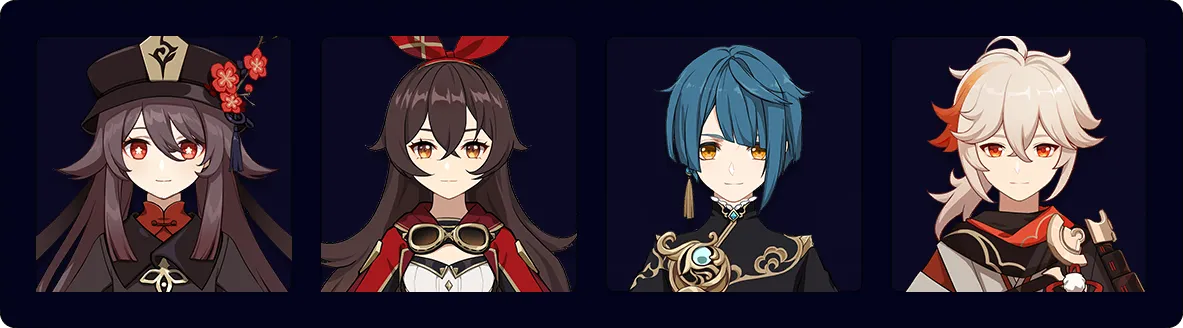
 Furina | Flex option for Melt Charged Attack playstyle. Enables Burgeon. |
Citlali | Enables Melt, shreds Pyro RES and provides a strong shield. |
Lan Yan | Flex option for Melt playstyles. A strong shielder with some grouping and personal damage. |
 Xilonen | Flex option for Melt Charged Attack playstyle. |
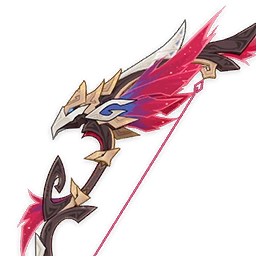 Astral Vulture’s Crimson Plumage | Amber’s new Best-in-Slot for Melt Charged Attack playstyle, providing a CRIT DMG secondary stat with a strong Charged Attack DMG% buff. |
 4pc Scroll of the Hero of Cinder City | Support set that can be held by Amber’s teammates (Melt playstyle) or Amber herself (Burst Support playstyle). |
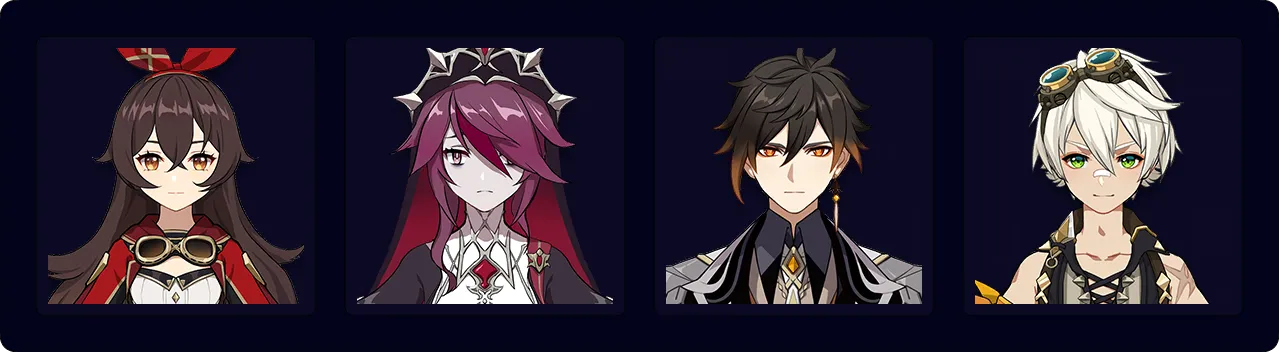
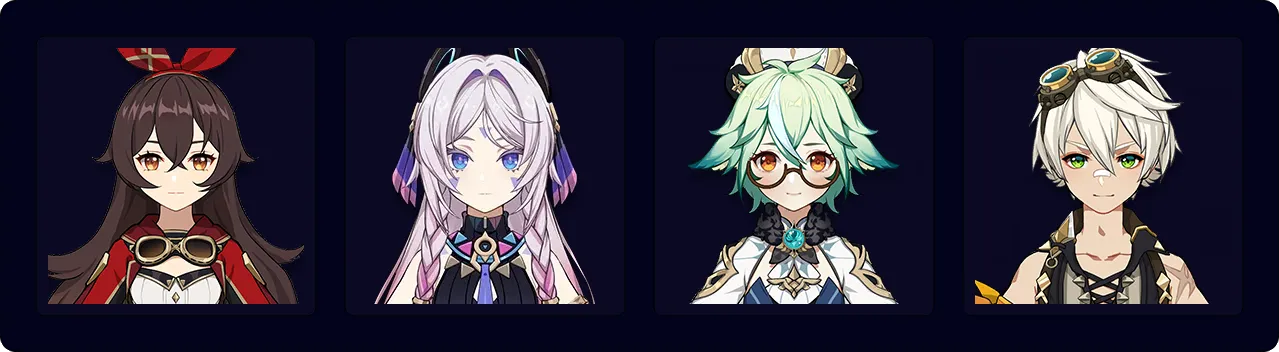
Infographics
Credits to: cuppacote, lesterberne, casdela, and KQM TC Staff
Credits to: cuppacote, kolvii, lesterberne, casdela, and KQM TC Staff
Character Overview
Playstyles
This quick guide will cover Melt, Burgeon, and Burst support playstyles. For her Physical playstyle, please check out the full guide here.
Melt
Amber’s standard DPS playstyle; requires extremely high Resin and Primogem investment to catch up with other DPS units. Amber has numerous ways to trigger Melt, but some are more effective than the others:
| Charged Shot | – Staple Amber on-field DPS playstyle that is accessible at C0. – Suffers from being single-target only, falling off in multi-target content. – Having a standard Charged Shot (CS) multiplier means lower damage than Charged Shot DPS units with a CS-centric kit. |
| Elemental Skill (C2+) | – Amber’s biggest source of front-loaded AoE damage; needs C4 to comfortably use. – Deals damage in satisfying big numbers, but has potential locked behind Constellations. |
| Elemental Burst | – High hit count leads to high Pyro application rate, which makes it difficult to Melt all of Amber’s Burst hits. Instead, it’s mainly used to enable Reverse Melt for Cryo units or for quickly setting up VV Shred in Solo Pyro at C4+. – At C0, it’s highly impractical to use her Burst every rotation without enormous ER investment, due to Baron Bunny’s very limited AoE and delayed explosion which lead to unreliable Energy generation. – From C4 onward, it is instead encouraged to use Amber’s Burst, even when a Pyro teammate is present, for her C6 buffs and to fill down time in rotations. – Deals less damage against smaller enemies and makes up a rather small percentage of Amber’s DPS in general. |
Due to the differences in builds, preferred teammates, and rotations when switching from a pure Charged Shot playstyle to a playstyle that utilizes both Amber’s C2 and C4, this guide separates Melt into two sub-playstyles: Melt Charged Shot and Bunny Bomber.
Burgeon
Offers high sustained AoE damage. Amber is a capable Burgeon DPS as almost all attacks within her kit can trigger Burgeon:
| Charged Shot | – Controlled, consistent Pyro application; in gameplay, using only Charged Shots is recommended. – It’s important to NOT aim at an enemy as it would trigger Burning.* – Dendro Cores have a very forgiving range where Burgeon can be triggered. |
| Elemental Skill | – AoE Pyro application. At C2+, it has occasional use cases when Charged Shots are obstructed from hitting Dendro Cores, or when AoE application is needed to trigger scattered cores. – Before C2, it’s too unreliable as a Pyro source since you cannot control when Baron Bunny explodes. – After C2, the time wasted on casting the Skill is better used on Charged Shots, unless the scenario demands it. – Amber deals negligible Skill damage with an EM build. – Triggering Burgeon with Amber’s Charged Shot also triggers C2 Baron Bunny detonation, which may apply excess Pyro on enemies, causing Burning.* |
| Elemental Burst | – Not recommended to use, since its high Pyro application triggers Burning*. |
Burst Support
A playstyle where Amber uses her Burst to enable Pyro VV Shred and provide buffs for teammates, such as: 4pc Noblesse or 4pc Instructor set effects, Elegy and Favonius Warbow’s passives, Pyro Resonance, etc. It can also be used to break Elemental shields.
Additionally, C4+ Amber can battery very Energy-hungry teammates, like Xiangling in Bennett-less teams; this enables some very specific teams thanks to her extremely high particle generation from two simultaneous Baron Bunny explosions.
Most of these effects are achievable at C0 and only require investment in ER% — a decent package deal for a free character.
Elegy for the End and Amber’s C6 can be valuable in maximizing her support potential.
Talents
Talent Overview
 Normal Attack | Sharpshooter
Talent Description
Normal Attack
Performs up to 5 consecutive shots with a bow.
Charged Attack
Perform a more precise Aimed Shot with increased DMG.
While aiming, flames will accumulate on the arrowhead. A fully charged flaming arrow will deal Pyro DMG.
Plunging Attack
Fires off a shower of arrows in mid-air before falling and striking the ground, dealing AoE DMG upon impact.
Amber mainly uses her Normal Attack Talent’s Charged Shot. Each shot takes ~1.5s to fully charge and can be interrupted by enemy attacks, which may call for a shield.
 Elemental Skill | Explosive Puppet
Talent Description
The ever-reliable Baron Bunny takes the stage.
Baron Bunny
- Continuously taunts the enemy, drawing their fire.
- Baron Bunny’s HP scales with Amber’s Max HP.
- When destroyed or when its timer expires, Baron Bunny explodes, dealing AoE Pyro DMG.
Hold
Adjusts the throwing direction of Baron Bunny.
The longer the button is held, the further the throw.
The main utility of Amber’s Skill is its taunting mechanic, which can prevent interruption mid–Charged Shot by luring enemies within a 5-meter (~2 Abyss tiles) radius around Baron Bunny away from Amber. However, enemies can’t switch targets mid-attack, which means Baron Bunny needs to be deployed some time before they begin to attack.
 Elemental Burst | Fiery Rain
Talent Description
Fires off a shower of arrows, dealing continuous AoE Pyro DMG.
Fires a volley of 18 arrows, each with its own hitbox. It’s worth noting that only large targets are hit by all 18 arrows. This ability applies a large amount of Pyro within its AoE, which is useful in setting up combos and breaking Elemental shields.
 Ascension 1 Passive | Every Arrow Finds Its Target
Talent Description
Increases the CRIT Rate of Fiery Rain by 10% and widens its AoE by 30%.
Increases both the size of Amber’s Burst field and the hitbox of its arrows. The bonus CRIT Rate is helpful to improve the proc chance of Favonius Warbow’s passive.
 Ascension 4 Passive | Precise Shot
Talent Description
Aimed Shot hits on weak spots increase ATK by 15% for 10s.
A minimal buff that further reinforces Amber’s identity as a sharpshooter.
Constellations
 Constellation 1 | One Arrow to Rule Them All
Fires 2 arrows per Aimed Shot. The second arrow deals 20% of the first arrow’s DMG.
The second arrow is fired 10 degrees vertically below the actual aiming reticle. It is an additional attack whose damage is calculated separately and shares ICD with the primary shot. The primary arrow usually hits enemies first.
This Constellation isn’t particularly relevant for most playstyles, aside from Physical Amber.
 Constellation 2 | Bunny Triggered
Baron Bunny, new and improved! Hitting Baron Bunny’s foot with a fully-charged Aimed Shot manually detonates it.
Explosion via manual detonation deals 200% additional DMG.
The “200% additional DMG” here is a 200% DMG Bonus that is additive to other DMG Bonus sources. It is easier to trigger detonation by shooting at the floor near Baron Bunny’s feet. C2 detonations can also be triggered by an AoE reaction activated by Amber’s Charged Shot (Overloaded or Burgeon).
It’s not recommended to focus on the Bunny Bomber playstyle at this Constellation due to the long Skill cooldown and single Skill charge.
 Constellation 3 | It Burns!
Increases the Level of Fiery Rain by 3.
Maximum upgrade level is 15.
A non-negligible boost to Amber’s Burst damage, but it usually can’t be fully utilized against smaller targets, diminishing the value of this Constellation.
 Constellation 4 | It’s Not Just Any Doll…
Decreases Explosive Puppet’s CD by 20%. Adds 1 additional charge.
A nice quality-of-life Constellation. The cooldowns are counted sequentially, meaning it takes a full 24s to recharge both Bunnies.
 Constellation 5 | It’s Baron Bunny!
Increases the Level of Explosive Puppet by 3.
Maximum upgrade level is 15.
A sizable boost to Amber’s Elemental Skill damage if manual detonation is utilized. It’s the maximum potential for the Bunny Bomber playstyle.
 Constellation 6 | Wildfire
Fiery Rain increases all party members’ Movement SPD by 15% and ATK by 15% for 10s.
Offers teamwide buffs. At this Constellation, Amber has her best potential as a Burst support.
Melt
Level and Talent Priority
C0 Melt Charged Shot: Normal Attack >> Burst > Skill
C4+ Bunny Bomber: Skill ≥ Normal Attack > Burst
ER Requirements
| Scenario | No team Fav procs | 1 team Fav proc | 2 team Fav procs |
| Melt (C4+) | 100–120% | 100–110% | 100% |
- Team Favonius (Fav) procs are not funneled to Amber.
- C0 Melt Amber doesn’t Burst in her rotation.
Use the Energy Recharge Calculator to determine exact requirements for your team and rotation.
Artifact Stats
 Sands |  Goblet |  Circlet |
| EM > ATK% | Pyro DMG% | CRIT Rate*/CRIT DMG |
Substats: ER% (until requirement) > CRIT Rate* = CRIT DMG > EM > ATK% > Flat ATK
ATK% Sands gains value when there is an abundance of EM from Amber’s weapon and team buffs. A 1:2 ratio of CRIT Rate to CRIT DMG is optimal.
*A Melt Charged Shot build with no CRIT Rate is viable for skilled players but only against enemies with weak spots. This eliminates the need to build CRIT Rate on Amber, which results in a fairly substantial DPS increase as compared to a balanced CRIT ratio build.
Artifact Sets
4pc Shimenawa’s Reminiscence / 4pc Wanderer’s Troupe | Best for Charged Shot playstyles, they range from viable to questionable for Bunny Bomber playstyles. Shimenawa’s Energy drain increases Amber’s ER needs in exchange for a powerful buff to Charged Shots. |
 4pc Crimson Witch of Flames (CW) | Buffs all of Amber’s Pyro attacks and reactions. Best-in-Slot for Bunny Bomber. |
 4pc Desert Pavilion Chronicle | Despite its unutilized 2pc effect, this set performs equal to 4pc CW for a Melt Charged Shot playstyle. |
 4pc Gilded Dreams | Provides stronger buffs than 2pc combinations for Bunny Bomber. It’s a negligible increase for Melt Charged Shot. Comes from a Resin-efficient Domain. |
 2pc combinations of Crimson Witch of Flames (CW), Marechaussee Hunter (MH), +80 EM, and +18% ATK sets | Usable sets. Generally, the 2pc combination of CW and +80 EM is stronger for Bunny Bomber playstyles, while 2pc CW + 2pc MH is stronger for Melt Charged Shot. |
Weapons
Melt Charged Shot
Weapon rankings assume the use of Bennett’s Burst. Without it, 3-star weapons lose value due to their low Base ATK.
No CRIT Rate
5★ Astral Vulture’s Crimson Plumage | Amber’s Best-in-Slot, provides a hefty Charged Attack DMG% buff. |
 5★ The First Great Magic | Very synergic passive and CRIT DMG secondary stat. |
  5★ Aqua Simulacra, Amos’ Bow | Good all-around options with similar power levels. Aqua requires close range. Note that at 0 stacks, Amos’ Bow loses to every 5-star option in this list. |
 5★ Thundering Pulse | CRIT DMG and ATK% stat stick. Heavily underutilized passive. |
 4★ Hamayumi | Craftable option. Decent for Charged Shot playstyle, but falls off if Amber needs to Burst. |
 3★ Sharpshooter’s Oath | Offers a potent DMG bonus to weak spot hits; a very accessible F2P option. |
  4★ Prototype Crescent, Song of Stillness | Craftable options. Prototype Crescent is a potent ATK% stat stick with its passive. If Amber is able to get consistent healing, Song of Stillness is comparable to Prototype Crescent. |
 4★ Ibis Piercer | Free Event weapon that offers both ATK% and EM. |
 4★ Blackcliff Warbow | Only worth using if options above are unavailable. Blackcliff’s passive is unreliable but can surpass craftable options if the scenario allows for consistent stacks. |
Balanced CRIT
5★ Astral Vulture’s Crimson Plumage | Amber’s Best-in-Slot, provides a hefty Charged Attack DMG% buff. |
5★ The First Great Magic | Very synergic passive and CRIT DMG secondary stat. |
 5★ Hunter’s Path, Aqua Simulacra, Amos’ Bow | Good all-around options with similar power levels. Hunter’s Path slightly overtakes Aqua while not having the close range requirement. It scales better the more EM Amber has. Note that at 0 stacks, Amos’ Bow loses to every 5-star option in this list. |
 5★ Thundering Pulse, Skyward Harp, Polar Star | CRIT and ATK% stat sticks. Thundering Pulse has a heavily underutilized passive. Polar Star encourages full use of Amber’s kit for maximum performance. |
 3★ Slingshot | Surprisingly strong close-range 3-star option. |
4★ Hamayumi | Craftable option. Decent for Charged Shot playstyle, but falls off if Amber needs to Burst. |
4★ Prototype Crescent, Song of Stillness | Craftable options. Prototype Crescent is a potent ATK% stat stick with its passive. If Amber is able to get consistent healing, Song of Stillness is comparable to Prototype Crescent. |
4★ Ibis Piercer | Free Event weapon that offers both ATK% and EM. |
4★ Blackcliff Warbow | Only worth using if options above are unavailable. Blackcliff’s passive is unreliable but can surpass craftable options if the scenario allows for consistent stacks. |
Bunny Bomber (C4+)
 5★ Polar Star, The First Great Magic | These weapons have similar performance with a very synergic passive and a CRIT secondary stat. Polar Star performs slightly better if you use Amber’s Burst and a quick N1C before her Skill. |
 5★ Aqua Simulacra, Hunter’s Path | Good all-around options with similar power levels. Aqua requires close range. |
 5★ Skyward Harp | Skyward Harp is high in both CRIT and Base ATK, making it a decent 5-star stat stick. |
5★ Astral Vulture’s Crimson Plumage | CRIT DMG stat stick; its passive doesn’t buff Bunny damage but offers a hefty Charged Attack and Burst DMG% buff. |
5★ Amos’ Bow | Note that at 0 stacks, Amos’ Bow loses to every 5-star option in this list. |
5★ Thundering Pulse | CRIT DMG and ATK% stat stick. Heavily underutilized passive. |
4★ Prototype Crescent, Song of Stillness | Craftable options. Prototype Crescent is a potent ATK% stat stick with its passive. If Amber is able to get consistent healing, Song of Stillness is comparable to Prototype Crescent. |
Melt Teams

Functional as long as a Cryo applier is present. Slotting in a shielder is recommended as Amber is easily interrupted during Charged Shots.
Amber generally wants Bennett as a teammate. Bunny Bomber teams also want an Anemo unit that provides grouping.
Rotation Notation
- N = Normal Attack
- C = Charged Attack
- A = Aimed Shot
- P = Plunging Attack
- E = Elemental Skill
- tE = Tap Skill
- hE = Hold Skill
- Q = Elemental Burst
- D = dash (cancel)
- J = jump (cancel)
- W = walk (cancel)
- > = switch character
- ( ) = these actions are optional; please refer to the notes below
- [ ] = repeat these actions the specified number of times
Notable Teammates
Citlali | Amber’s best Cryo teammate, Citlali provides a strong shield and Pyro RES while enabling all of Amber’s Charged Attacks and Bunny hits to Melt. |
  Ganyu, Rosaria | Have good AoE, personal damage, and Cryo application. |
 Chongyun | Able to Melt his Burst 3–4 times off of Amber’s Burst. At C2, reduces C4 Amber’s total Skill cooldown to 20.4s. He can’t provide off-field Cryo application for Amber without help from an Anemo unit’s Cryo Absorption or another Cryo teammate. |
 Diona | Shielder, healer, and slow Cryo applier; EM buffer at C6. |
 Layla | Has higher personal damage and a stronger shield than Diona; provides a middling Additive Base DMG Bonus to Amber’s Charged Shots at C4. |
  Kazuha, Sucrose | Both provide strong buffs, grouping, and extra Cryo application through their Cryo-infused Burst. Bunny Bomber prefers Sucrose as she can hold Thrilling Tales of Dragon Slayer (TTDS) and buff EM, while Kazuha’s DMG% buff is diluted by Amber C2’s 200% DMG buff. |
Lan Yan | Shielder with some EM buff and grouping. TTDS holder. |
 Heizou | Provides some personal damage, a small EM buff, and some grouping improved with C2. TTDS holder. |
 Lynette | Lynette’s Burst provides a much-needed taunt for Amber, allowing her to not run a shielder, while supplying extra Cryo application through its Cryo Absorption. Lynette’s C1 also provides a rather weak grouping through her Hold Skill. |
 AMC | Possesses a unique Absorption Priority, allowing for Double Swirl setups in AoE that maintain a Cryo aura. As their Burst requires good positioning to be useful, it is best to instead use their Short-Hold Skill. |
  Sayu, Jean | Provide healing and VV Shred. |
 Bennett | Amber’s best Pyro teammate; offers a large Flat ATK buff and Pyro Resonance. |
Xilonen | Shreds Pyro RES and offers a Pyro DMG% buff from either 4pc Scroll or 4pc Petra set effects. |
 Zhongli | Gives Universal RES Shred and a strong shield. |
Furina | Flex option for Charged Attack playstyles. Provides strong personal damage, a DMG% buff, and Freeze against non-Boss enemies. Strongly incentivizes a healer to maximize her DMG% buff. Note that un-Freezable enemies cannot generate a Frozen aura to trigger Melt on. |
 Another Cryo unit | Free 15% CRIT Rate buff from Cryo Resonance on Amber’s Melts; running Double Cryo also reduces each Cryo unit’s ER needs. |
Example Teams
This is not a comprehensive list of teams. The inclusion or exclusion of any given team does not necessarily reflect its power level.
Melt Charged Shot
Sample Rotation
Bennett E > Xilonen E N2 > Bennett Q > Citlali EQ > Amber 6[C] > repeat
Rotation Video
Sample Rotation
Zhongli hE > Bennett EQ > Rosaria EQ > Amber 6[C] > repeat
Bunny Bomber
Sample Rotation
Bennett Q E > Amber Q > Sucrose E > Citlali EQ > Amber 2[E + C to detonate] > Sucrose Q > Amber 3[C]
This rotation is 23s; Amber’s Skill cooldowns will desync after ~3 rotations.

Sample Rotation
Diona hEQ > Amber Q > Rosaria Q > Sucrose 2[E] / E (Q) N1 > Amber 2[E + C to detonate] 2[C] > Diona tE > Amber C > Rosaria E N2 > repeat
There should be a slight pause before Sucrose’s 2nd E or N1 (if no Q) to ensure she swirls Cryo; you can skip this if Rosaria isn’t focused on damage.
Burgeon
Level and Talent Priority
Amber deals damage exclusively through Burgeon in this playstyle; it’s top priority to level her to 90 to maximize the reaction’s base damage. All of her Talents can be left at Level 1.
ER Requirements
Amber doesn’t use her Burst in a Burgeon playstyle, so she does not have an ER requirement.
Artifact Stats
Sands | Goblet | Circlet |
| EM | EM | EM |
Stat Priority: EM
EM is the only useful state for Amber’s Burgeon playstyle.
Artifact Sets
 4pc Flower of Paradise Lost | Best-in-Slot at high EM. |
4pc Gilded Dreams | Strong set that provides an abundance of EM. |
 2pc combinations of +80 EM sets | Usable sets. |
Weapons
 4★ Cloudforged | Free Event weapon; offers the same Base EM as the Stringless, potentially more in teams where Amber can Burst. |
 4★ The Stringless | Gacha option; wasted Skill and Burst DMG Bonus passive. |
 4★ Windblume Ode | F2P option; offers the same EM substat as Stringless. |
 4★ King’s Squire | Craftable option. Has an 8s down time. Needs R3+ to beat Raven Bow; at R5 it’s still less EM than the above options. |
 3★ Raven Bow | Very accessible F2P option; less EM than the above options. |
 5★ Elegy for the End | Wasted ER% substat; Amber can’t trigger the passive reliably without using her Elemental Burst, which risks causing Burning instead of Burgeon. It’s better to let a teammate use this weapon instead. |
Burgeon Teams

Bringing a shielder or using Freeze is recommended as Amber is easily interrupted during Charged Shots. Freeze also benefits Dendro core production.
Rotation Notation
- N = Normal Attack
- C = Charged Attack
- A = Aimed Shot
- P = Plunging Attack
- E = Elemental Skill
- tE = Tap Skill
- hE = Hold Skill
- Q = Elemental Burst
- D = dash (cancel)
- J = jump (cancel)
- W = walk (cancel)
- > = switch character
- ( ) = these actions are optional; please refer to the notes below
- [ ] = repeat these actions the specified number of times
Notable Teammates


 Kokomi | Consolidates off-field AoE Hydro application and healing, both of which are valuable for this team archetype. |
Furina | Provides consistent off-field Hydro application and personal damage. Does not need to be paired with a healer (unless for survival), since her DMG% buff does not affect Burgeon damage. |
 Ayato | Decent off-field AoE Hydro applier through his Burst, but has to forgo offensive stats for ER% and take up field time by using Skill to meet Energy needs. |
Zhongli | Gives Universal RES Shred and a strong shield. |
Lynette | Lynette’s Burst provides a much-needed taunt for Amber, allowing her to not run a shielder, while supplying extra Hydro application through its Hydro Absorption. Lynette’s C1 also provides a rather weak grouping through her Hold E. |
Kirara | Solid shielder, but does not have enough Dendro application to be a viable solo Dendro. |
Sucrose, Heizou | Offer valuable EM buff and grouping. Sucrose can also supply extra Hydro application through Hydro Absorption of her Burst. |


Example Teams
This is not a comprehensive list of teams. The inclusion or exclusion of any given team does not necessarily reflect its power level.
R5 Sacrificial Fragments is highly recommended on Kokomi to align her Skill cooldown with the rest of the team, but it’s not necessary. If Kokomi holds any other Catalysts or non-R5 Sac Frag, add 1–2 more Amber Charged Shots depending on your rotation execution speed.
Sample Rotation
Rosaria EQ > Collei EQ > Kokomi E > Amber 5[C] > repeat

Nilou must hold a Sacrificial Sword to function in this team.
Sample Rotation
Nahida EQ > Diona Q hE > Nilou E N2 E > Amber 5[C] > Nahida E > Nilou E N2 E > Diona hE > Amber 6[C] > repeat
Burst Support
Level and Talent Priority
Amber mainly uses her Burst to apply Pyro and buff the team, only using her Skill if it does not interfere with reactions. The Talents of Amber’s damage-dealing teammates take priority over her own.
Burst >> Skill >> Normal Attack
ER Requirements
| Scenario | No team Fav procs | 1 team Fav proc | 2 team Fav procs |
| Burst Support (Elegy) | 225–240% | 185–195% | 160–170% |
| Burst Support (Fav) | 165–175% | 145–150% | 130–135% |
- Team Favonius (Fav) procs are not funneled to Amber.
- Amber absorbs her own particles when wielding Favonius Warbow.
- Omission of Skill when played as a Burst support.
Use the Energy Recharge Calculator to determine exact requirements for your team and rotation.
Artifact Stats
Sands | Goblet | Circlet |
| ER%/ATK%* | Pyro DMG% | CRIT Rate/CRIT DMG |
Substats: ER% (until requirement) > CRIT Rate (if Favonius) > CRIT DMG > ATK% > Flat ATK
*An ATK% Sands becomes viable when running Favonius Warbow. Prioritize ER% and completing a 4pc artifact set before going after offensive main stats and substats.
Artifact Sets
 4pc Instructor | Only use if the team allows Amber to trigger reactions with her Burst. Provides an EM buff that is valuable to reaction-heavy teams like Hu Tao VV Vape. |
4pc Scroll of the Hero of Cinder City | Only use if the team allows Amber to trigger reactions with her Burst. Helps alleviate her ER needs if there’s a Natlan character in the team. |
 4pc Noblesse Oblige | Support set for ATK-scaling damage dealers. |
Weapons
5★ Elegy for the End | Possesses a useful substat and provides a valuable teamwide buff. |
 4★ Favonius Warbow | Ensures Amber meets her ER requirement and reduces teammates’ ER needs; build CRIT Rate on Amber to reliably trigger the passive. |
| ER% Bows | Getting Amber’s Burst up reliably is more important than dealing damage. This makes weapons that assist in fulfilling her ER needs solid options. |
Hu Tao VV Burst Support
A well-invested Hu Tao benefits greatly from a Pyro teammate for VV setups, since she herself cannot reliably apply Pyro for VV Shred without sacrificing a large portion of her damage.
For more in-depth info, check out the Hu Tao guide here.
Rotation Notation
- N = Normal Attack
- C = Charged Attack
- A = Aimed Shot
- P = Plunging Attack
- E = Elemental Skill
- tE = Tap Skill
- hE = Hold Skill
- Q = Elemental Burst
- D = dash (cancel)
- J = jump (cancel)
- W = walk (cancel)
- > = switch character
- ( ) = these actions are optional; please refer to the notes below
- [ ] = repeat these actions the specified number of times
Notable Teammates


Example Teams
This is not a comprehensive list of teams. The inclusion or exclusion of any given team does not necessarily reflect its power level.

Sample Rotation
Yelan EQ N1 > Amber Q > Sucrose N3 E > Hu Tao N1 E combo > repeat
Sample Rotation
Xingqiu EQ N1 > Kazuha Q N1 > Amber Q > Kazuha tEP N1 > Hu Tao combo > repeat
Credits
casdela, polomo, idkanonymized, nikatosaurus, cuzimori, chasing_haze, .reimu., lostguide, ausshuu
Team images made with the KQM portrait generator.