A Furina Guide
by GenshinNoir
Updated for Version 5.3
“I’ll be here always, forever and tomorrow
To behold the world’s undying beauty
And that shall live on in perpetuity…”
– La Vaguelette
Table of Contents
Introduction
Furina is a 5-star, HP-scaling Hydro Sword character who deals off-field Hydro damage and application with her Skill and provides a DMG% buff with her Burst. She possesses a unique, teamwide HP drain mechanic to stack her buff!
This guide examines Furina’s kit in-depth to help you better understand her best builds, best teams, best weapons, best artifacts, synergies, Talents, Constellations, and more!
Why Play Furina?
Pros
- Excellent off-field damage
- Hydro application and damage from Skill don’t require player input
- Decent AoE
- Full uptime on her off-field damage and Hydro application
- HP drain from her Skill enables characters to use the Marechaussee Hunter set and HP change-reliant weapons
- Burst has high 18s uptime and buffs the entire team
- Burst Buff is dynamic; even characters that snapshot will benefit from it
- Hydro Element allows her to fit well into many teams
- Excellent Constellations, especially the early ones (C1-C2)
Cons
- Teams are reliant on a healer for buffing, which restricts team building flexibility
- HP drain makes teams more fragile
- Slow and inconsistent Hydro application compared to other units
- Fairly high Energy Recharge requirements
TL;DR
Credits to: euphorysm, irokei, haafr, caxia5, and KQM Staff
Glossary
FAQ
How does Furina compare to Xingqiu and Yelan?
Furina will usually deal similar, if not higher damage than both Xingqiu and Yelan.
However, she has lower Hydro application than either two, making her less suitable as a solo Hydro applier for Reverse Vaporize, Hyperbloom, Burgeon, etc. Vaporize teams benefit greatly from using Furina alongside Xingqiu or Yelan, thanks to Hydro Resonance and lower Energy Recharge requirements on both Hydro units.
Paired alongside Yelan or Xingqiu, there will be enough Hydro application for most, if not all teams. In teams that don’t need high Hydro application, Furina is a strong competitor to Xingqiu and Yelan, and she excels in teams that are able to innately provide the HP fluctuations she desires.
Is Furina only good with Fontaine units?
Fontaine units and characters with innate HP fluctuation are able to generate Fanfare faster than those without. However, units without their own HP fluctuation can still get plenty enough Fanfare to get great value out of Furina, as long as their team has room for a healer.
Do I need to use a healer with Furina?
Yes.
Furina’s Summons constantly drain your entire team's HP, only stopping once teammates end up at 50% HP. If you do not bring a healer to combat her HP drain, Furina will not be able to stack any Fanfare points that increase her DMG% buff, and she will also lose the multiplier her Skill gets from draining HP.
Not bringing a healer also increases the risk of your characters dying during combat. The only exception to needing a healer with Furina are teams where the DPS unit has good enough healing of their own, such as Neuvillette and Clorinde.
Are single-target healers good enough with Furina?
It depends on the team.
Characters like Bennett and Kuki that only heal the active character instead of the whole team will stack less Fanfare than a teamwide healer, but may provide additional utility that can even out the loss of potential Fanfare.
Bennett’s ATK buff is valuable enough to more than make up for the lower Fanfare, so he still performs well with ATK-scaling units like Navia, Lyney, and Wanderer.
Shinobu’s off-field AoE Electro application still makes her ideal in Hyperbloom teams and some Quickbloom teams like Alhaitham’s. As long as a single-target healer has great value that they provide in addition to healing, they can compensate for lower Fanfare.
How do I know how many Fanfare stacks I have?
During Furina’s Burst, a bubble overlay effect appears on-screen. The bubbles appear blue before you hit max Fanfare stacks, and pink once you’re at max stacks. Additionally, at different intervals, audience members will show up at the bottom of the screen. They appear approximately at intervals of 25% Fanfare increases, and more audience members show up each time. At C0, the Fanfare indicators are at 75/150/225/300 stacks, and at C1 they are marked at 100/200/300/400 stacks. At 100% Fanfare, a bubble-popping effect appears on-screen to indicate that you’ve hit max stacks.
Does Furina’s HP drain count as “taking damage”? Can it activate artifact and weapon effects?
No. Effects like those found in 4pc Vourukasha’s Glow, Beacon of The Reed Sea, and Serpent Spine will not activate from Furina’s HP drain as it does not count as taking damage. This means that Serpent Spine is still a good weapon for characters used with Furina.
Can Furina use 4pc Marechaussee Hunter?
4pc Marechaussee Hunter does not work off-field, so the set is not useful on Furina unless she is C6. A C6 Furina can use an on-field playstyle and Marechaussee Hunter is her ideal set in this scenario.
How much HP do I need to build on Furina?
There is not a specific amount of HP you need to aim for on Furina — her buffing does not scale directly with her HP. However much HP% you can get via artifacts without sacrificing other important stats like CRIT and Energy Recharge will be fine.
Character Overview
Playstyles
Furina’s primary playstyle is as a support unit, providing her team with a large and long-lasting DMG% buff from her Elemental Burst while also dealing high off-field Hydro damage herself. In most teams and rotations, Furina will cast her Skill and Burst and then swap off and remain off-field until the next rotation.
At Constellation 6, Furina can use an on-field playstyle centered around dealing high damage with Hydro-infused Normal, Charged, and Plunging Attacks. However, this playstyle will not be focused on in this guide.
Talents
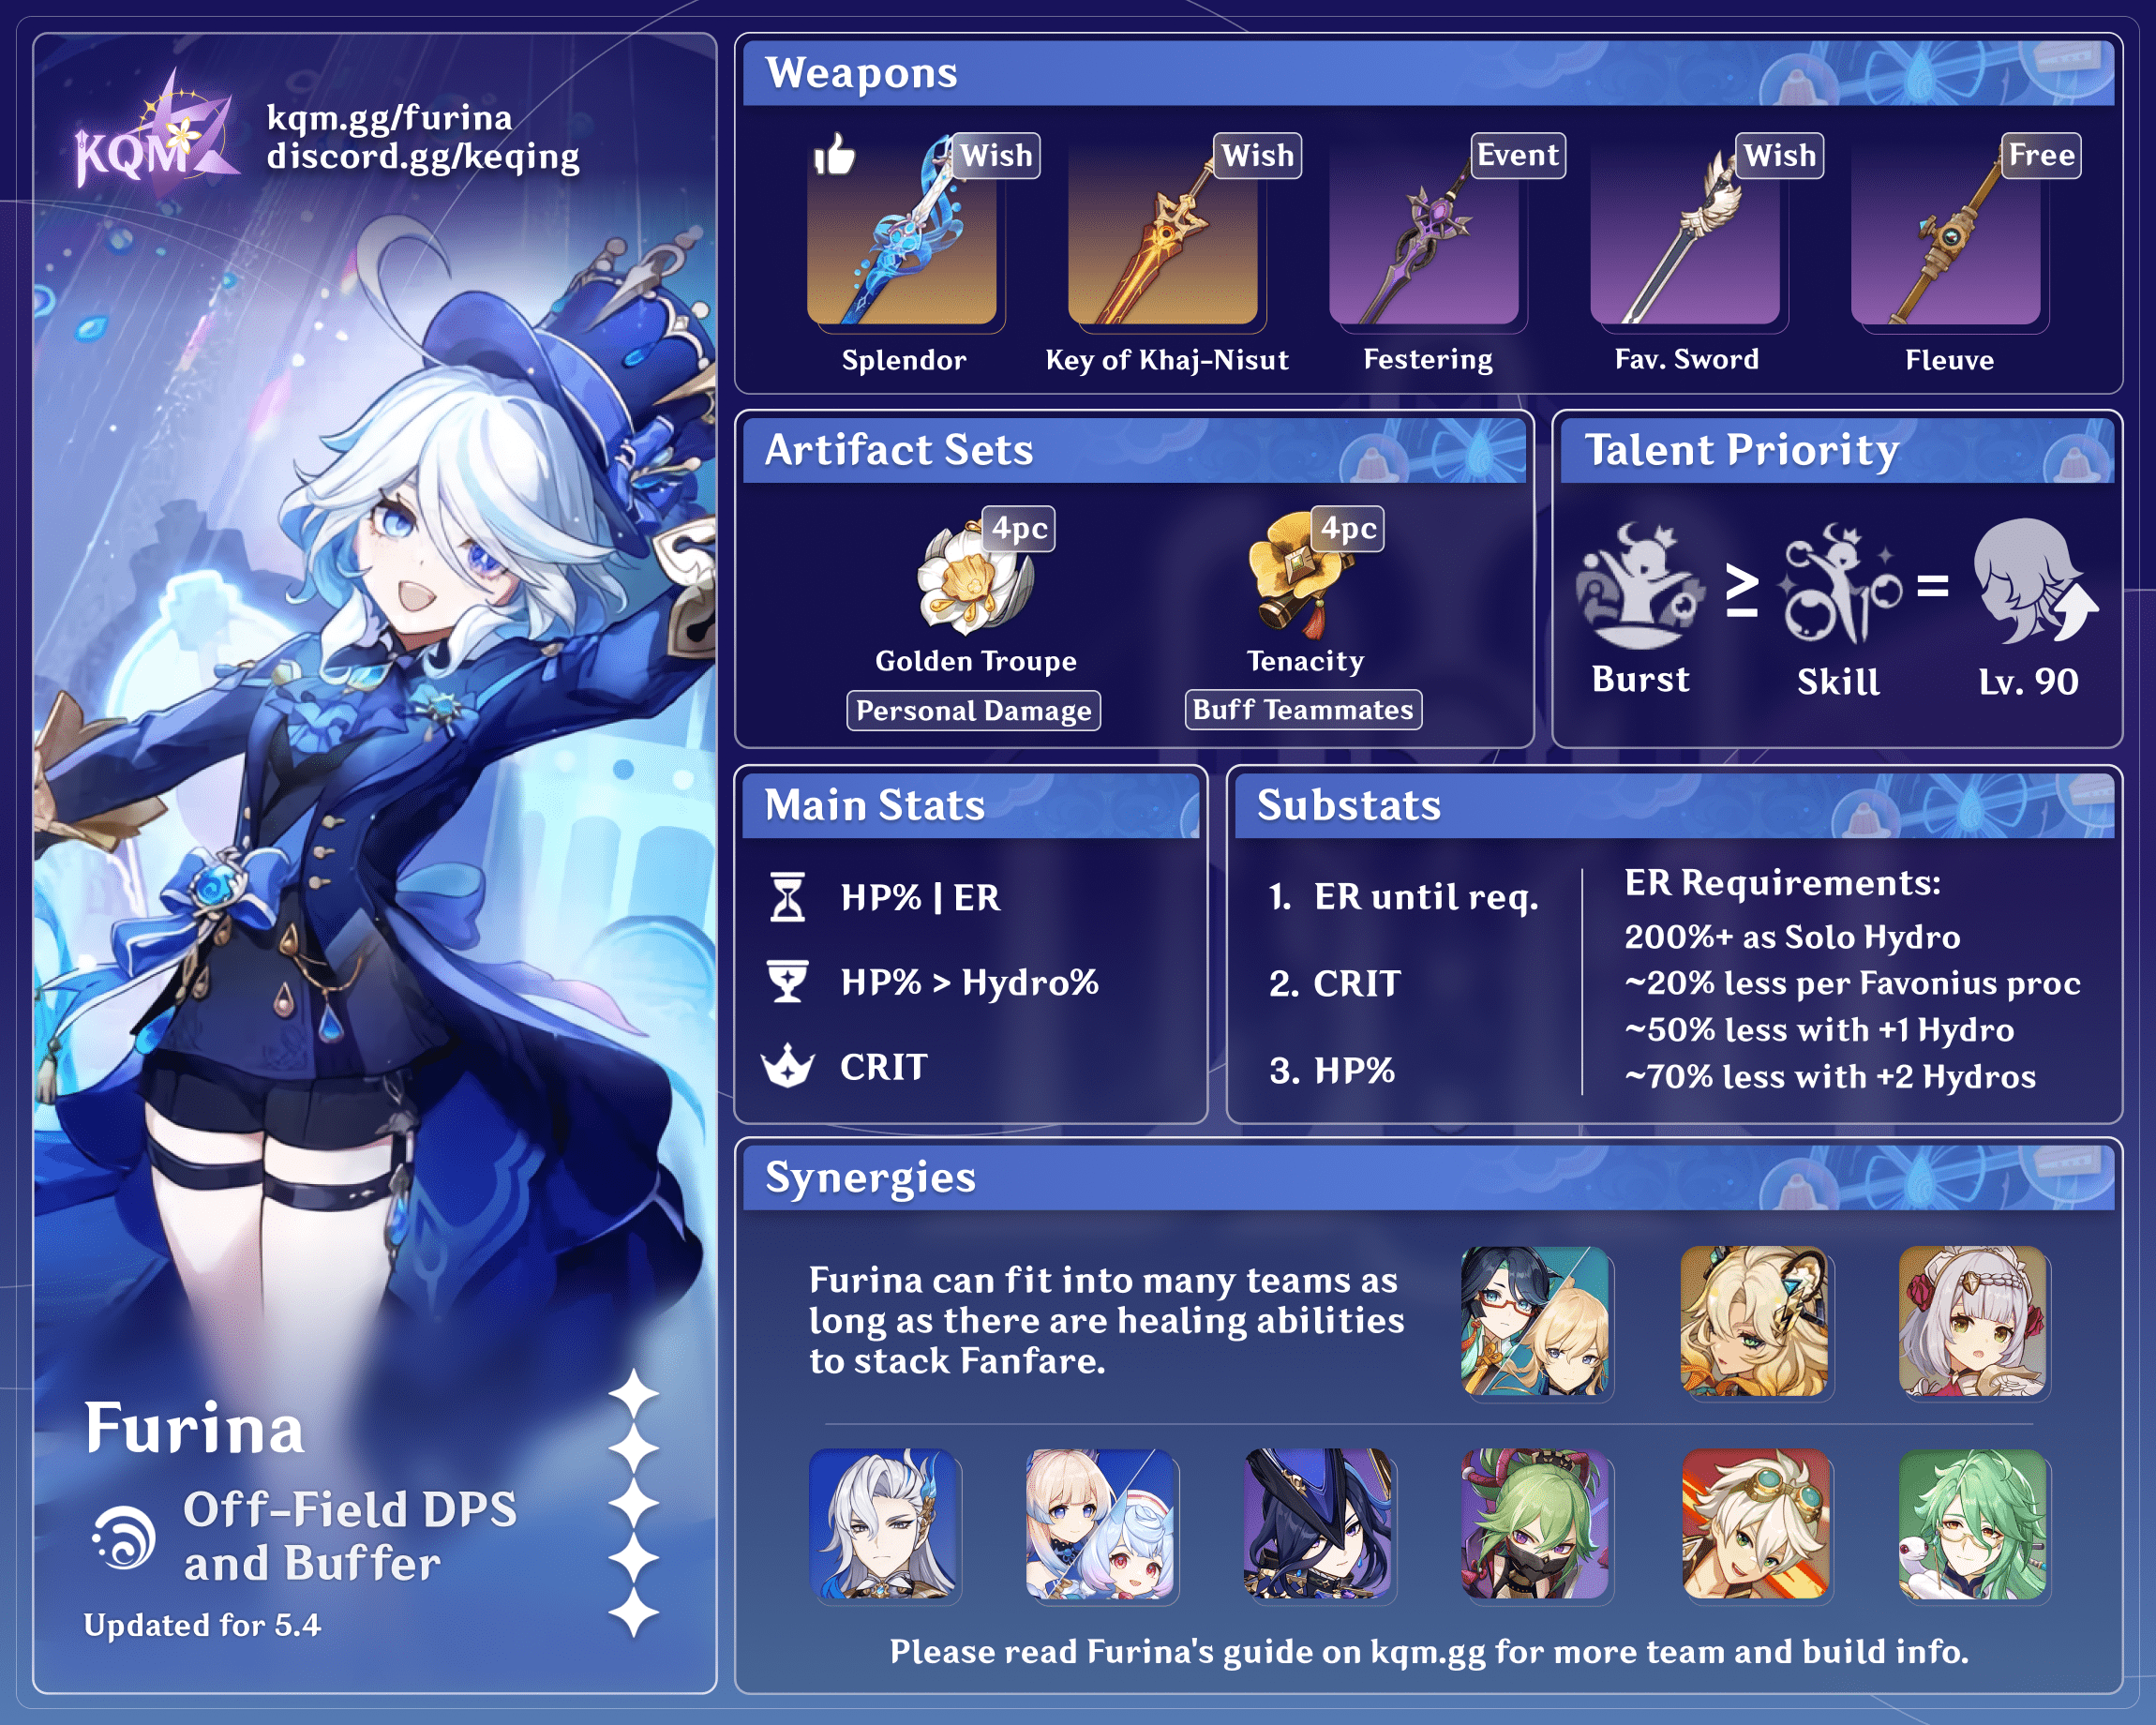
Talent Priority
 ≥
≥ 
Burst ≥ Skill
Whether Furina’s Skill or Burst should be leveled first will depend on the exact team, but it is generally recommended to level them equally. Her Burst is usually more valuable for the team’s overall DPS, but the damage difference between leveling her Burst and Skill is minor. Since Furina scales with her Max HP, raising her to Level 90 is recommended to maximize her damage.
Talent Overview
 Normal Attack | Soloist’s Solicitation
Talent Description
Normal Attack
Performs up to 4 consecutive strikes.
Charged Attack
Consumes a certain amount of Stamina to unleash a solo dance, dealing Physical DMG to nearby opponents and changing her Arkhe alignment. If Salon Members or Singer of Many Waters summoned by her Elemental Skill "Salon Solitaire" are present, their lineup will switch in response.
Arkhe: Seats Sacred and Secular
At intervals, when Furina's Normal Attacks hit, a Spiritbreath Thorn or a Surging Blade will descend based on her current alignment, dealing Pneuma- or Ousia-aligned Hydro DMG
When Furina takes the field, her starting Arkhe will be Ousia.
Plunging Attack
Plunges from mid-air to strike the ground below, damaging opponents along the path and dealing AoE DMG upon impact.
Furina does not actively use her Normal Attack in her teams before C6. The most important thing to note is that by performing her Charged Attack, she can swap her Arkhe alignment between Ousia and Pneuma, changing the effects of her Elemental Skill. This can be useful if you need to use Arkhe against specific enemies.
Elemental Skill | Salon Solitaire
Talent Description
Invites the guests of the Salon Solitaire to come forth and abet in Furina's performance. Will summon either the Salon Members or the Singer of Many Waters based on Furina's current Arkhe alignment.
Ousia
Foaming bubbles like celebrants shall dance, dealing AoE Hydro DMG based on Furina's Max HP and summoning 3 Salon Members: the Ball Octopus-shaped Gentilhomme Usher, the Bubbly Seahorse-shaped Surintendante Chevalmarin, and the Armored Crab-shaped Mademoiselle Crabaletta.
They will attack nearby opponents at intervals, prioritizing the target of the active character, dealing Hydro DMG based on Max HP.
When they attack, if character(s) with more than 50% HP are nearby, the Members will increase their current attack's power based on the number of such characters, and consume said characters' HP. If 1/2/3/4 (or more) characters meet these requirements, the Members' attacks will deal 110%/120%/130%/140% of their original DMG.
Pneuma
Summons the Singer of Many Waters, who will heal nearby active character(s) based on Max HP at intervals.
The Salon Members and Singer of Many Waters share a duration, and when Furina uses her Charged Attack to change the guest type, the new guests will inherit the initial duration.
While the Salon Members and the Singer of Many Waters are on the field, Furina can move on the water's surface.
Ousia
Furina’s Ousia-aligned Skill is where her damage comes from, summoning three Salon Members that deal HP-scaling Hydro damage. Each Salon Member has their own individual scalings, ICD, and HP drain.
| Scaling (TL9) | HP Drain | Attack Frequency | Hydro Application | |
| Surintendante Chevalmarin | 4.59 HP% | 1.6% Max HP | ~1.5s | Every other hit |
| Gentilhomme Usher | 10.13 HP% | 2.4% Max HP | ~3.2s | Every other hit |
| Mademoiselle Crabalette | 13.26 HP% | 3.6% Max HP | ~5.1s | Every hit |
When the Salon members drain HP from the team with their attacks, they gain a multiplier onto their damage for each party member with HP above 50%. This multiplier increases their damage by up to 40%, so it is important to keep the party healed to maintain this multiplier, since the Salon Members will stop draining HP from characters at or below 50% HP.
When a Salon member hits an enemy, it will produce 1 Hydro Particle, with a 2.5s particle ICD. This averages out to around 1 particle every ~3.25 seconds.
The three Salon Members all have good range on their attacks, and if the enemy is out of their range, they will teleport towards the enemy to close that distance. They also follow you, and prioritize attacking the same target as you.
For more information on the Salon Members’ mechanics, you may check the Mechanics section below.
Pneuma
Furina’s Pneuma-aligned Skill will summon the Singer of Many Waters. This is a stationary summon that heals your active character over time every ~2s. The Singer of Many Waters does not attack enemies, so it is not capable of dealing any damage, applying Hydro, or making any Elemental particles. Since you cannot have it summoned at the same time as the Salon Members, the Singer of Many Waters is normally not used in combat and is mainly reserved as a source of emergency healing or as a convenient means of healing in the Overworld. It does, however, gain some use if Furina is at C6.
Elemental Burst | Let the People Rejoice
Talent Description
Rouses the impulse to revel, creating a stage of foam that will deal AoE Hydro DMG based on Furina's Max HP and cause nearby party members to enter the Universal Revelry state: During this time, when nearby party members' HP increases or decreases, 1 Fanfare point will be granted to Furina for each percentage point of their Max HP by which their HP changes.
At the same time, Furina will increase the DMG dealt by and Incoming Healing Bonus of all nearby party members based on the amount of Fanfare she has.
When the duration ends, Furina's Fanfare points will be cleared.
Furina’s Burst provides teamwide buffs based on a mechanic called Fanfare. Fanfare stacks are accumulated when party members lose or gain HP through any means (whether that be through healing, taking damage, or Salon Members draining HP. Fanfare stacks are also gained for every percentage point of HP changed per party member. For example, if all four Party Members are healed by 30% of their HP, you’ll gain 120 Fanfare Stacks. This makes characters with front-loaded teamwide healing highly valuable on Furina’s teams, as they can allow Furina’s Burst to have a high amount of Fanfare early into its duration.
At C0, Furina’s Fanfare stack limit is 300. She gives the entire team DMG% equal to 0.25% (at Talent level 10) per Fanfare stack; 300 stacks provides 75% DMG% and 30% Incoming Healing Bonus. This is an incredible buff, but it is important to understand that this is the maximum. Strong teamwide healers like Xianyun, Charlotte, Mika, etc. can max Fanfare early into the rotation, while single target healers like Bennett and Kuki won’t until late into the rotation, if at all. However, the buff is still excellent even when accounting for this. Furina’s long, 18s Burst duration and teamwide DMG% buff makes her great in most teams that can afford to use a healer. However, teams that rely on Transformative Reactions such as Hyperbloom for damage will see fewer benefits from this, as Transformative Reaction damage does not scale with DMG%.
Furina’s Fanfare buff is dynamic, meaning that it cannot be snapshot. This is a good thing, since Furina’s buff gets larger as the rotation goes on.
If Furina’s Burst is cast again while already active, the Fanfare points will reset.
 Ascension 1 Passive | Endless Waltz
Talent Description
When the active character in your party receives healing, if the source of the healing is not Furina herself and the healing overflows, then Furina will heal a nearby party member for 2% of their Max HP once every 2s within the next 4s.
Furina’s A1 passive helps with gaining Fanfare stacks, mitigating the HP drain from the Salon Members, and sustaining your team’s HP above 50%. While this does not provide much in teams with strong teamwide healers, the extra healing comes a long way for teams with single-target healers such as Bennett or Kuki. It also proves useful for characters with self-healing, such as Neuvillette, Lynette, or Gaming. Each A1 proc will generate 32 Fanfare points before the Incoming Healing Bonus from Furina’s Burst is considered.
 Ascension 4 Passive | Unheard Confession
Talent Description
Every 1,000 points of Furina's Max HP can buff the different Arkhe-aligned Salon Solitaire in the following ways:
- Will increase Salon Member DMG dealt by 0.7%, up to a maximum of 28%.
- Will decrease active character healing interval of the Singer of Many Waters by 0.4%, up to a maximum of 16%.
This passive is a nice buff for Furina’s damage. The buff from her A4 caps out at 40,000 HP, further incentivizing Furina to build more HP and making an HP% Goblet more valuable.
 Utility Passive | The Sea is My Stage
Talent Description
Xenochromatic Fontemer Aberrant ability CD decreased by 30%.
Useful for underwater exploration.
Constellations
Furina has excellent Constellations. Her C1, C2, and C3 all improve her buffing abilities, her C4 and C5 increase her personal damage, and her C6 gives her a potential new playstyle.
The value of Furina’s Constellations varies depending on the team. The damage increase numbers below reflect the increase to her personal damage. Calculations Source
 Constellation 1 | Love Is a Rebellious Bird That None Can Tame
When using Let the People Rejoice, Furina will gain 150 Fanfare.
Additionally, Furina's Fanfare limit is increased by 100.
Apart from increasing the potential buff amount by upping Furina’s max Fanfare limit, starting with 150 Fanfare stacks means that you automatically have a 37.5% DMG Bonus upon casting her Burst, which increases the average buff size over a rotation. The immediate stacks also means that you start with 15% Incoming Healing Bonus, which helps you gain Fanfare faster, especially when using single-target healers.
| Personal DPR Increase: ~12% |
 Constellation 2 | A Woman Adapts Like Duckweed in Water
While Let the People Rejoice lasts, Furina's Fanfare gain from increases or decreases in nearby characters' HP is increased by 250%. Each point of Fanfare above the limit will increase Furina's Max HP by 0.35%. Her maximum Max HP increase is 140%.
Another great Constellation, Furina’s C2 multiplies the amount of Fanfare stacks gained by 3.5 times. With this, her Fanfare stacks will max out very quickly, even with single-target healers like Bennett. On top of that, Furina also gains a massive buff to her max HP from overcapping on Fanfare stacks, which is very easy to do with this Constellation.
The increased Fanfare gain allows Furina to cap out the DMG Bonus after team health fluctuates by approximately ~72%, and cap out the HP bonus after ~186%.
Both Furina and her team gain significant value with this Constellation, making C2 an excellent early stopping point.
| Personal DPR Increase from previous Constellation: ~42% | Personal DPR Increase from C0: ~59% |
 Constellation 3 | My Secret Is Hidden Within Me, No One Will Know My Name
Increases the Level of Let the People Rejoice by 3.
Maximum upgrade level is 15.
Increases Furina’s Burst by 3 Talent levels. This will increase the amount of DMG Bonus and Healing Bonus gained per Fanfare, thus increasing the entire team's damage. With a crowned Furina Burst, this will increase the DMG Bonus per Fanfare stack from 0.25 to 0.31. With the max Fanfare of 400, her DMG Bonus jumps from 100% to 124%.
| Personal DPR Increase from previous Constellation: ~7% | Personal DPR Increase from C0: 71% |
 Constellation 4 | They Know Not Life, Who Dwelt in the Netherworld Not!
When the Salon Members from Salon Solitaire hit an opponent, or the Singer of Many Waters restores HP to the active character, Furina will restore 4 Energy. This effect triggers once every 5s.
Furina’s C4 significantly decreases her Energy Recharge requirements. Over a 20s rotation, she can restore up to 16 Energy. This can lower her Energy Recharge requirements by about 40-65%, increasing the value of non-ER weapons.
This Constellation will also restore Energy when the Singer of Many Waters attempts to heal a character. Energy is still gained if the effect heals a full HP character or if they do not restore HP due to negative effects.
| Personal DPR Increase from previous Constellation: ~12% | Personal DPR Increase from C0: ~91% |
 Constellation 5 | His Name I Now Know, It Is...!
Increases the Level of Salon Solitaire by 3.
Maximum upgrade level is 15.
Increases Furina’s Skill by 3 Talent levels. This is a large personal damage increase as all of her damage comes from her Skill.
| Personal DPR Increase from previous Constellation: ~18% | Personal DPR Increase from C0: ~125% |
 Constellation 6 | Hear Me — Let Us Raise the Chalice of Love!
When using Salon Solitaire, Furina gains "Center of Attention" for 10s.
Throughout the duration, Furina's Normal Attacks, Charged Attacks, and Plunging Attacks are converted into Hydro DMG which cannot be overridden by any other elemental infusion. DMG is also increased by an amount equivalent to 18% of Furina's max HP.
Throughout the duration, Furina's Normal Attacks (not including Arkhe: Seats Sacred and Secular Attacks), Charged Attacks, and the impact of Plunging Attacks will cause different effects up to every 0.1s after hitting opponents depending on her current Arkhe alignment:
Arkhe: Ousia
Every 1s, all nearby characters in the party will be healed by 4% of Furina's max HP, for a duration of 2.9s. Triggering this effect again will extend its duration.
Arkhe: Pneuma
This Normal Attack (not including Arkhe: Seats Sacred and Secular Attacks), Charged Attack, or Plunging Attack ground impact DMG will be further increased by an amount equivalent to 25% of Furina's max HP. When any of the attacks mentioned previously hit an opponent, all nearby characters in the party will consume 1% of their current HP.
During the duration of each instance of "Center of Attention," the above effects can be triggered up to 6 times. "Center of Attention" will end when its effects have triggered 6 times or when the duration expires.
Furina’s C6 gives her a Hydro Infusion for up to six Normal/Charged/Plunging Attacks, allowing her to deal massive damage. Doing this in her Ousia-aligned stance will turn her into an excellent healer — using all six hits in Ousia will cause her to heal by 60% of her Max HP over the course of 15s (before even considering her Healing Bonus buffs). This healing is enough to allow Furina’s teams to forgo another healer entirely, making her teams much more versatile.
In her Pneuma-aligned stance, Furina’s C6 hits will deal much higher damage than when in her Ousia stance. However, instead of healing, each hit will drain 1% of each team member’s current HP. There will, however, still be some healing since the Singer of Many Waters will be active.
The “Center of Attention” count is only lowered when an attack successfully connects with an enemy to trigger the Arkhe-aligned effects - how many enemies are hit by each attack does not matter.
In addition, “Center of Attention” effect also allows Furina’s Spiritbreath Thorn, Surging Blade and mid-air plunge damage to benefit from the base 18% HP modifier without lowering the hit amount, further increasing her damage beyond what may be expected.
The Hydro Infusion is independent from the “Center of Attention” hit count, persists until an attack is finished, and can be extended by buffering a Charged Attack after a Normal Attack that consumes the 6th hit. This means that Furina can effectively perform up to seven Hydro-infused hits, potentially applying 1 more instance of Hydro in niche cases, though extended hits/hits after Center of Attention’s expiration will not benefit from its DMG Bonus.
| Personal DPR Increase from previous Constellation: ~21-31% | Personal DPR Increase from C0: ~172-196% |
Mechanics
Salon Solitaire Behavior
Salon Solitaire members will prioritize attacking the target you are attacking, indicated by a small marker above the enemy; otherwise, they prioritize the closest enemy. If Salon Solitaire members are too far from a target, they will teleport to reposition instead of moving over.
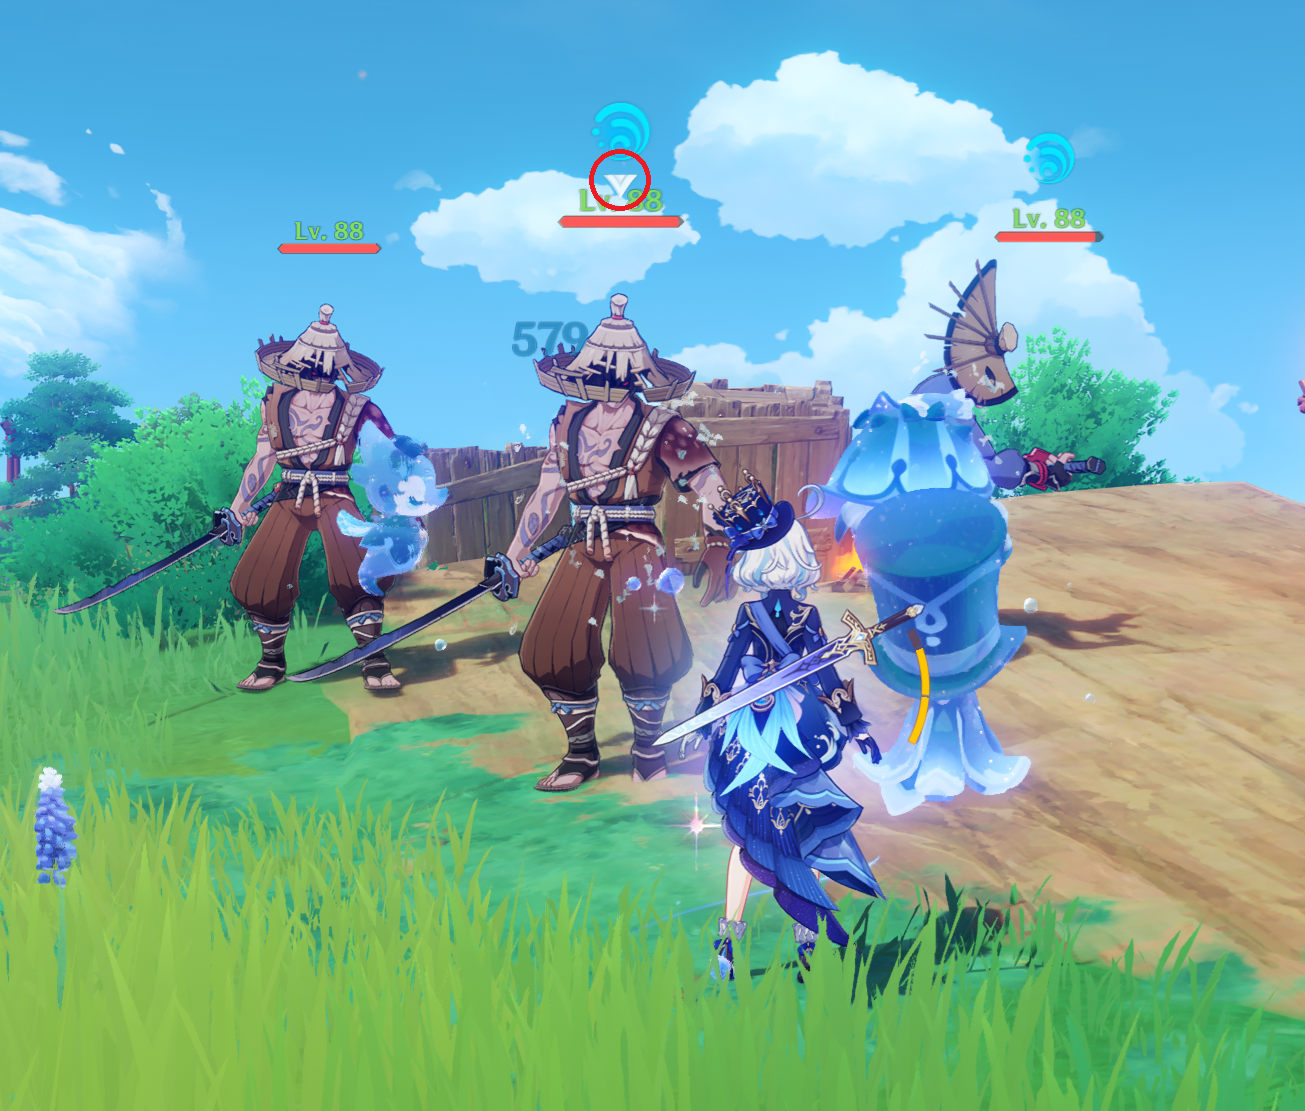
The target marker is represented by the inverted white triangle above enemy health bars.
Unlike the Salon Solitaire, the Singer of Many Waters does not move and does not teleport along with Furina; this is important if you move around a lot, since while the Singer’s range is large, it is not infinite.
Using a Charged Attack to change Furina’s Arkhe alignment will reposition her summons to her current location; resummoning the Salon Solitaire will also reset their attack timers. This can be utilized with Mademoiselle Crabaletta due to her long attack timers, allowing her to Vaporize more often, or to increase damage in Co-Op.
Salon Solitaire HP Drain
Salon Solitaire members drain HP when initiating their attacks, not when their attacks hit.
This HP drain can be prevented if it occurs during a period of invincibility frames, such as when casting an Elemental Burst. Though you will not gain Fanfare from prevented HP loss, you can still gain the respective DMG Bonus to Salon Solitaire members as that only checks how many characters were above 50% HP at the moment they would drain.
The HP drain is not considered damage, so it will not trigger effects that require a character to take damage (such as Dehya’s Fiery Sanctum damage mitigation, Serpent Spine stacks, etc.). It will, however, trigger effects that require a character’s HP to change, such as 4pc Marechaussee Hunter or the effects of Tome of the Eternal Flow and Cashflow Supervision.
Fanfare
Fanfare does not start to accumulate until approximately the moment Furina’s Burst animation ends.
Max HP% increase buffs such as Yelan’s C4 do not generate Fanfare, as they do not change your current percentage of HP.
Effects that prevent healing such as Bond of Life will not yield Fanfare from healing effects until they have been cleared.
The damage from Furina’s Burst cast does not snapshot any Fanfare buffs, and Fanfare stacks from the previous Burst reset before the succeeding Burst’s cast damage. So, even though Furina’s Burst has a lower CD than its duration, it cannot benefit from previously accumulated Fanfare. The initial Burst cast damage does, however, benefit from Furina’s C1.
Basic Attack Mechanics
Unlike other Sword users, Furina can perform a Charged Attack without initiating a Normal Attack first, as well as chain an N4 into a CA.
Due to this, she will not proc abilities like Xingqiu’s or Yelan’s Bursts or her Surging Blade and Spiritbreath Thorn effects by spamming Charged Attacks, since she does not perform the initial Normal Attack.
The Arkhe effects of her Normal Attacks, Surging Blade and Spiritbreath Thorn, have independent cooldowns and can be triggered rapidly in succession if required.
Builds

“You're interested in hearing about me? I suppose there's no helping that…”
Furina fits into many different teams with many different playstyles, but her own build remains mostly the same in all of them, with only her Energy Recharge requirements changing per team archetype. Note that the on-field Furina playstyle will not be covered in this guide.
ER Requirements
Furina fits into a wide variety of different teams, and her ER requirements vary heavily depending on the exact team, rotation and how many Favonius weapons are used. Furina’s ER requirements can decrease by ~10-30% for each Favonius proc in a rotation, depending on if she catches the particles or not. Calcs for ER requirements can be found here.
Use the Energy Recharge Calculator to determine exact requirements for your specific team and rotation.
C0 Furina
| Scenario | ER Requirements | |
| Solo Hydro | — | ~200-260% |
| “High Particle Gen” | ~160-180% | |
| With Raiden | ~135-160% | |
| Double Hydro | With Raiden | ~105-115% |
| With Neuvillette | ~115-125% | |
| With Kokomi | ~145-155% | |
| With Yelan/Xingqiu | ~135-190% | |
| Triple Hydro | — | ~100-140% |
C4 Furina
| Scenario | ER Requirements | |
| Solo Hydro | — | ~145-190% |
| “High Particle Gen” | ~105-120% | |
| With Raiden | ~100% | |
| Double Hydro | With Raiden | ~100% |
| With Neuvillette | ~100% | |
| With Kokomi | ~100-115% | |
| With Yelan/Xingqiu | ~100-135% | |
| Triple Hydro | — | ~100-105% |
Artifact Stats
 Sands |  Goblet |  Circlet |
| HP% / Energy Recharge | HP% / Hydro DMG Bonus | CRIT > HP% |
Substat Priority:
ER% (until requirement) > CRIT > HP%
Furina should use an HP% Sands if she has enough Energy Recharge from her weapon and substats. However if she is not using an Energy Recharge weapon, she may need to use an ER Sands instead. She may sometimes need to use both an ER weapon and ER Sands to hit her ER requirements.
HP% Goblets are ideal on Furina — Hydro DMG% Goblets lose value because Furina already gets a lot of DMG Bonus through Golden Troupe and her own buffs. Hydro DMG% Goblets can be used if you do not have a good HP% Goblet, but it’s advised to eventually upgrade to a HP% Goblet. Note that at C2, Hydro DMG% and HP% Goblets will be roughly equivalent to one another due to the large amount of HP% her C2 provides.
CRIT Rate or CRIT DMG Circlets can be used — just pick whichever works best with your specific stat spread. HP% Circlets are not far behind in performance and can be used if they have better substats than your CRIT Circlets.
We recommend using Genshin Optimizer to compare your actual artifacts.
Artifact Sets
If an artifact set isn’t included in this list, it is not worth considering on Furina.
Calcs for artifact set comparisons can be found here.
| Artifact | DPS% | Notes |
 4pc Golden Troupe | 100% | 4pc Golden Troupe is by far Furina’s best set for her own personal damage and is what she should ideally equip. Golden Troupe is also extremely Resin-efficient to farm, since Furina’s HP drain enables any on-field DPS to use 4pc Marechausee Hunter. |
 2pc HP% / Skill% / ER / Hydro% 2pc HP% / Skill% / ER / Hydro% | ~83-89% | Furina’s second-best option for her personal damage. These combinations are behind 4pc Golden Troupe by a large margin and should only be used as an alternative if you don’t yet have a Golden Troupe set. |
 4pc Tenacity of the Millileth | ~80% | 4pc Tenacity is far worse for Furina’s personal damage than 4pc Golden Troupe. However, since Furina can maintain full uptime on 4pc Tenacity buffs, this set can be a good alternative in teams where most of the damage comes from ATK-scaling units. |
Weapons
If a weapon is not included in this list, it is not worth considering on Furina.
The DPS column displays a range based on Furina's ER requirements. The range is 130%-200% ER.
Calcs for weapon comparisons can be found here.
| Weapon | DPS | Notes |
 Splendor of Tranquil Waters | ~125-136% | Furina’s signature weapon, Splendor is always her strongest weapon for her personal damage, even if you need an ER% Sands to use it. In teams where she doesn’t need much Energy Recharge and can use an HP% sands, this will be a massive increase over her other options. Keep in mind that getting Furina’s Constellations should be prioritized over obtaining Splendor. |
 Uraku Misugiri | Geo Passive ~121-134% No Geo Passive ~111-123% | Uraku Misugiri provides excellent stats for Furina, with its high CRIT DMG secondary stat and the Skill DMG% from its passive. With a Geo unit on the team, the Skill DMG% is further increased, making it Furina’s second strongest weapon. If there is no Geo unit on the team, Uraku Misugiri is still one of Furina’s strongest weapon options. |
 Primordial Jade Cutter | ~110-120% | Furina scales exclusively with HP and not ATK, so the ATK buff Jade Cutter gives is not useful on her. However, the high CRIT Rate and the 20% HP Jade Cutter provides still makes it a great weapon option for Furina. Keep in mind that Furina ascends with CRIT Rate, so she will want a CRIT DMG Circlet if using this weapon to balance out her CRIT ratio. |
 R5 Festering Desire | ~110% | Festering Desire is similar to Fleuve Cendre — it provides a good amount of Energy Recharge, Elemental Skill CRIT Rate, and Elemental Skill DMG%. Festering Desire is an upgrade over Fleuve Cendre, but could only be obtained in Version 1.2 so you won’t be able to obtain it if you haven’t already. |
 Light of Foliar Incision | ~104-115% | Light of Foliar Incision serves as a good CRIT stat stick for Furina, unconditionally providing the second highest CRIT value of any weapon in the game. Its passive is negligible unless you are using Furina at C6. |
 Key of Khaj-Nisut | ~104-109% | Key of Khaj-Nisut is stronger for Furina’s personal damage than Fleuve Cendre and also provides an EM buff. The teamwide EM buff can result in this weapon being the best for overall team damage in reaction damage-based teams such as Quickbloom and Vaporize. |
 Harbinger of Dawn | 80% Uptime: ~102-112% 0% Uptime: ~87-96% | Harbinger of Dawn, with its passive active, provides the highest CRIT value of any weapon in the game, and the low Base ATK does not negatively impact Furina since she scales with HP. However, it requires being above 90% HP to keep the passive active, which can be hard to maintain without a continuous source of teamwide healing such as Xianyun’s Burst. |
 Fleuve Cendre Ferryman | ~100% | Fleuve Cendre is a great free-to-play weapon option for Furina that can be obtained by fishing. It provides a lot of Energy Recharge and Elemental Skill CRIT Rate, two stats she greatly appreciates. The Energy Recharge provided by its passive only lasts 5 seconds, so it doesn’t help that much. However, the 45.9% ER provided by the secondary stat still helps. |
 R1 Wolf-Fang | ~98-109% | Wolf-Fang is a good stat stick, but Furina isn’t on the field long enough to gain much from the CRIT Rate buff it can provide. |
 Mistsplitter Reforged | ~97-108% | Mistsplitter’s high Base ATK is of no use on Furina, so it performs similarly to her 4-star options. Furina can maintain 2 stacks. |
 Favonius Sword | ~88-105% | Favonius provides a massive 61.8% Energy Recharge secondary. Its low Base ATK is irrelevant to Furina since she scales exclusively with HP. Between the high ER secondary and the extra particles from Favonius' passive, using Favonius will almost always fulfill most if not all of Furina’s Energy Recharge requirements. It is usually behind Fleuve Cendre for Furina’s own damage, but it is highly valuable for overall team damage if the rest of the team appreciates the Energy it provides. |
Synergies
“Being too popular can be such a hassle. Who knew the people would adore me so much?”
Healers
Healers are an integral part to most Furina teams. You normally want a healer capable of quickly healing the entire team — teamwide healers provide a lot of Fanfare to gain a high DMG Bonus from Furina’s Burst more quickly. They also help keep the team’s HP above 50% to maximize Furina’s damage.
Below is a list of healers that can work well with Furina. Note that these characters are listed in alphabetical order and are not ranked.
 Baizhu | Baizhu provides great team-wide healing from his Elemental Skill while also providing some off-field Dendro application, shields, and buffs for Dendro reactions. At C1, his ER requirements drop, allowing him to use Thrilling Tales of Dragon Slayers to further buff teammates. Keep in mind that Baizhu’s Dendro application is relatively slow and single-target, which can cause Quicken uptime to suffer if he is the only Dendro unit on the team. |
 Bennett | Bennett’s Burst doesn’t heal the entire team, but the ATK buff he provides is large enough to make up for having less Fanfare. This makes him great in teams with units that scale highly with ATK. Keep in mind that your units will need to be below 70% HP for Bennett to heal them, but if Bennett is on a healer build (HP% Goblet, HB% Circlet) he will still overheal most characters. Bennett can hold Freedom-Sworn for even more buffs. Or, he can play as an on-field DPS with Furina, utilizing her Hydro application to Vaporize his Skills. |
 Charlotte | Charlotte has a massive teamwide heal with her Burst, and can hold both TTDS and 4pc Tenacity to provide additional buffs. Pairing her with Furina gives the team access to Freeze — a team archetype where Charlotte particularly shines. |
 Jean | Jean provides massive teamwide healing from her Burst and can hold 4pc Viridescent Venerer (VV) to shred enemy Elemental RES. At C2, Jean gains an ATK SPD buff, and at C4, she provides Anemo RES Shred as well, making her a great support for Anemo DPS units. You can opt to equip Freedom Sworn or Xiphos’ Moonlight on Jean to further support teammates. |
 Kokomi | When paired with Furina, Kokomi enables Hydro Resonance, whose HP% increase benefits both units. While Kokomi can only heal the active character while off-field, she can provide plenty of teamwide healing with her Burst-enhanced Normal Attacks, so Kokomi works best when used as a driver in Furina teams like Mono Hydro and Electro-Charged. |
 Kuki Shinobu | Kuki doesn’t have access to teamwide healing, but her healing is enough to overheal for Furina’s A1 Passive. As an HP and EM-scaling Sword user, Kuki also has access to great support weapons such as Xiphos’ Moonlight, Key of Khaj-Nisut, and Freedom- Sworn. The main benefit of using Kuki is her off-field AoE Electro application, which makes her excellent for Quickbloom/Hyperbloom teams. |
 Mika | Mika provides great teamwide healing from his Burst and good buffs to Physical DMG and ATK Speed. This allows him to work great for Physical DPS units and those that benefit greatly from ATK Speed. Mika can hold Rightful Reward or Dialogues of the Desert Sages to refund up to 32 Energy per Burst, lowering his ER requirements. |
 Noelle | Noelle doesn’t have any off-field healing. Instead, she heals the entire party with her Normal and Charged Attacks while her Skill is active. This healing alongside her powerful shield makes her teams very comfortable. Since Noelle has to remain on-field to heal, she either runs as an on-field DPS with Furina as her buffer, or as a driver in teams such as Double Hydro with Furina and Yelan. |
 Sayu | Sayu works much the same as Jean: good teamwide healing with her Burst and access to 4pc VV. Sayu has higher Energy Recharge requirements than Jean and lower teamwide healing, but her active character healing is much higher, so she can be a good 4-star alternative. Note that if using Sayu, you will want to have her at least at C1, as without it her Burst will only heal when your active character is below 70% HP. |
Sigewinne | Sigewinne provides an excellent amount of teamwide healing through her Skill. This makes her a very reliable healer, as her healing can be done with minimal field time and is not dependent on having enough Energy to Burst. As a Hydro unit, she can utilize Hydro Resonance when paired with Furina and supply additional Hydro Particles to lower Furina’s ER requirements. Sigewinne’s A1 also allows her to buff other teammates’ off-field Skill DMG, improving Furina’s damage in Mono Hydro teams. |
 Xianyun | Xianyun provides continuous off-field teamwide healing with her Burst — a trait that is uniquely excellent for building Fanfare. Furthermore, as an Anemo unit, she provides extra utility through 4pc VV. Xianyun’s ability to enable and buff Plunging Attacks makes her the ideal pick for units such as Xiao and some Pyro Vaporize DPS units like Diluc, Gaming, and Hu Tao. |
Xilonen | Although Xilonen’s healing is single-target, the amount she heals by is exceptionally high, and it is frequent enough to build up high Fanfare. On top of her healing, Xilonen can provide some of the best buffing in the game by shredding enemy resistance and providing a large DMG% buff with 4pc Scroll. This makes Xilonen an excellent pick for many teams that use a Pyro/Hydro/Electro/Cryo (PHEC) or a Geo DPS, especially if she can buff every Element in the team. |
 Yaoyao | Yaoyao is similar to Baizhu in that she provides off-field Dendro application and great teamwide healing. However, her Skill’s Dendro application can be inconsistent and slow, and its healing is not enough to sustain Fanfare. Additionally, Yaoyao requires extensive field time to access her teamwide healing since it is tied to her Burst. Baizhu will usually be a better pick than Yaoyao, but Yaoyao can be a good 4-star alternative in Dendro teams. |
Buffers and Supports
The following units can work great with Furina, either by buffing or providing additional utility that Furina and her teams can benefit greatly from.
 Kazuha | Kazuha provides excellent utility via 4pc VV’s RES Shred and his A4 Passive’s Elemental DMG% buff. Kazuha’s grouping also allows Furina and teammates to hit multiple enemies at the same time. |
 Venti | Like Kazuha, Venti also provides grouping and RES Shred through 4pc VV. Venti also refunds 15 Energy to all party members of the Element he absorbs with his Burst, which can allow Furina and any other Hydro units to build less ER in exchange for more offensive stats. Furina’s Salon Members also have no trouble hitting enemies suspended in Venti’s Burst. |
Lan Yan | Lan Yan can provide RES Shred with 4pc VV and buff with a weapon such as Thrilling Tales of Dragon Slayers, while also creating a highly durable shield. This brings great value if the on-field DPS is prone to interruption, such as an Aimed Shot DPS like Lyney. |
 Xiangling | Xiangling provides fast and excellent AoE Pyro application from off-field, allowing both herself and Furina to consistently Vaporize. Depending on the team, Xiangling may act as either an off-field DPS buffed by Furina, or as an off-field Vaporize enabler for Hydro units. |
 Emilie | While Emilie doesn’t provide any buffing, her personal damage and Dendro application from off-field can still be valuable. With a good source of Pyro application, Furina will be able to Vaporize her own damage, while still having good uptime on Burning for Emilie to deal excellent damage from off-field. |
  Yelan, Xingqiu | Using Furina alongside either Yelan or Xingqiu creates an excellent Double Hydro core. Having a second Hydro unit provides 25% HP from Hydro Resonance while also massively lowering the Energy requirements for both Furina and Yelan/Xingqiu, thus allowing them both to build less ER and focus more on damage. Using Yelan or Xingqiu alongside Furina also provides excellent Hydro application, which can be great to have in reaction-focused teams. |
Ororon | Furina’s Hydro application enables the Electro-Charged reaction, allowing Ororon to trigger his A1 Passive. This will allow him to deal a respectable amount of AoE damage while also buffing both Electro and Hydro with 4pc Scroll, which can make him a great option for Electro and Hydro DPS units. Ororon can also pair well with Pyro DPS units, as his Electro application will not interfere with Vaporize, and he can buff Pyro with 4pc Scroll in a proper setup. If Ororon is Constellation 6, he will also provide up to a 30% ATK buff to your active character. |
Citlali | Citlali has direct synergy with Hydro, as she has consistent off-field Cryo application to trigger Freeze and will provide 20% RES Shred to both Hydro and Pyro any time a Freeze or Melt reaction is triggered. Since Citlali uses Nightsoul’s Blessing, she will also be able to use 4pc Scroll for DMG% buffing. Citlali is also a Catalyst user, so she can provide further buffing with her weapon, Starcaller’s Watch, or Thrilling Tales of Dragon Slayers. |
 Zhongli | Zhongli provides universal RES Shred with his Elemental Skill and can buff further by holding 4pc Archaic Petra set. His shield’s added survivability and interruption resistance can be valuable for units like Neuvillette, but remains a nice QoL asset regardless. |
Kachina | As a support unit from Natlan, Kachina is able to use 4pc Scroll, providing 40% DMG Bonus to both Geo and the PHEC Element she triggered Crystallize with. Kachina also provides a Geo Construct, so she can form a good Geo core with Chiori in some teams. |
DPS Units
Since Furina’s team-wide buff from her Burst has high uptime and works for all characters regardless of Element or scaling stat, there is no shortage of DPS units that get great value out of using her. Below is a list of some DPS units and teams that have particularly noteworthy and powerful synergy with Furina.
This list is not exhaustive and follows an alphabetical order. There are far more DPS units than the ones listed, these are just a few examples.
  Ayaka, Ganyu | Ayaka and Ganyu’s Freeze teams get great benefit out of using Furina as the Hydro unit — Furina provides the team with a similar buff to Mona, but without needing to rely on Mona’s Omen extension, and Furina herself also deals high damage in these teams. However, Furina’s slow Hydro application can make it difficult to Swirl Hydro for Furina’s damage in these teams. Additionally, triggering Swirl on unfreezable targets can be difficult, as triggering the Frozen reaction against them consumes both Hydro and Cryo aura, leaving no remaining Elemental aura to Swirl. |
 Alhaitham | Furina’s relatively slow Hydro application benefits Alhaitham’s Quickbloom teams, as it allows him to get more Spreads than if he were with other Hydro options. Furina’s long duration on her Hydro application also allows Alhaitham to perform longer rotations and still enable Hyperblooms throughout the full rotation. |
Chasca | Chasca deals damage of multiple Elements at the same time, so Furina’s universal DMG% buff is greatly appreciated, as it will buff all of Chasca’s damage. Furina’s Hydro application is also great for Chasca, as it will help ensure she can trigger Vaporize on her Pyro bullets. |
 Clorinde | Clorinde constantly heals herself during her Skill duration, for a total of 110% of her Bond of Life per Impale the Night: Pact instance (which is equivalent to 10% of her Max HP once the Bond of Life has been cleared). When paired with Furina, Clorinde’s healing ability is enhanced because of Furina’s Healing Bonus buff. Furina’s buff applies to the whole of Clorinde’s 110% Bond of Life healing, NOT just the 10% overheal that affects her Max HP. As such, with an assumed 15% Healing Bonus from Furina, Clorinde can now effectively heal ~27% of her Max HP per proc instead of her usual 10%. Her improved healing ability alongside Furina makes a dedicated healer unnecessary on the team, opening the slot for another buffer or off-field DPS. |
 Cyno | Cyno benefits tremendously from Furina — he has no innate DMG Bonus buffs of his own before C2, so Furina’s buff is highly appreciated. Furina’s Burst is also one of the few buffs in the game that will last through most of Cyno’s long field time. Furina’s Hydro application is relatively slow, so while Cyno will trigger fewer Hyperblooms, there will be more Aggravates instead. |
 Diluc | Diluc works particularly well with Furina — his Pyro application can be controlled and spaced out enough for Furina to provide enough Hydro for him to Vaporize, even as the sole Hydro unit on the team. |
 Eula | Furina is generally one of Eula’s best teammate options — Eula much appreciates the DMG% buff, and Furina will usually be at max Fanfare by the time Eula’s Burst hits. Superconduct can still be triggered even with Hydro on the team, as applying Cryo to an enemy affected by Electro-Charged will still trigger it. As a Physical DPS, Eula also has direct synergy with Mika as a teamwide healer for Furina. |
 Gaming | Gaming works great with Furina in much the same way as Diluc — he can space out his Pyro application enough that Furina’s Hydro application alone is enough for him to Vaporize all his damage. He also has self HP-drain and healing to allow for some extra Fanfare. |
 Hu Tao | It may seem like Hu Tao wouldn’t work well with Furina, since Furina teams want a healer and Hu Tao wants to be below 50% HP. However, Furina’s buffs, off-field damage, and Hydro application are more valuable than what Hu Tao loses by being above 50% HP. Do note, however, that you will need Xingqiu or Yelan on the team for Hu Tao to reliably Vaporize all her damage. |
 Itto | Itto is unable to use Furina in a traditional Triple Geo team, since Xilonen is the only option for a Geo healer and doesn’t heal without two or more PHEC units on the team. Therefore, Itto will have to forgo his usual team setup and instead do a Double Geo team with Xilonen in order to use Furina. This can be a worthy tradeoff for Itto, but keep in mind without Itto’s C2, he will have much higher Energy requirements in a Double Geo team. |
Kinich | Although Kinich wants to consistently have Burning on enemies, Furina still works great with him. As long as you have a fast source of Pyro application, such as Xiangling, each time Furina Vaporizes and removes the Pyro aura, the Pyro will be re-applied fast enough for Kinich to continue building up his Nightsoul points, losing out on little to no damage. Keep in mind that using Furina with Kinich will mean not using Emilie, so Furina is not part of Kinich’s strongest team, but she is a great alternative if you don’t have Emilie available. |
Klee | Klee’s Pyro application is too fast for her to Vaporize reliably. However, fast Pyro application is great for allowing Furina to forward Vaporize instead. And even as Furina’s personal damage increases, Klee’s own damage will remain high, as she will be buffed by Furina and other buffers such as Bennett and Kazuha. |
 Lyney | Pairing Furina with Lyney may seem like a strange pick, since he performs best in Triple Pyro teams. However, Lyney can still play a Triple Pyro team with Furina as the fourth slot. Since Furina’s Hydro application is slow, Pyro can be sustained as the aura on the enemy, allowing Lyney to get his Pyro aura buff, and Furina to trigger forward Vaporize on some of her hits. You do, however, have to play Lyney without a shield for this to work. Furina’s Hydro application can also be used for Lyney to Vaporize his damage instead. Although he won’t get the buff from his passive doing this, the damage added from Vaporize alongside the other team buffs make up for this. Lyney’s HP drain with his Charged Attacks and healing with his Skill also help Furina stack Fanfare faster. |
 Navia | Navia greatly appreciates having a good source of off-field PHEC Elemental application for Crystallize, to maximize her Skill damage. While Furina’s Hydro application is on the slower side, Crystallize does not fully consume a Hydro aura, so Furina’s application is more than enough for Navia. |
 Mavuika | Mavuika’s Pyro application is spaced out enough for Furina to provide sufficient Hydro application as the solo Hydro. Mavuika’s best combos use her Charged Attacks, so Furina works more comfortably than other Hydro options like Yelan and Xingqiu who require ending and restarting Mavuika’s Charged Attack to trigger their Bursts. Note, however, that Mavuika wants Natlan support units on her team to fuel her Burst, so if using Furina with Mavuika, you will want to ensure that you include a Natlan unit such as Xilonen or Ororon. Mavuika can also be used in a more supportive role, where she Vaporizes her Burst and then swaps off-field, providing support with the AoE Pyro application from her Skill, as well as a DMG% buff from her passive and the Scroll set if using it. |
 Neuvillette | C0 Neuvillette loses out on a stack of his A1 passive by using Furina. However, using Furina will provide Neuvillette with Furina’s buffing, damage, Energy, and Hydro Resonance, which makes up for missing out on the A1 stack. Neuvillette also does not need to use a healer with Furina, thanks to his own HP drain and healing. |
 Raiden Shogun | Raiden provides a lot of Energy refund, which allows Furina to run much lower Energy Recharge than normal, and focus more on damaging stats. Raiden also provides off-field Electro application, which makes it easy to Swirl an electro-charged enemy, and get buffs from 4pc Viridescent Venerer and/or Kazuha for both Electro and Hydro. |
 Wanderer | Wanderer benefits greatly from Furina’s buffing and off-field damage. Using Furina with Wanderer means using him without a shield, but Furina’s Hydro application lets Wanderer get his A1’s Hydro buff for 20 more Skydweller Points. This allows him to evade enemy attacks without losing much Skill uptime by either flying higher or fitting in a dash without his A4 up. |
 Wriothesley | Wriothesly drains his own HP very quickly, which helps build Fanfare more quickly. In Wriothesley’s Melt teams, Furina can both buff his damage and trigger Vaporize while Wriothesley Melts. The pair can also be used in Freeze teams, although these teams will not be as strong. |
 Xiao | Furina provides both a strong, high uptime buff and consistent off-field damage that lasts through the majority of Xiao’s Burst. Combined with Xiao’s innate HP loss during his Burst that contributes to Fanfare stacking, Furina has strong synergy with Xiao. |
Teams
Rotation Notation
N = Normal Attack
C = Charged Attack
A = Aimed Shot
P = Plunging Attack
hP = High Plunge
lP = Low Plunge
E = Elemental Skill
tE = Tap Skill
hE = Hold Skill
shE = Short Hold Skill
Q = Elemental Burst
D = dash (cancel)
J = jump (cancel)
W = walk (cancel)
> = switch character
( ) = these actions are optional; please refer to the notes below
[ ] = repeat these actions the specified number of times
This list is not exhaustive. There are far more teams than the ones listed; these are just a few examples.
Note: Recommended DPS units and healer options will be listed for each team archetype, but the flex units will not as this varies heavily depending on the exact team. For more information on a team or unit that isn’t included, please check that character’s guide.
Mono and Double Hydro
These are teams that use Furina alongside one or two more Hydro units. Mono and Double Hydro teams are some of the best for Furina’s personal damage, as they provide Hydro Resonance to further buff Furina’s HP and damage, lower Hydro units’ ER requirements and allow Furina to exchange ER stats for more offensive stats, and supply team buffs that benefit all damage dealers. Due to the prevalence of Hydro damage in these teams, an Anemo unit that can hold 4pc VV is recommended.
Furina can either serve as a support for an on-field DPS such as Neuvillette or Kokomi, or as a support duo with Xingqiu or Yelan. Neuvillette and Kokomi have especially strong synergies because of their abilities to stack Furina’s Fanfare by themselves, but other Hydro on-fielders still appreciate her DMG% buff, personal damage, and Energy. An off-field duo with Xingqiu or Yelan brings strong damage and Hydro application and can often easily slot into any team with a healer.
Note: The units below are just a list of the most recommended teammates. It is not a comprehensive list of all units that work with Furina in this archetype.


Non-Hydro Drivers


Sample Teams
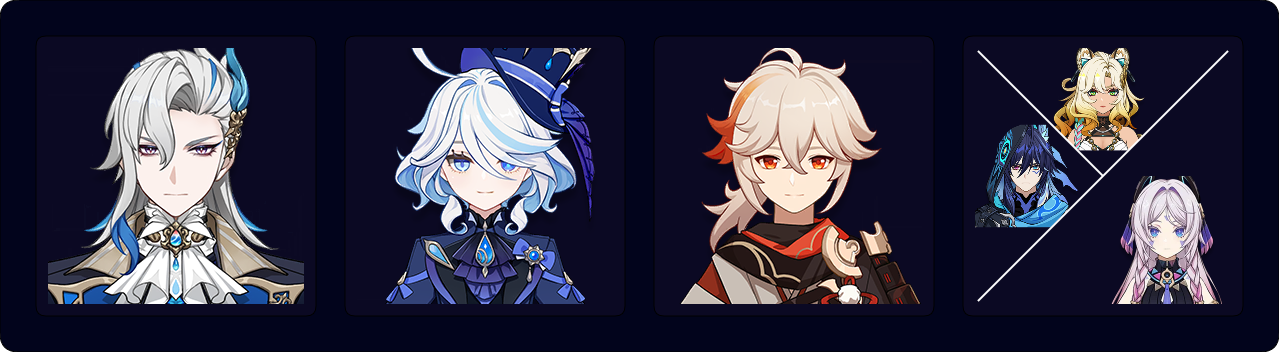
Neuvillette’s premium team — this team combines the buffs from Hydro Resonance and Furina’s Fanfare, as well as the RES Shred and DMG% buffs from Kazuha and Xilonen, to allow both Neuvillette and Furina to deal incredible damage together. If Xilonen is the last slot, her healing will ensure that you can keep the team’s HP high most of the time, allowing for max Fanfare faster than relying on Neuvillette’s self-healing alone. Xilonen is overall the best option here, but Citlali and Ororon make great alternatives.
Like Xilonen, Citlali and Ororon can both provide a DMG% buff with 4pc Scroll. Citlali will offer less RES Shred than Xilonen, but she provides a shield, which can make her a more comfortable option for a C0 Neuvillette. Ororon does not provide RES Shred, but he deals a good amount of off-field AoE damage of his own that can be further buffed by Kazuha Swirling both Hydro and Electro.
Neuvillette is very flexible in his team options, so you will still be able to make a very strong team with him even if you don’t have Xilonen, Citlali, or Ororon available for the last slot. A few examples of other units that can be used instead include Zhongli, Baizhu, Charlotte, and Kachina.
Rotation (Xilonen)
Neuvillette E > Furina ED > Xilonen EQ N2 > Kazuha tEPQ > Furina Q > Neuvillette C E C Q > Xilonen E N2 > Kazuha tEP > Neuvillette 2[C]
Rotation (Ororon)
Neuvillette E > Furina ED > Kazuha tEPQ > Furina Q > Ororon EQ > Neuvillette C Q E C > Kazuha tEP > Neuvillette 2[C]
Rotation (Citlali)
Neuvillette E > Furina ED > Kazuha tEPQ > Citlali EQ > Furina Q > Neuvillette C E C Q > Kazuha tEP > Neuvillette 2[C]
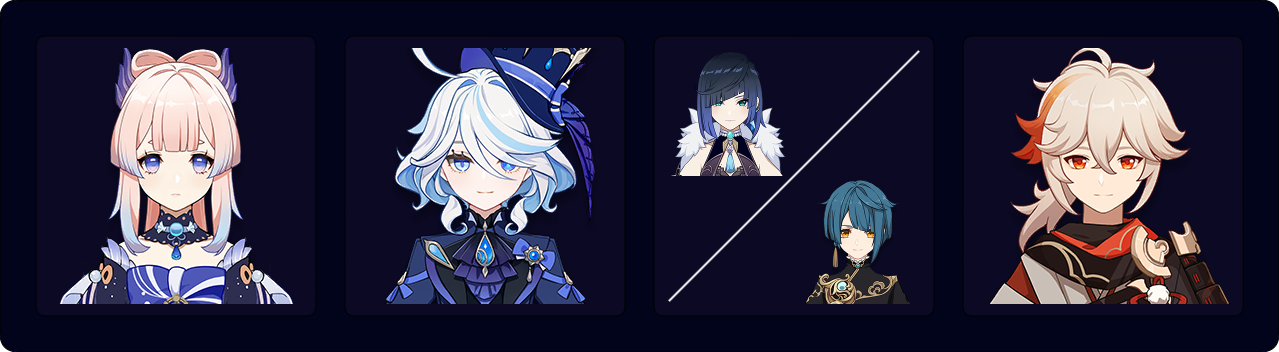
With three Hydro units on the team, the ER requirements for everyone are very low, allowing Furina and Yelan to build fully for damage. This, alongside the excellent buffing from Furina, Yelan, and Kazuha, results in a team with excellent single-target damage output. Xingqiu can replace Yelan without losing too much damage.
First Rotation
Furina ED > Kokomi E > Kazuha tEP > Furina Q > Yelan Q N1 E N1 > Kazuha tEP > Kokomi Q 5[N3D]
Subsequent Rotations
Yelan E > Kokomi E N1 > Kazuha tEP > Furina ED Q > Yelan Q N1 > Kazuha tEP N1 > Yelan E N1 > Kokomi Q 5[N3D]
With Raiden’s Energy refund, alongside Furina and Yelan as a Double Hydro core, the entire team is able to function with minimal ER requirements. Raiden will receive both Furina and Yelan’s DMG% buffs, as well as either RES Shred from VV held by an Anemo healer such as Jean, or RES Shred from Xilonen on top of DMG% from 4pc Scroll.
In this team, Xilonen can not reliably Crystallize both Hydro and Electro, as Electro will be prioritized on an Electro-Charged enemy, so Hydro will not be reliably buffed by Scroll. However, Xilonen will still provide 36% RES Shred to both Elements, with higher uptime than VV, so she is the best option here. Jean, or another Anemo healer such as Xianyun or Sayu, can be used instead if you do not have Xilonen available.
Rotation (Xilonen)
Raiden E > Furina ED Q > Xilonen EQ N2 > Yelan Q N1 E N1 > Raiden Q 4[N4D]
Rotation (Jean)
Raiden E > Furina ED Q > Yelan Q N1 E N1 > Jean E N1 Q > Raiden Q 4[N4D]
Rotation is the same with Xianyun or Sayu — they will use their Skill and Burst right before swapping to Raiden.
Reverse Vaporize
Furina’s Hydro application can allow some Pyro characters with lower Elemental application to amplify their damage through Vaporize on top of Furina’s hefty DMG% buff. Note that Furina’s sporadic Hydro application will require you to play carefully in some teams. It is recommended to equip Key of Khaj-Nisut on Furina, as the weapon passive’s high EM buffs are especially valuable in Vaporize teams.
Characters with higher Pyro application such as Hu Tao or Xiangling, require another source of Hydro to supplement Furina’s own. You may opt to bring another Hydro character such as Xingqiu or Yelan or an Anemo character that can infuse Hydro for Pyro units to Vaporize. These teams are limited in their flex slots since a healer is required to enable Furina’s buffs and damage.
Electro units can also be used on some Reverse Vaporize teams, as Electro-Charged does not completely remove a Hydro aura, allowing the Pyro DPS to trigger both Vaporize and Overloaded.
Note: The units below are just a list of the most recommended teammates. It is not a comprehensive list of all units that work with Furina in this archetype.


Sample Teams
Pairing Furina with Xingqiu or Yelan ensures there will be enough Hydro for Hu Tao to Vaporize. With Furina and Yelan together, Hu Tao gets a lot of DMG% buffs, and the Double Hydro core enables Hydro Resonance to buff all three of them.
Bennett makes an excellent choice for the healer slot, providing Hu Tao with a massive ATK buff and a Pyro DMG% buff if he is at C6. If using Bennett, you will want to equip him with 4pc Instructors to maximize Hu Tao’s damage.
Xilonen can be used instead of Bennett — she will only Crystallize Hydro and not Pyro in this team, so Hu Tao won’t be buffed by 4pc Scroll and her personal damage will be much lower compared to using Bennett. However, the buffing your Hydro units will get can compensate for this.
Xianyun also makes a good choice for the healer slot as she can buff the Hydro units via 4pc VV. She also allows Hu Tao to do Plunging Attacks — this is great, because Hu Tao already wants to jump to animation-cancel her Charged Attacks at C0. Plunging Attacks have no ICD, so as long as there is a Hydro aura, Hu Tao will Vape each Plunging Attack for massive damage. Plunging Attacks also give Hu Tao a good source of AoE damage, which she normally lacks.
If you do not have Bennett or Xianyun available, Jean or Sayu can be used as alternatives, but the team’s damage will be lower.
If you do not have Yelan, Xingqiu can be used instead. The team damage won’t be as high, but his damage reduction and interruption resistance can still be useful.
Rotation (Xilonen)
Furina ED Q > Xilonen EQ N2 > Yelan Q N1 E N1 > Hu Tao E 8[N2CJ]
Rotation (Bennett)
Furina ED Q > Yelan Q N1 E N1 > Bennett EQ N21 > Hu Tao E 8[N2CJ]
1Use 2 Normal Attacks to trigger Yelan’s Burst and to receive healing from Bennett’s Burst.
Rotation (Xianyun)
Furina ED Q > Xianyun EPQ > Yelan Q N1 E N1 > Hu Tao E 5[N2CJP]
Mavuika has exceptionally high multipliers, making Vaporize a great archetype for her to improve her damage further. Her Pyro application is slow enough that Furina alone is enough Hydro application to allow consistent Vaporize hits. Mavuika’s multipliers all scale with her Attack, so Bennett is a must to maximize her damage. Mavuika also relies heavily on Nightsoul point consumption from the team to fuel her Burst and increase her multipliers, so Xilonen is the ideal fourth slot — her combination of Nightsoul point consumption, RES Shred, and buffing Pyro with 4pc Scroll are invaluable here.
If Xilonen is not available, Ororon is a good alternative — over a full rotation he consumes a similar amount of Nightsoul points as Xilonen, while being able to reliably buff Mavuika, Furina, and himself with 4pc Scroll and even do some good damage of his own. At C6, he will buff Mavuika even further with up to 30% ATK.
Rotation (Xilonen)
Mavuika tE > Xilonen E N2 Q > Furina ED Q > Bennett EQ N11 > Xilonen E N2 > Mavuika Q C8F
1Use if C6 Bennett to make Pyro Scroll more consistent. If pre-C6 Bennett, use the N1 before EQ.
Rotation (Ororon)
(Mavuika tE)1 > Furina ED Q / Q ED > Bennett Q E N12 > Ororon EQ > Mavuika Q C8F tE > Bennett E
1First rotation only.
2Use if C6 Bennett to make Pyro Scroll more consistent. If pre-C6 Bennett, skip this.

Diluc gets an incredible amount of buffing in this team between Furina, Bennett, and Xianyun. Xianyun enables Diluc to easily do Plunging Attacks, which take advantage of his very high Plunging Attack multipliers. Plunging Attacks also have no ICD, meaning that Diluc can Vaporize on every Plunging Attack.
Furina is typically not able to apply enough Hydro to work as the solo Hydro in Reverse Vaporize teams, but Diluc’s Pyro application is low enough for Furina to re-apply Hydro in time. If the enemy does not have a Hydro aura, you can briefly delay your Plunge to give Furina enough time to apply Hydro.
If Bennett is C6, Diluc can skip his Burst, instead relying on the Pyro Infusion from Bennett. This results in overall higher damage on Diluc, as skipping his Burst lets him fit in an extra Plunge. However, if Bennett is not C6, you will want to use Diluc’s Burst at the start of his field time to gain the Pyro Infusion from it.
Rotation
(With C6 Bennett)
Furina ED Q > Xianyun EPQ > Bennett EQ > Diluc 2[JP] E 3[JP] E 2[JP] E JP
(Without C6 Bennett)
Furina ED Q > Xianyun EPQ > Bennett EQ > Diluc EQ 7[JP] 2[E]
Note: These rotations do not Swirl Pyro.

Much like Diluc, Gaming spends his field time doing Plunging Attacks — some with his Skill, and the rest through Xianyun’s Burst. Plunging Attacks are spaced out enough for Furina to provide enough Hydro application, but you will want to be careful and pay attention to ensure there is Hydro aura on the enemy before Plunging. You can delay your Plunge Attack to allow Furina time to re-apply Hydro.
Gaming also has further synergy with Furina: he consumes 15% of his HP upon doing the Plunging Attack from his Skill, heals 6% of his HP after each Plunge with his A4 Passive, and with his C1, he also heals 15% of his HP every time Man Chai returns to him during his Burst duration. This HP drain and self-healing allows him to build up Fanfare faster.
Rotation
Furina ED Q > Xianyun EPQ > Bennett Q E > Gaming EP Q 3[JP EP] > Bennett E
Note: This rotation does not Swirl Pyro.

Although Lyney’s kit is designed to be used in Mono Pyro teams, he also makes a fantastic Vaporize DPS, as he has no ICD on his Charged Shots or the Grin-Malkin Hats they summon, which allows him to Vaporize most, if not all, of his damage. Furina’s Hydro application is sufficient for this, as Lyney takes around 2 seconds to perform each Charged Shot, so Furina will usually have Hydro re-applied between each.
Lan Yan is recommended as the fourth slot for this team because she offers good buffing to Lyney with 4pc VV and Thrilling Tales of Dragon Slayers, while also providing him with a very strong shield. A shield is greatly appreciated by Lyney because he loses a lot of damage if interrupted while performing an Aimed Shot.
If you do not need a shield, you can get more damage by using units such as Kazuha, Xilonen, or Ororon instead. Kazuha will provide grouping and additional AoE Hydro application with his Burst, which can help make Vaporize more consistent at the expense of harder VV setup timings. Xilonen will provide similar buffing to Kazuha, but with better uptime for multiwave scenarios. Xilonen will also create a Crystallize shard, which can prevent Lyney from getting interrupted by the first attack that hits him. Ororon will buff Lyney, as well as Furina and himself, with 4pc Scroll; and at C6, he can provide up to 30% ATK to Lyney. Ororon will also contribute a good amount of personal AoE damage.
Rotation (Lan Yan)
Furina ED Q > Bennett EQ > Lan Yan 2[E]1 > Lyney Q 3[C] E C
1Wait on Lan Yan briefly to gain a Pyro aura from Bennett’s Burst.
Rotation (Kazuha)
Furina ED Q > Kazuha Q > Bennett Q E > Kazuha tEP > Lyney C Q 2[C] E > Kazuha tEP
Rotation (Xilonen)
Furina ED Q > Xilonen Q > Bennett EQ N11 > Xilonen E N2 > Lyney C Q 2[C] E C
Rotation (Ororon)
Furina ED Q > Ororon Q > Bennett Q E > Ororon E > Lyney Q 3[C] E C
With this team, Chasca will be able to Vaporize her Pyro bullets off of Furina’s Hydro application, while Furina’s DMG% buff will apply to all of Chasca’s bullets regardless of their Element. Bennett is the perfect healer for Chasca, since all of her damage scales with Attack, and Chasca has huge range on her Charged Shots, so Bennett’s Burst radius is of little to no issue.
Mavuika is the ideal fourth slot here — although Chasca loses out on some damage by not running a full rainbow team at C0, Mavuika’s own damage contribution makes up for it. Mavuika’s damage has great AoE, which improves Chasca’s flexibility due to her own lack of AoE.
If Mavuika is not available, Ororon remains a great fourth slot, buffing Pyro, Hydro, and Electro with 4pc Scroll, while also providing up to 30% ATK at C6. Ororon can also refund up to 9 Energy to Chasca, allowing her to use her Burst more often.
Rotation (Mavuika)
Furina ED Q > Mavuika tE > Bennett Q E > Mavuika Q > Chasca E 4[C] (Q)1
1Use if available.
Rotation (Ororon)
Furina ED Q > Ororon Q > Bennett EQ N21 > Ororon E > Chasca E 4[C] (Q)2
1Use 2 Normal Attacks to receive healing from Bennett’s Burst.
2Use if available.

This team focuses on Vaporizing Xiangling’s damage, while also allowing Furina to deal great damage thanks to Hydro Resonance and the Hydro RES Shred provided by Xingqiu should you have his C2. Since there is no dedicated on-fielder in this team, everyone can be freely swapped to, allowing Bennett ample opportunity to heal the team for good Fanfare generation. This allows Bennett to use his Skill several times throughout the rotation to funnel particles to Xiangling.
Rotation
Furina ED Q > Xingqiu Q N1 > Bennett N1 Q E > Xiangling N1 Q N1 E > Furina N2 > Bennett N1 E > Xingqiu N1 ED N2 > Bennett N1 E > Xiangling N2 > Bennett N1 E > Xiangling N2
Forward Vaporize
Furina’s ability to Vaporize most of her damage with the help of Pyro teammates makes Vaporize a very appealing team for her. These teams are the best way to maximize Furina’s personal damage and scale especially well with Furina’s Constellations.
Note: The units below are just a list of the most recommended teammates. It is not a comprehensive list of all units that work with Furina in this archetype.

Non-Pyro Options

Sample Teams

Furina is able to Vaporize her damage off the Pyro application from both Xiangling and Lyney, and there will still be enough remaining Pyro aura on the enemy for Lyney to get his own DMG% buff. Lyney’s HP drain with his Charged Attacks also builds Fanfare and allows him to be healed by Bennett more frequently for even more Fanfare.
Lyney fires three Charged Attacks in the rotation below but since this team has no shielder, executing all three won’t always be feasible in practice. However, even if Lyney can only perform one or two Charged Attacks, the team is still very powerful.
Against aggressive enemies that you may not be able to perform all of your Charged Attacks against, you may want to consider just using 1-2 Charged Attacks on Lyney in addition to his Skill and Burst, and instead spend the rest of the rotation using Bennett’s Skill for more particles. The Vaporized hits from Furina, as well as Xiangling’s off-field Pyro damage, allow the team to still do great damage even while Lyney is not attacking.
Rotation
Furina ED Q > Bennett Q E > Xiangling Q E > Lyney 3[C] Q E > Bennett E
Klee’s fast Pyro application allows for Furina to forward Vaporize most of her damage. With the combined buffs from Bennett, Kazuha, and Furina, Klee can deal high amounts of damage alongside Furina, even without Vaporize.
With the listed rotation, Kazuha can Swirl both Pyro and Hydro, providing significant buffs for both Klee and Furina.
Rotation
Furina ED Q > Bennett Q E > Kazuha hEPQ > Klee EQ combo
Xiangling’s fast Pyro application allows Wriothesley and Furina both to Melt and Vaporize most of their hits. There will be a couple of occasions where Hydro or Cryo ends up as the aura, but this doesn’t matter much since it will result in Xiangling Vaporizing or Melting. With the listed rotation, Bennett and Xiangling both get healed by Bennett before swapping to Wriothesely, which builds more Fanfare. You can also quickly swap to Furina during Bennett’s Burst duration to heal her if needed.
Rotation
Furina ED Q > Bennett Q E > Xiangling Q E > Wriothesley E 5[N3C] N3 (Q)1 > Bennett E > Xiangling N2
1Use if available.

Kinich wants to have Burning consistently on enemies to build up Nightsoul points; Xiangling’s fast AoE Pyro application will allow him to still get this, even with Furina Vaporizing her own damage and buffing Kinich at the same time. Keep in mind with this team that you want to have Xiangling on 4pc Deepwood Memories to maximize Kinich’s damage, so Xiangling’s damage will be lower than usual.
Rotation
Furina ED Q > Bennett Q E > Xiangling Q E > Kinich shE (Q) combo > Bennett E > Xiangling N2
Quickbloom
Furina’s slower paced Hydro application and her DMG% buff are especially useful in Quickbloom teams. She will create some Hyperblooms while still maintaining strong Quicken uptime to boost the damage of on-field Electro or Dendro characters. If running Kuki as a Hyperbloom trigger, obtaining healing from another source such as Prototype Amber will increase both the team’s survivability and the rate at which you gain Fanfare stacks.
Note: The units below are just a list of the most recommended teammates. It is not a comprehensive list of all units that work with Furina in this archetype.


Healers and Supports
 Baizhu |  Yaoyao | Kuki Shinobu |  Prototype Amber |  Nahida | Ororon |
Sample Teams
Cyno’s best Quickbloom teams already use Baizhu as a healer, allowing Furina to fit in naturally as the Hydro slot. Furina’s slower rate of Hydro application means that she will seldom remove Quicken before it is refreshed, meaning that Cyno gets most of his Aggravates. Furina’s DMG% buff is also excellent for Cyno’s Aggravate damage, since he doesn’t have easy access to DMG% buffs before reaching C2.
Both Ororon and Nahida work well as the fourth slot for this team — they both provide good personal damage of their own. Nahida will provide good Elemental Mastery buffing and higher Quicken uptime, while Ororon will provide buffs with 4pc Scroll and his C6. With Ororon, Cyno will require little to no Energy Recharge due to Ororon’s Electro Particle generation, his passive that refunds 9 Energy, and Electro Resonance. This also means that Cyno can afford to use a set like Marechaussee Hunter instead of Thundering Fury, for more damage. Furthermore, Cyno will not suffer from multiwave issues as he does with Nahida.
Rotation (Ororon)
Furina ED > Ororon Q > Furina Q > Baizhu EQ > Ororon E > Cyno EQ N2E N5 N2E N5 N2E N5 N2E
Note: This is NOT a Thundering Fury combo.
Rotation (Nahida)
Furina ED > Nahida E Q > Furina Q > Baizhu EQ > Cyno EQ N1E 6[N4E]
Note: This is NOT a Thundering Fury combo.
Alhaitham is able to perform long rotations, so Furina’s 30s-duration Skill allows her to enable Hyperblooms throughout the entire rotation. Furina’s slower rate of Hydro application is also ideal for Alhaitham as it results in greater Quicken uptime than other Hydro options, thus allowing Alhaitham to get more Spreads.
Simple Rotation
Furina ED > Nahida E Q > Furina Q > Shinobu E > Alhaitham Q 2[N3D] N2 E 2[N3D] N1C 4[N3D]
Advanced Rotation
Shinobu E > Nahida E Q > Furina ED Q > Alhaitham hEP N2C N3C > Shinobu Q E > Alhaitham Q N3D N3C 5[N3D]
Since Clorinde has constant self-healing throughout her Skill duration, she is able to bring Fischl instead of a healer. When paired with Furina’s slower Hydro application, Clorinde can trigger a high number of Aggravates alongside some Hyperblooms. This allows Clorinde to trigger Fischl’s A4 Passive frequently, while also constantly triggering Fischl’s C6 since she performs a lot of Normal Attacks. And since Furina’s slower Hydro application does not easily remove the Quicken aura, Fischl will also be able to trigger a high number of Aggravates alongside Clorinde, resulting in a powerful team.
Furina’s Skill has a 20s CD which doesn’t often align well with Clorinde as she prefers shorter rotations. To get around this drawback, Furina can cast her Burst before her Skill on the second rotation or be swapped to at different timings. Another option is using the Thundering Fury (TF) set, where Clorinde can extend her rotation and use her Skill twice in order to deal nearly two rotations’ worth of damage in less time than it would take to perform those two full rotations. Furina’s long-lasting abilities work well in this extended rotation, as most of Clorinde’s second Skill duration will receive Furina’s buffs alongside Furina’s off-field damage and Hydro application.
Non-TF Rotation
Furina ED Q / Furina Q E > Nahida E Q > Fischl E/Q > Clorinde E combo Q
TF Rotation
Furina E > Nahida E Q > Fischl E > Furina Q > Clorinde E combo > Nahida E > Fischl Q > Clorinde Q E combo
Freeze
Because Furina’s AoE Hydro application is not tied to units performing Normal Attacks, she provides an easy way to enable Freeze for Cryo units. Enabling Freeze allows access to the 4pc Blizzard Strayer’s strong 40% CRIT Rate and helps maintain grouping and survivability. However, Furina’s dependence on a healer makes it hard for her to run Shenhe and an Anemo unit, so she is often not used in the strongest Freeze teams.
Note: The units below are just a list of the most recommended teammates. It is not a comprehensive list of all units that work with Furina in this archetype.


Sample Teams
This team is very similar to Ayaka’s teams before Furina’s release; Ayaka is buffed as much as possible while using Freeze and crowd control to keep enemies together and maximize her Burst damage. Charlotte provides Cryo Particles to help reduce Ayaka’s ER requirements while also buffing with TTDS and the Tenacity of the Millelith set.
Rotation
Furina ED Q > Ayaka ED > Kazuha tEPQ > Charlotte Q E > Ayaka Q D N2C E D N2C > Kazuha hEP > Ayaka D N2C
Thanks to Xilonen’s healing, using her in place of Kazuha allows Shenhe to be used instead of Charlotte as the second Cryo. Having Shenhe’s buffing results in Ayaka dealing higher damage in this team than she would with Charlotte and Kazuha. However, you lose out on grouping, so using Charlotte and Kazuha can be more ideal in groupable AoE content.
Rotation
Xilonen Q > Furina ED Q > Shenhe tEQ > Xilonen E N2 > Ayaka ED Q N2C D N2C > Shenhe tE > Xilonen E N2 > Ayaka D N2C ED N2C
This team plays similarly to a traditional Ganyu Freeze team, using an Anemo unit to group enemies close together so that Ganyu can take advantage of her Burst’s AoE and its pseudo-quadratic scaling. Furina can take advantage of the grouping with her own AoE damage.
Keep in mind that this team won’t perform as well in single-target, since Ganyu’s Burst will be doing a lot less damage. Since Bosses can’t be Frozen, Ganyu also loses out on 4pc Blizzard Strayer’s set bonus, and the team will also be riskier to play since she is highly prone to being interrupted during her Charged Attacks.
Venti is listed as an option, as he can be used instead of Kazuha if you desire Venti’s stronger grouping and Energy refund.
Rotation
Furina ED Q > Ganyu E > Kazuha Q hEP > Charlotte EQ > Ganyu Q C E C > Kazuha tEP > Ganyu C
“Other Teams”
Furina’s universal buffing makes her an appealing option even for Elements and teams that can’t directly utilize Hydro reactions to enhance their damage, most notably Anemo, Geo, and Physical teams. The remaining teams listed will be those that do not particularly benefit from Furina’s Hydro application but still greatly appreciate her buffing and off-field damage.
Note: The units below are some of Furina’s strongest teammates only; this is not a comprehensive list of all units that work with Furina in this archetype.


Sample Teams
Wanderer has a few different healer options that work well alongside Furina.
Bringing Bennett results in the highest-damage teams, because the loss of potential Fanfare is outweighed by his massive Flat ATK buff. You can, however, still gain some amount of Fanfare by allowing Bennett and Faruzan to heal themselves shortly before Wanderer takes the field.
Mika, Charlotte, or C4 Jean can be used in place of Bennett. While Wanderer’s damage will suffer, you may have an easier time dodging enemy attacks since you aren’t restricted to staying within Bennett’s Burst radius. C4 Jean provides 40% Anemo RES Shred, which is useful against enemies with high Anemo RES. Mika’s ATK SPD buff allows Wanderer to trigger his A4 much quicker, allowing him to get his free A4 dodges more often. Charlotte provides off-field AoE Cryo application that helps Freeze enemies and prevent Wanderer from getting interrupted.
Keep in mind that much of the value in bringing Charlotte or Mika comes from the 20% CRIT Rate they provide via Wanderer’s A1 Passive. Wanderer would ideally want to hold 4pc Marechaussee Hunter when paired with Furina. However, it can be hard to avoid overcapping on CRIT Rate, since Wanderer also gains CRIT Rate from Ascensions.
Rotation (Bennett)
Furina ED Q > Bennett EQ N21 > Faruzan Q2 > Wanderer E combo (Q)3
1Use 2 Normal Attacks to receive healing from Bennett’s Burst.
2If Faruzan is not Constellation 6, cast her Skill and an Aimed Shot for particles.
3Use if available.
Rotation (Charlotte)
Furina ED Q > Faruzan 1Q > Charlotte EQ > Wanderer E combo (Q)2
1If Faruzan is not Constellation 6, cast her Skill and an Aimed Shot for particles.
2Use if available.
Rotation (Jean)
Furina ED Q > Faruzan Q1 > Jean EQ > Wanderer E combo (Q)2
1If Faruzan is not Constellation 6, cast her Skill and an Aimed Shot for particles.
2Use if available.
Rotation (Mika)
Furina ED Q > Faruzan Q1 > Mika EQ > Wanderer E combo2 (Q)3
1If Faruzan is not Constellation 6, cast her Skill and an Aimed Shot for particles.
2Wanderer should use a Normal Attack combo with Mika.
3Use if available.
This team has excellent synergy as Xiao gets massive buffs from Furina, Faruzan, and Xianyun. Xianyun’s healing is great for building Fanfare with Furina, and since this is a Triple Anemo team, if Faruzan is C6, the ER requirements are very low. This team eliminates “Circle Impact,” as Furina and Xianyun’s buffs follow the active character and Faruzan’s Burst has a wide range.
4pc Viridescent Venerer’s RES Shred buffs Furina’s damage but does not benefit Xiao, who does the vast majority of this team’s damage. So, it is better to equip Xianyun with an alternative set like 4pc Noblesse Oblige or 4pc Song of Days Past to buff Xiao instead. If you do not have Xianyun, Jean C4 or Bennett are the best alternative healers.
Rotations below assume a C2+ Faruzan.
Rotation (Xianyun)
Faruzan Q1 > Furina ED Q > Xianyun EPQ > Xiao 2[E]Q 12[JhP]
1If Faruzan is not Constellation 6, cast her Skill and an Aimed Shot before Xiao to funnel particles.
Rotation (Bennett)
Faruzan Q1 > Furina ED Q > Bennett EQ > Xiao 2[E]Q 12[JhP]
1If Faruzan is not Constellation 6, cast her Skill and an Aimed Shot before Xiao to funnel particles.
Rotation (Jean)
Faruzan Q1 > Furina ED Q > Jean Q E > Xiao 2[E]Q 12[JhP]
1If Faruzan is not Constellation 6, cast her Skill and an Aimed Shot for particles.
This team has fantastic synergy — Furina, Kazuha, and Ororon together will provide great buffs that everyone on the team will benefit from. Since Ororon and Furina are benefiting from these buffs, they will have high off-field damage, and since Kazuha will be Swirling both Hydro and Electro, he will contribute a respectable amount of damage of his own. The Electro-Charged reaction damage itself also adds a decent amount of extra damage, especially if Kazuha is the trigger.
Rotation
Furina ED Q > Ororon EQ > Kazuha tEP > Clorinde E combo > Kazuha tEP > Clorinde Q > Kazuha Q > Ororon EQ > Kazuha tEP > Clorinde E combo
Furina, Bennett, and Xilonen’s combined buffing allows Navia to deal exceptionally high damage. Furina also provides consistent Hydro application for Crystallize throughout the entire rotation and does respectable off-field damage due to Xilonen’s buffs.
While Xilonen is the recommended second Geo unit for this team, if you don’t have her available, other great options you can use instead are Chiori, Zhongli, or Kachina. Chiori will deal good damage even without a construct present, Zhongli will provide an incredible shield and some RES Shred, and Kachina can provide a DMG% buff with 4pc Scroll.
Rotation (Xilonen)
Xilonen Q > Furina ED Q > Xilonen E N2 > Navia Q > Bennett EQ > Navia tE combo > Xilonen E N2 > Navia hE combo
Rotation (Chiori)
Navia Q > Furina ED Q > Chiori 2[E] > Bennett EQ N21 > (Chiori Q)2 > Navia tE combo hE combo
1Use 2 Normal Attacks to receive healing from Bennett’s Burst.
2Use if available.
Rotation (Zhongli)
Zhongli hE > Navia Q > Furina ED Q > Bennett EQ N21 > Navia tE combo hE combo
1Use 2 Normal Attacks to receive healing from Bennett’s Burst.

In this team, you get a good amount of buffing from Furina’s Fanfare, alongside Kachina holding the Scroll set. These buffs will apply to all three of Noelle, Furina, and Chiori, allowing them to all do good damage together. Kachina will also provide a Geo Construct, allowing Chiori to get two Tamoto dolls.
If you do not have Chiori available, Albedo or Gorou can be used instead — it will result in less overall team damage than using Chiori, but it will still be viable enough for most content. You can also play a Double Hydro team with Yelan instead, as discussed in the Mono Hydro teams section.
In a Noelle Triple Geo team, Xilonen should not be used at C0 as her RES Shred would not work. At C2, Xilonen can shred Geo when off-field and should be used over Kachina even if Chiori is not C1.
Rotation
Furina ED Q > Kachina E N1 > Chiori 2[E] > Noelle Q E 3[N3D] > (Chiori Q / Kachina Q)1 > Noelle 2[N3D]
1Use either Burst if available.
Credits
Writing: Genshin Noir, soul_fish
Calculations: leifa
Editing: nikatosaurus, novalicious, itslin, nzpieface, nociii, cuppacote, irokei, lostguide
TC Contribution: terra.pin, baloopy, acerbus, Lesterberne
Document Formatting: cuppacote
Transcription: spphrs, plumetra